Breathwork Basics // Understanding & Getting Started with Breathwork
Breathwork has been practiced for centuries across many different cultures - Chinese, Jewish, the ancient Greeks, India, different tribes in Africa, and more - for healing, reaching ecstatic states, reaching states of extraordinary consciousness, self-discovery, and spiritual healing.My definition of breathwork is consciously working with the breath for healing. We breathe every day, of course, but often we’re breathing unconsciously. When I first found breathwork through yogic pranayama, it shocked me how powerful it was to breathe consciously.
Breathwork has been practiced for centuries across many different cultures - Chinese, Jewish, the ancient Greeks, India, different tribes in Africa, and more - for healing, reaching ecstatic states, reaching states of extraordinary consciousness, self-discovery, and spiritual healing.
My definition of breathwork is consciously working with the breath for healing.
We breathe every day, of course, but often we’re breathing unconsciously. When I first found breathwork through yogic pranayama, it shocked me how powerful it was to breathe consciously. Different breathwork patterns can bring up various things with you, offer varying levels of intensity, and creating a wide variety of effects.
In the book Holotropic Breathwork, author Stanislav From shares that the word breath can be translated to mean spirit or soul. In Latin, the word spiritus is used to describe the physical intake of air but is also the word for spirit.
Breath nourishes us on a physical level (we literally can’t live without it!), but for centuries different cultures have thought of breath a bit differently: as spirit, as life force.
In this blog, I’ll be sharing a bit about the benefits of breathwork, a few different styles of breathwork, and how to get started with a breathwork practice of your own.
BENEFITS OF BREATHWORK
One of the things I love about breathwork is how different every experience can be. With that in mind, here is a non-exhaustive list of some of the benefits I have personally experienced through breathwork and/or witnessed clients experience:
Unblock creativity
Open to your intuition
Open your heart
Heal trauma
Feel your feelings
Ground and drop into your body
Calm your mind
Relax
Release stress
Release shame
Clear stuck energy from your body
Experience joy, love, and pleasure
Connect with yourself
Connect with the Universe
Find a place of steadiness and peace within
Heal unhealthy patterns
Release fear
I’ll share about three different patterns of breath to work within the sections below, but please know that this is just a sampling of the many different breath patterns out there.
DIAPHRAGMATIC BREATHING
We start here with a simple but powerful breath, also known as abdominal breath or belly breath. I find this breath to be relaxing, grounding, and centering. It helps us get into the body and release stress and tension, making it a great meditative practice.
The intention of this breath is to breathe deeply in through your nose into your belly and exhale out of the nose or, ideally, the mouth.
Your belly expands with your inhale (because of the downward movement of your diaphragm) and contracts to your spine with your exhale (because of the upward movement of the diaphragm). Breathing into your belly really means that the lowest lobes of the lungs, somewhere we don’t usually breathe into, are being filled with breath.
This breath can be done lying down or sitting up, and I highly recommend placing one hang or both hands on your belly to really get a feel for the movement of the breath.
Try this breath out with five or ten rounds of inhales and exhales to start, then spend a moment noticing how your body feels. What sensations are present?
BREATHWORK
The style of breathwork I am trained in and facilitate is simply called breathwork and was taught to me by my teacher David Elliott. This breath comes from the pranayama tradition in India.
This three-part active breath is intended to move stuck emotional energy, and it’s the most powerful breath style I know to heal trauma, open your heart, and move energy. With that being said, it is a much more intense breath than diaphragmatic breathing and has a few contraindications.
For any breathwork, you’ll want to talk to your doctor if you have a condition or health issue you’re concerned about. For this breath specifically, talk to your doctor before practicing if you’re in your first trimester of pregnancy, have a history of seizures, experience retinal detachment, or have an aneurysm.
This breath can create a lot of sensation in the body, including vibration and tingling and/or numbness in different parts of the body. It can bring up memories, intense emotions like anger, and grief. Sometimes, folks will connect with a guide, or ancestor, or have another type of dreamlike experience.
To practice this breath, you’ll want to either lay down or prop yourself up - just make sure you’re fully supported in whatever way feels best to your body. When you’re ready, breathe in through your mouth into your belly, in through your mouth into your heart/high chest, and out through your mouth.
To try out this breathwork, start with just five minutes of breath followed by a few minutes of rest and integration. Or, check out the Zenned Out IGTV to breathe along with me in a short guided breathwork practice.
BOX BREATH
Box breath, or square breath, can help regulate the nervous system, lower blood pressure, improve sleep, and help you feel more relaxed - making it a great breath to practice when you’re feeling stressed or to relax before bed.
According to the Mayo Clinic, the slow holding of the breath “allows carbon dioxide to build up in the blood, which enhances the cardio-inhibitory response of the vagus nerve when you exhale and stimulates your parasympathetic system. This produces a calm and relaxed feeling in the mind and body.”
Box breath can be done sitting up (recommended) or lying down if needed. To practice, inhale slowly and deeply through your nose for a count of 4. Hold your breath for a count of 4 (this is internal breath retention). Exhale slowly through your mouth for a count of 4. Hold the breath out for 4 (this is external breath retention). So you’ll inhale for four counts, hold the breath in for four counts, exhale for four counts, and hold the breath out for four counts.
You can change the counts to match your lung capacity, perhaps working with a count of 3 for a lower capacity for 8 for a larger one. You may find that your capacity grows as you continue to practice, as well.
Try it out with four cycles of breath, then notice how you feel.
CREATE A REGULAR BREATHWORK PRACTICE
The most incredible thing about breathwork is that it truly allows you to become your own healer. It’s a body-based, self-healing practice that is quite accessible for most folks.
You now have three different styles of breathwork to work with - I recommend trying them all out, and seeing what feels best for you. Then, try committing to practicing that style of breathwork every day for at least a week for just a few minutes, journaling about how the practice made you feel after each practice.
If you’d like to learn more about breathwork, I recommend checking out my wonderful friend Jennifer Patterson’s book The Power of Breathwork.
Unlocking the Power of your Pineal Gland // 8 Tips
If you're interested in opening your third eye chakra and expanding your psychic abilities, understanding the pineal gland is essential. Ancient cultures were well aware of the power of the pineal gland. It's referenced and depicted in a variety of texts and artwork around the world. Furthermore, a variety of breathing techniques, chants, and exercises from ancient cultures are dedicated to activating this tiny gland inside your brain.
Somewhere in our evolutionary process, we've forgotten about the power of this pea-sized intuitive aid. For many of us, our pineal gland has gone unused and become calcified. Don't worry, there's hope! Science is slowly catching on to this forgotten gland, and there are so many tools (both ancient and modern) to help you activate your mighty pineal gland. Bonus, the tips I'm sharing don't all involve eating copious amounts of seaweed and green leafy vegetables.
In this post, I will cover what the pineal gland is, how it functions in our body physically and energetically, and tips for decalcifying the pineal gland for optimal psychic sight and third eye activation. I’ve linked several studies and resources in this post to help you out along the way! Keep scrolling for a video and more tips.
Science is slowly learning more about the pineal gland. However, many doctors and scientists still dismiss it as a useless gland after sexual maturation. New studies are starting to pique the interest of the scientific community and are shedding light on what many ancient cultures and spiritual communities already know to be true. For starters, did you know that microscopic calcite crystals were recently discovered inside of the pineal gland? I’ll dive into this a bit deeper later in the blog post.
The study of the pineal gland from a scientific and spiritual perspective is deep and complex. I’ve covered as much as I can in this post in a digestible format. However, if you feel called to research further, I encourage you to do so because there is much, both recent and ancient, to be learned about this topic.
What is the Pineal Gland?
The pineal gland is a tiny cone-shaped gland in the center of your brain. It’s about the size of a grain of rice, when not fully utilized but can grow in size when used properly. Its location inside of the brain lines up with the area of the third eye chakra, in the center of the brow bone.
At a quick glance, the pineal gland is responsible for regulating melatonin, circadian rhythms, and spurring sexual maturation. It actually has light receptors in it that function much like an eye, which enables the pineal gland to keep your circadian rhythms in check.
Recent Discoveries About the Pineal Gland
Here’s where things start to get a bit more woo-woo and compelling...
A recent study indicates that DMT, a psychoactive, may be produced in the pineal gland. Though the jury is still out on whether or not DMT is produced in the pineal gland, the implications are intriguing. Many describe the effects of DMT as feeling like an out-of-body experience or a feeling of being connected to all things. Both of these descriptions sound quite similar to being in deep states of meditation.
Another recent study found tiny calcite crystals inside the pineal gland! They are tiny and can only be seen with a microscope. That said, it is one of only two places where natural crystals are found inside the human body, the other being the inner ear. The calcite crystals in your pineal gland are piezoelectric (conduct electricity) when they vibrate. Yes, you read that correctly, there are tiny crystals in your pineal gland that can create energy when they vibrate. Because these crystals are so small, it doesn’t take much to make them vibrate.
Your pineal gland is not protected by the blood-brain barrier and unlike most of your brain and has frequent contact with your blood and cerebrospinal fluid (CSF). In fact, the blood supply to your pineal gland is higher than almost any part of your body! Your cerebrospinal fluid is highly structured water (extremely pure and energized water), which you can learn more about in this wonderful blog post by Jen Isabel Friend here.
These three facts indicate that the pineal gland is an incredibly important point in your brain. The fact that it aligns perfectly with several ancient descriptions of the third eye or spiritual eye is not a coincidence.
Ancient cultures clearly understood the importance of the pineal gland, which is evident by the frequent depictions of third eyes, single eyes, and references to a singular eye in ancient texts. Many ancient pranayama techniques and chants are intended to push your cerebrospinal fluid up to your pineal gland and vibrate the tiny calcite crystals inside. If you’d like to learn more about third eye references in history, I suggest this digital short read by Manly P. Hall.
Based on these few facts, it sounds like we have an energized antennae in our brain. The more important question is, is your pineal antennae working?
Calcification of the Pineal Gland
Now for the downside. It’s estimated that 40% of American’s pineal glands are calcified (this percentage varies from country to country). Calcification of the pineal gland has been seen at ages as young as two! To a certain extent, the calcification of the pineal gland is natural over time, many parts of our body calcify as we age. However, the extent to which our pineal glands are calcifying is likely much greater than what nature intended and certainly makes it harder for us to utilize the full potential of this gland.
Several outside factors can cause the pineal gland to calcify. The top offender is fluoride intake. Most countries add fluoride to their water, with claims of helping tooth decay. Fluoride can aid in cavity prevention, when used topically, but does not appear to add any benefit when ingested and is actually toxic. Read more about this here. Beyond fluoride consumption, processed foods and age also play a role in the calcification of the pineal gland.
Tips for Decalcifying and Activating the Pineal Gland
You can find a host of suggestions online for decalcifying the pineal gland. Many of them may require huge lifestyle changes, which I also share here. I would also like to offer some more realistic suggestions, that, I believe, are just as valuable.
These suggestions work best when they’re combined. Taking a supplement and ignoring the rest of the tips may not yield the results you’re hoping for. Start small and do what you can. I’ve placed the suggestions at the top that I find to be the easiest (and most cost-effective)
.1. Hydrate with High-quality Water
Remember how I said your pineal gland is bathed in cerebrospinal fluid daily? Well, this can’t happen if you’re dehydrated, which most of us are. Try drinking naturally structured spring water or learn techniques for creating your own structured water. Structured water, among other things, does a much better job of hydrating us. Learn more about structured water from my favorite water guru, Jen Isabel Friend, here.
2. Practice Conscious Breathing Techniques
Conscious breathing and pranayama exercises are the simplest and cheapest way to cleanse and activate your pineal gland. Breathing consciously, especially sending the breath deep into your belly, helps push CSF (cerebrospinal fluid) up your spine and up to your brain, bathing your pineal gland in highly charged and clean water.
Three-part breath and the breath of fire are two great options to get started. If you’re not familiar with them, you can find a plethora of videos with instructions with a quick internet search. If you’d like some more advanced suggestions beginning to work with the bandhas (pranic locks) as you practice your breathwork can be helpful. Dr. Joe Dispenza also offers a variety of meditations with breathing designed to push CSF up the spine (I’ve been using the Break the Habit of Being Yourself meditations and enjoying them).
3. Meditate Regularly
Before you run off and say you don’t have time to meditate daily, I want you to know that even ten minutes a day will have a big impact. I also want to emphasize the daily aspect of this step. Regular, consistent meditation will help you access and activate the pineal gland. Learn more about how to start and stick to that meditation practice here. If guided meditations resonate with you, check out my guided meditations here.
4. Add Some Chanting to Your Meditation Practice
Chanting can help vibrate those tiny calcite crystals inside of your pineal gland and wake them up a bit. This is best used once you’ve started the process of decalcifying your pineal gland. Once you’re in a good groove of giving your pineal gland some love, add in some chanting and see if you notice a difference. My favorite meditation to use this “AHHH” meditation by Dr. Wayne Dyer. I always feel AMAZING after completing this meditation!
5. Reduce Fluoride Intake
I’m not saying you have to stop going to your dentist and stop brushing your teeth with fluoridated toothpaste. I am saying to be aware of how much fluoride you’re consuming. Using it topically is one thing, but ingesting it from tap water on a daily basis is something else entirely. Do your research and find out how much fluoride is being added to your local water supply.
Here are a couple of companies that offer great fluoride filtration systems, including fluoride removing straws and water bottles. Check out PWF here for fluoride removing straws and Clearly Filtered here for a variety of fluoride filters, including fluoride removing water bottles. I’ve used PWF’s filters and can attest to their quality. Again, these aren’t sponsored, simply products I’ve used or that look helpful.
6. Eat Mindfully
As I mentioned above, processed foods are another calcifying culprit for the pineal gland. In a fast-paced world, it can be tough to limit all processed foods. I’m just as guilty of relying on easy-to-make processed foods to get me through the day. I invite you to simply become more aware of what you’re putting into your body and how it makes you feel. Opting for whole foods and less processed foods will have a cleansing effect on not only your pineal gland but your entire body.
7. Dark and light
Try minimizing light pollution in your room at night. Your pineal gland controls your circadian rhythm. Consider dimming lights and avoiding screens after sunset, and give yourself time in total darkness before bed. Both of these things will give your pineal gland cues that it’s nighttime and help it maintain normal function.
Alternatively, some ancient practices (that are still practiced today by some) suggest sun-gazing to invigorate your pineal gland and third eye chakra. It’s advised to gaze at the less intense light of the rising or setting sun and not the bright midday sun. Of course, please do your research on this and practice caution. Some also suggest candle gazing as an alternative.
8. Suggested Supplements and Foods
There’s a slew of supplements that can be used to help decalcify the pineal gland. Bonus, they’re also pretty great for your entire body! As with any supplement suggestion, be sure to run it by your healthcare provider and do your research before consuming any supplements.
Here’s a list of supplements to help in combination with the other steps outlined above. Many of these will cause your body to detoxify, please take these with caution and start with just one. I don’t recommend taking all of these at once, as it could leave you feeling pretty awful.
Spirulina
Chlorella
Green leafy vegetables
Turmeric
Apple cider vinegar
Iodine supplements and iodine-rich foods. (Iodine can significantly affect the thyroid. Please, exercise caution and discuss with your healthcare provider before taking iodine supplements.)
There are some great supplement options created by trusted natural herbalists. One product that I’ve been using and enjoy for the purpose of decalcifying my pineal gland is this blend by Anima Mundi Apothecary. This isn’t a sponsored ad, I just really love all of their products!
As I said, doing all of these things at once could be completely overwhelming and unnecessary. Start small and be kind to yourself. Bonus, all of these suggestions are pretty great for your entire body ;)
Want to learn more about the third eye chakra? Check out this previous blog post all about opening the third eye chakra.
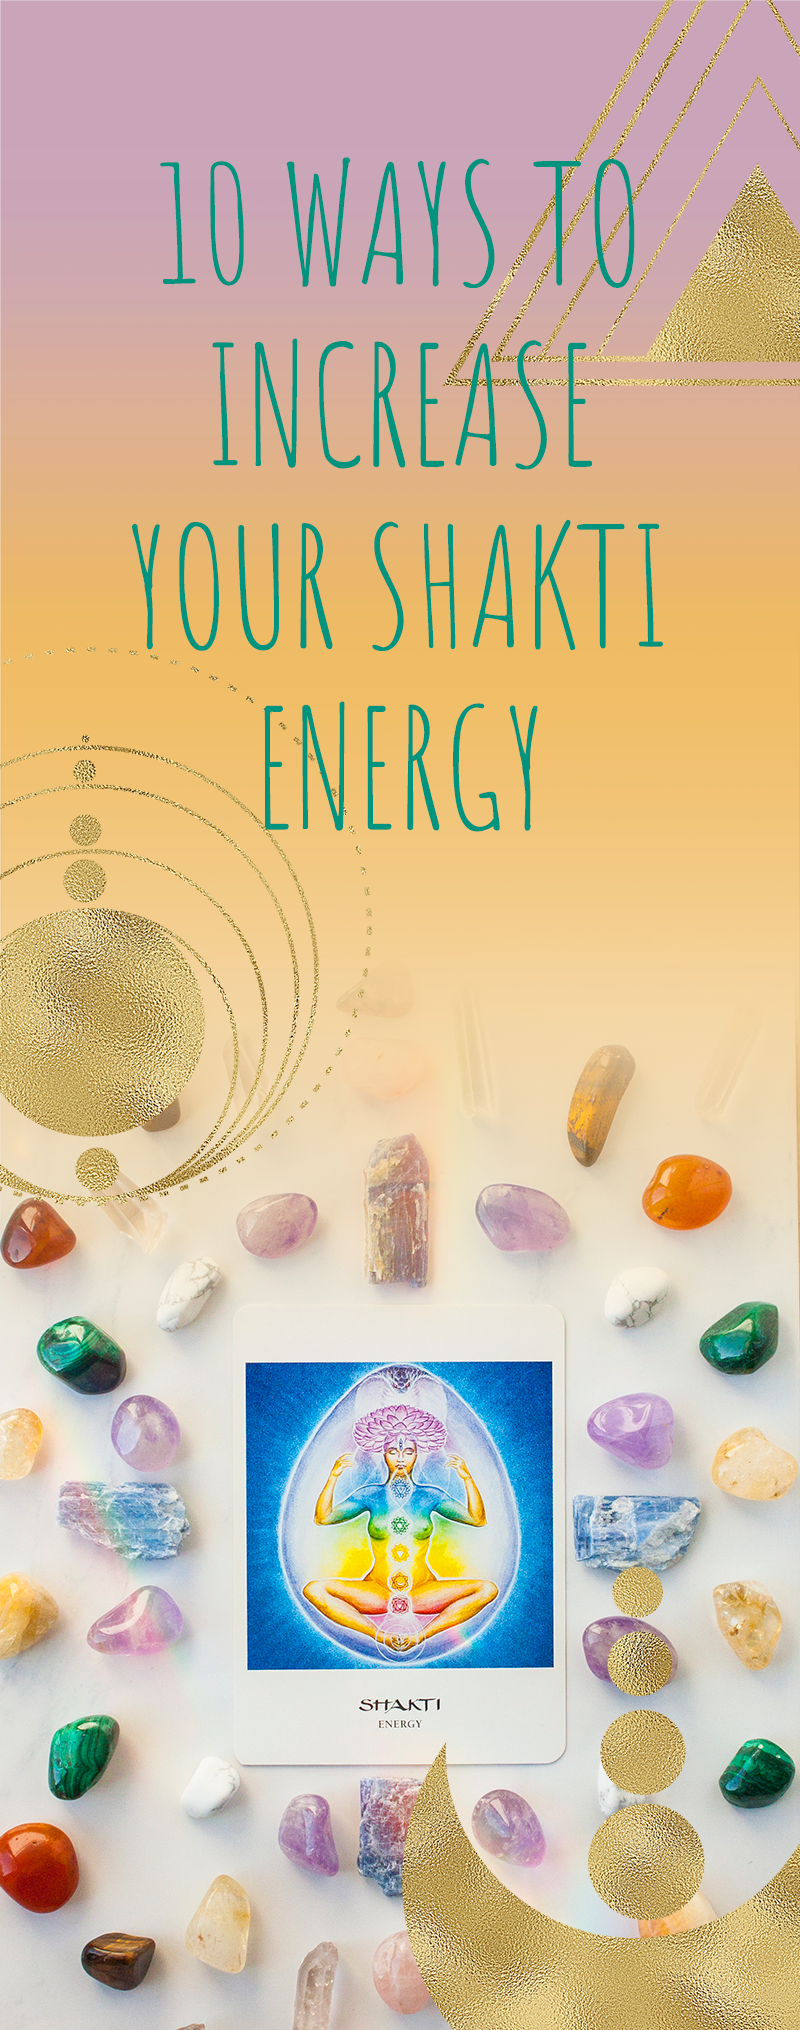
10 Ways to Increase Your Shakti Energy
How is a society that’s stuck in the patriarchy able to find balance? The answer lies in you. The answer lies in one person at a time increasing their Shakti energy.I’m sure you’ve heard the term “Shakti” before but do you know how to tap into this creative life force that is the personification of feminine energy? I’m going to share what this term means with you, but more importantly, how you can increase your own Shakti to help our world find balance. First, let’s dive a little deeper into what and who Shakti is.
How is a society that’s stuck in the patriarchy able to find balance? The answer lies in you. The answer lies in one person at a time increasing their Shakti energy.
I’m sure you’ve heard the term “Shakti” before but do you know how to tap into this creative life force that is the personification of feminine energy? I’m going to share what this term means with you, but more importantly, how you can increase your own Shakti to help our world find balance. First, let’s dive a little deeper into what and who Shakti is.
What is Shakti
Shakti is life, death, rebirth, destruction, and creation. Shakti energy is the divine feminine force coursing through the cosmos and all aspects of our reality. She is the ultimate Goddess and the creative energy behind all Goddesses. Even though Shakti is a divine feminine force, it is present in all life forms, male and female, though it may be repressed in some. The balancing force to Shakti is Shiva or masculine energy.
Who is Shakti
Shakti is referred to as the “Mother Goddess” in Hinduism. She is the Goddess that guides all other Goddesses. Shakti is represented in the Hindu Goddesses Durga, Parvati, and Kali. Each Goddess utilizes Shakti energy differently and can be called upon for different purposes.
Kundalini Shakti
If you’re familiar with Kundalini energy, then you have probably heard the term Shakti used here as well. Kundalini Shakti refers to the idea that every being has Shakti energy coiled up at the base of their spine, waiting to be awakened. You may have already had a Kundalini awakening and not even known about it! That’s another blog post for a different day though!
Here are ten simple ways to increase your Shakti. Warning! Shakti energy is INTENSE. Be mindful of this as you practice the following suggestions. Build in some time to ground yourself after practicing any of these exercises and if it feels like too much, take a break for a few days.
10 Ways to Increase Your Shakti Energy
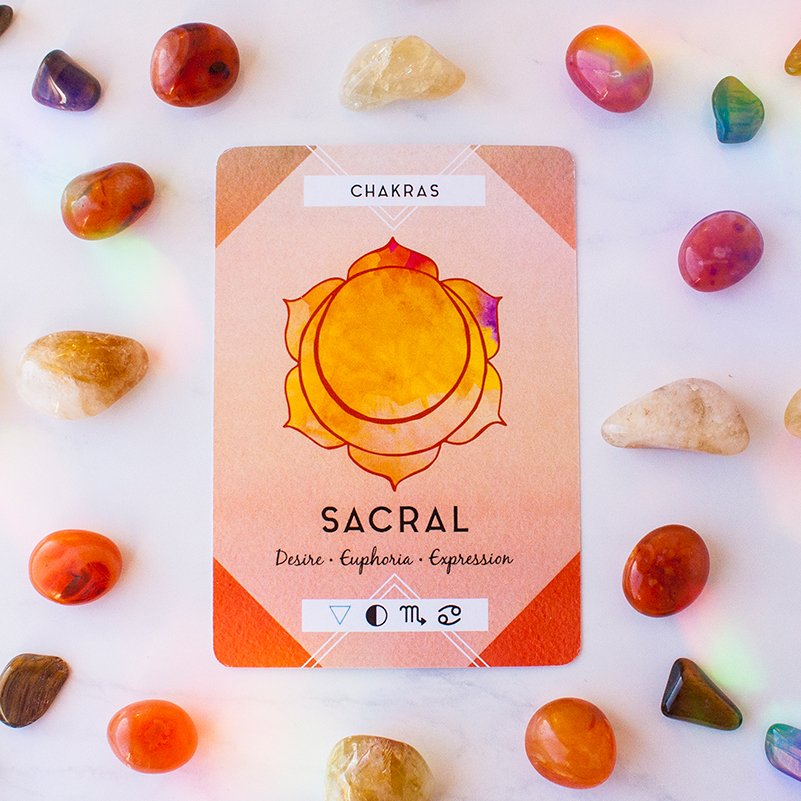
1. Activate your sacral chakra
Your sacral chakra is your hub of creativity and feminine energy. This chakra is located below your belly button and above your pubic bone. Imagine it glowing orange with each inhale and exhale to awaken it. Learn more about activating your sacral chakra in this blog post.
2. Tap into the water element
The water element represents femininity, so it’s the element to focus on to increase your Shakti energy. Let the water element wash over you, literally, by taking a soothing bath. Learn more about yoga poses for the water element here and ways to represent the water element here.
3. Meditate, meditate, meditate
Meditation in and of itself will help increase your Shakti energy (check out guided meditations here) but here’s a technique to give it an extra boost. Visualize your Shakti energy coiled up like a snake at the base of your spine. With each breath visualize this snake-like energy uncoiling and traveling through each chakra, lighting it up and cleansing it along its path. Continue until you reach the crown chakra. This meditation can be very intense and energizing, allow ample time to calm and ground yourself afterward.
4. Call on Kali, Durga, or Parvati
Remember the three Hindu Goddesses I mentioned above? Kali, Durga, and Parvati represent Shakti in Hinduism, calling on any of them can bring some extra Shakti into your life. Each Goddess will bring a different kind of energy. Parvati is a Goddess of love, Durga is a warrior Goddess, and Kali is the destroyer who ultimately brings balance. Learn more about connecting with Kali here. Goddess cards are from The Goddess Oracle.
Goddess cards are from The Goddess Oracle.
5. Follow the Moon
The moon has long been associated with divine Goddess energy due to its correlation with our menstrual cycles and the Triple Goddess. Try charting your cycle or journaling with the moon to connect to this moon energy. Learn more about the Triple Goddess symbol here and more about rituals for every moon phase here.
7. Get in touch with your shadow side
The imbalance of Shakti in our society is a direct reflection of our own imbalances. We so often focus only on our light, while directly under the surface our shadow side is seething. Take time to explore your light and dark to find balance within yourself. Learn more about shadow work here.
8. Practice the Shakti mudra
Guess what? There’s a mudra dedicated to Shakti! Try using this mudra during meditation or your yoga practice to increase your Shakti. Breathe deeply and focus on Shakti rising from the base of your spine.
9. Yoga asana practice
Let’s jump straight to the obvious here, Goddess pose. Remember when I said Kundalini aka Shakti energy is coiled at the base of your spine? Any pose that helps activate the base of your spine can help get your Shakti flowing, and Goddess pose certainly does this! Try to work different variations of this pose into your yoga practice or any postures that activate the sacral and root chakra.
10. Breathe Deep
Prana, your breath or life force, is Shakti. Any focused breathing can help increase your prana and therefore your Shakti energy. If you’re not familiar with any pranayama techniques, start with a three-part breath. Inhale, filling your lower belly with air first, then your middle section, and last your chest. Exhale in the reverse order. Practice this three-part breath 5-10 times and notice how you feel after you’re done. If you’re familiar with different pranayama techniques, try adding one into your practice daily. You can learn more about breathwork here.
You might find that you’re already practicing some of these things regularly. If you’re not, don’t stress! No need to start implementing all of them right away, in fact, I wouldn’t recommend it. Start small and start with the tips that sound most appealing to you. Learn more about your chakras system, the moon phases, and more in The Goddess Discovery Book.
Heart-opening Yoga practice & breathwork to cultivate self-love
Every February, we’re reminded of the love that already exists within us. While there are so many different kinds of love in our lives, it all starts with us: from a place of deep self-love. In this blog, I’ll be sharing a heart-opening yoga practice and a Kundalini breathwork meditation to help you cultivate self-love.
Every February, we’re reminded of the love that already exists within us. While there are so many different kinds of love in our lives, it all starts with us: from a place of deep self-love.
In this blog, I’ll be sharing a heart-opening yoga practice and a Kundalini breathwork meditation to help you cultivate self-love.
Kundalini Breathwork meditation
This Kundalini yoga breathwork meditation is said to help give strength to your heart and open up your heart center.
Find a comfortable seat and extend your arms straight out in front of you. You want them to be parallel to the mat with your palms facing down. Close your eyes and focus your inner gaze at the center of your chin. Start to take long, slow, deep breaths, holding your arms steady in front of you.
Hold this breathwork meditation for three minutes. Then, move into our asana practice below.
Yoga practice
This yoga practice is focused on heart-opening yoga poses because heart openers, like the name suggests, help balance and open your heart chakra. Your heart chakra is the center of giving and receiving love in your body. Opening this center helps open you up to a flow of unconditional love within and outside of yourself.
Heart bench
As someone with chronically tight shoulders, heart bench is my favorite restorative pose to start off a yoga practice. For this pose, you’ll need two yoga blocks. If you don’t have blocks, try getting creative with stacks of books or a rolled yoga mat under the shoulders.
You’ll take your first block at either its low or medium height and place it lengthwise along the spine between the shoulder blades, opening the heart. The second block will go under your head at whatever height supports a long neck and open throat.
Breathe into your heart space here, visualizing each inhale sending breath into the chest and each exhale softening, opening, and expanding your heart chakra. Stay here for 3-5 minutes, breathing deeply.
Half-pigeon variation
To transition out of your heart bench, lower all the way onto your back, bend your knees, and press your whole back into your mat. Feel your whole back grounding into the Earth, resetting the spine.
When you feel ready, cross your right ankle over the bottom of the left thigh (right under the knee). Then prop yourself up on your forearms and roll the shoulders back to open the heart as you energetically push your right knee away from you, stretching the hips. Spend a minute or two here, breathing deeply into the heart center, and then repeat on the other side.
Low lunge
Slowly find your way to downward-facing dog and pedal out the feet. When you feel ready, inhale to step your left leg forward. Lower the knee onto a mat or blanket, and create enough space in the hips so that you can really feel a stretch into your right hip flexor. Inhale to lift the arms overhead, bending back into a crescent lunge.
After a few breaths with this arm variation, stack your palms over your heart and breathe into your hands, keeping your back bending.
Stay here for ten more breaths, then repeat on the other side.
Mountain pose flow
From your lunge, step the back leg forward into a forward fold at the top of your mat. Hold opposite elbows to help pull your chest to your thighs and find a few breaths here.
When you feel complete, release your arms and inhale to a flat back, palms to shins or thighs. Exhale to fold forward. Inhale to roll all the way up to stand, reaching up and back. Exhale to fold all the way forward as you chant “YAM” (pronounced YUM), the bija mantra for the heart chakra.
Continue to flow with your breath for at least 10 complete cycles. Let yourself find a rhythm and find softness through the face, the knees, the heart, as you move.
Dancer’s pose
After your last exhale, hold in your favorite version of forward fold for a few more breaths. When you feel complete, inhale to roll up through your spine and find mountain pose with your arms at your sides.
Create a stable foundation by grounding down through your left foot, pressing into all four corners of the foot and through each of the toes. Bend your right knee and take the ankle into the right hand behind you. Inhale to lift your left arm over your head.
Feel free to stay here. If you’d like to go deeper, use your next exhale to slowly kick your right foot back and hinge forward at the hips, opening your heart and your right hip flexor. Stay here for at least 10 breaths. If you find yourself feeling unsteady or falling out of the pose, practice talking to yourself in a loving way and come back into the pose without judgment!
After ten breaths or whenever you feel ready, use an exhale to release everything back down and take the post to your other side.
Cobra pose or upward facing dog
From mountain pose at the top of your mat, fold forward, and step back to downward-facing dog. Inhale to shift forward to plank and exhale to either lower halfway or lower all the way onto the belly. Inhale to lift into cobra or upward facing dog. Stay here for a few breaths, rolling the shoulders back, pressing into the tops of the feet, and firming through the legs. After a few breaths, exhale to shift back to downward-facing dog.
Repeat this sequence one to three times, then stay in downward-facing dog for a few breaths.
Child’s pose
Inhale to lower your knees, and exhale to shift your hips back into your favorite variation of child’s pose. Let this child’s pose be a place of deep presence with yourself — with your breath, with any feelings or thoughts that are coming up to the surface. Practice speaking to yourself lovingly and tending to yourself with care. Stay here for about twenty breaths.
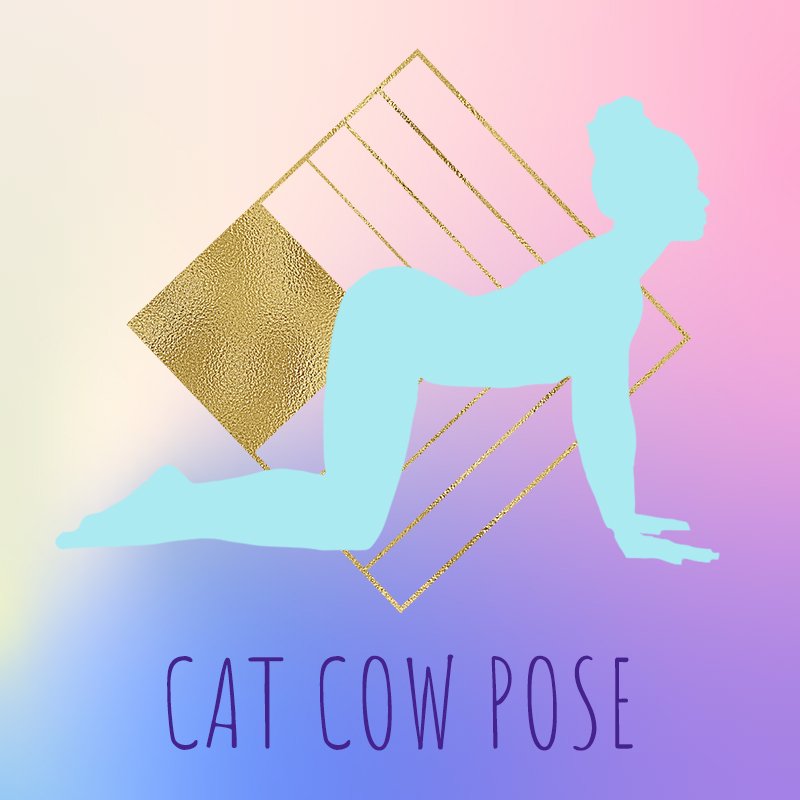
Cat/cow flow
From child’s pose, inhale to lift yourself into tabletop. Start to move through a cat/cow flow with your breath, using your inhale to lift your tailbone and open your heart, and your exhale to round through your spine and tuck your chin. Feel free to add in any other movements that feel good to you, like opening up through the sides of your body or incorporating hip circles.
Heart to Earth pose
When you feel complete in cat/cow, find your way back to a neutral spine. Start to walk your palms out in front of you, keeping your hips stacked over your knees, slowly lowering your chest and forehead all the way to your mat.
This intense pose invites us into a place of deep surrender. Keep your awareness on your breath, sending it into your heart space, and let yourself be with whatever comes up here. Stay here for at least 10 breaths, but feel free to stay longer if that feels right for you.
Bridge pose
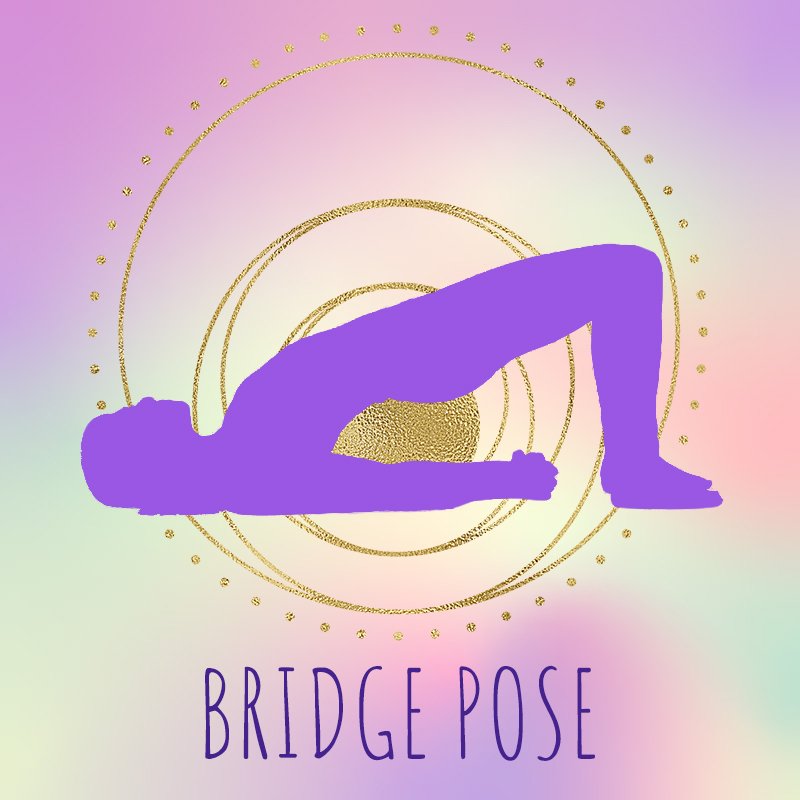
Slowly shift back into tabletop and all the way onto your back, bending your knees and planting your feet on your mat. Inhale to slowly lift your hips and lift your arms all the way overhead, backs of palms touching down behind you. Breathe here in this bridge pose variation for 10 breaths, using an exhale to slowly lower your hips and arms back down.
Find a counterpose after you come down by walking your feet wider than hip’s distance and releasing your knees to rest in on each other. Place your palms on your belly and rest here for 5-10 breaths.
Reclining cobbler pose
Find your savasana in reclining cobbler’s pose, bringing the soles of your feet together. Rest one palm on your heart and one palm on your belly, letting yourself rest, relax, and integrate the benefits of your practice. Stay here as long as you like, but make sure you let yourself spend at least three minutes here.
Explore more blogs to help you cultivate self-love here:
How to Create a Meditation Practice You’ll Actually Stick to
You know meditation is good for you. You’ve seen the studies. You know you feel better when you do it. You know all of the positives, yet, it’s still so hard to commit to a daily meditation practice. I know, I’ve been there.I’m here to share nine tools I’ve personally used, or use still daily, to create a meditation practice that sticks. I’ve been an on and off again meditator since I was in middle school but it wasn’t until I implemented a few simple practices that it became a daily routine for me. Read on to learn my favorite tips.
You know meditation is good for you. You’ve seen the studies. You know you feel better when you do it. You know all of the positives, yet, it’s still so hard to commit to a daily meditation practice. I know, I’ve been there.
I’m here to share nine tools I’ve personally used, or use still daily, to create a meditation practice that sticks. I’ve been an on and off again meditator since I was in middle school but it wasn’t until I implemented a few simple practices that it became a daily routine for me. Read on to learn my favorite tips.
Why Meditate?
Entire books are written on this topic, but here are some of the big reasons meditation will rock your world.
Stress relief: Regular meditation will help you see the bigger picture so you’re not narrowed in on the small stuff.
Better sleep: Meditation helps soothe your pineal gland, which, among other things, helps you sleep.
Improves your health: Regular meditation can help lower your blood pressure, improve your immune function, and decrease inflammation.
Improves your aura (energy field): Meditating raises your energy frequency, which will improve your aura. Meditate regularly, and you’ll start to experience a big shift in your energy frequency and aura.
Stay in tune with your soul’s purpose: Lost or confused about what to do? Meditation can help clear your mind so you can gain more clarity about the next right move.
Sounds good, right? A regular meditation practice is life-changing, but the key here is regular. Here are nine ways to build a meditation practice that you’ll actually stick to.
9 Ways to Create a Meditation Practice That Actually Sticks
1. Ritual for all five senses
Creating any habit is all about routine and repetition. One effective way to do this is to build rituals around your meditation time. By practicing the same rituals, at the same time, every day, you’ll prime yourself for your meditation practice.
The more of your five senses you can incorporate into your meditation rituals the better, it will help your new habit stick. Here are a few ways to engage your five senses and create a ritual around your meditation practice.
Sound: Music, gong, singing bowl, or a fountain
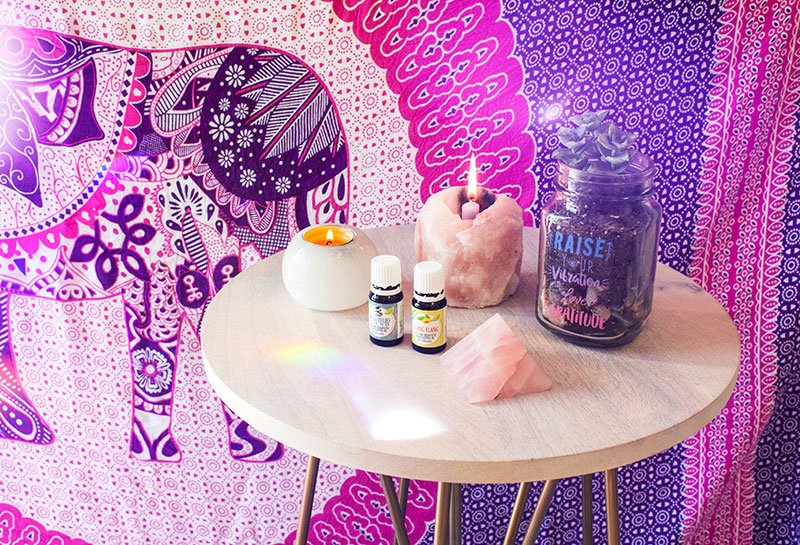
Scent: Essential oils, candles, or incense
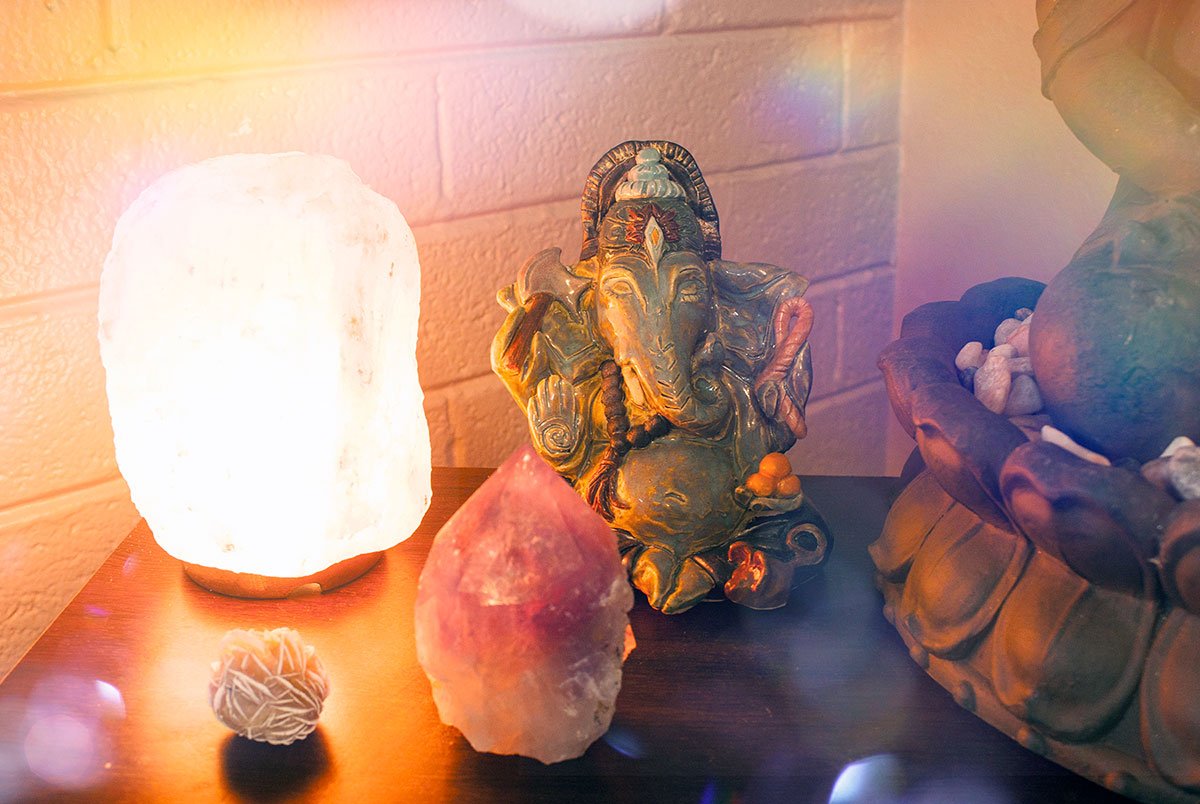
Sight: Salt lamps, candles, colored light, specific time of day, specific room
Touch: Meditation pillow or blanket, mudras, self-massage
Taste: Fresh breath right after you brush your teeth in the morning, or a specific herbal tea
Pick and choose what sounds good to you. These meditation rituals can be as elaborate or as simple as you want. The simple act of lighting a candle and rubbing a certain scent on your chest before every meditation can have a powerful effect.
2. Build in time. Something is better than nothing.
“There’s not enough time” is probably the #1 killer of most meditation practices. Like any new habit, it’s all about building in the time for it. The good news is, you don’t need much time to build a meditation practice, just 5-15 minutes a day will have a positive effect on your day.
The key, plan ahead. Take an honest look at the schedule of your day, and decide where the best place is to add in 10-15 minutes of quiet meditation time. When you’re just getting started try setting a reminder on your phone so you don’t forget.
Five minutes of meditation in your car is better than no meditation and will help solidify your meditation practice.
3. Create a space
A room, a corner of a room, or a simple seat will do. Designating a specific spot for your meditation time will help you stay on track. You know exactly where you need to go and have a spot for any meditation ritual elements you’re incorporating.
A space with minimal distractions is ideal but any dedicated space is better than no space.
4. Be OK with distractions
Distractions are part of life and will most likely make an appearance during your meditation time at some point. Whether it’s a pet, child, loved one, or a noisy work crew outside your house, expect them, accept them, and then move right back to your meditation.
5. Use a timer and start small
It can be difficult to get in the zone while you’re meditating if you’re spending the entire time wondering how long you’ve been meditating. Set a timer on your phone so you don’t have to wonder.
Starting out, set your timer for just 5 minutes and work your way up from there. Once you find that you’re naturally ready to sit for longer than 5 minutes, up your time by a couple of minutes. Do this for six months and you might be surprised by how long you can sit in quiet meditation.
6. Pranayama
If your mind goes a mile a minute the moment you sit down, try some pranayama to help you drop into your meditation. Many of us are stuck in fight or flight mode constantly and flipping the switch to relax can seem impossible. Starting your meditation with some simple breathing exercises can help set the tone for your meditation.
Try either of these breathing techniques to help queue your body to relax:
Three-part breath
As you inhale, feel the air filling the lowest part of your belly, the middle part of the torso (just below your heart center), and then your chest. As you exhale let the air out in the reverse order, feel the air leave your chest, just underneath your chest, and out your lower belly. Repeat as many times as you’d like.
Alternate nostril breathing
Using your thumb and your ring finger, close your right nostril with your thumb and inhale slowly through your left nostril. Cover your left nostril with your ring finger, release your thumb from the right nostril, and exhale. Repeat this on the other side starting with inhaling through your right nostril. Repeat as many times as you’d like.
7. Use guided meditations
If pranayama isn’t your jam, or you need some extra guidance to stay in the meditation zone try using guided meditations. There are several podcasts and free apps available with great guided meditations, you can also find several online. Here are some that I’ve used that are all great places to start:
Meditation Oasis Podcast (Free and my favorite!)
Meditation Minis Podcast (Free)
Headspace App (Free and paid options)
My guided meditations bundles for energy balancing, moon phases, Wheel of the Year, and Spirit Guides. Here you can download my free waning moon meditation.
8. Accountability Buddy or a Meditation Challenge
Using the momentum of a group or working with a meditation accountability partner can help you seal the deal for your meditation routine and keep you on track. Have a soul sister who’s trying to build a meditation practice too? Make a plan to touch base with each other every day once you’ve meditated.
9. Allow yourself cheat days
Things will come up, and you’ll probably miss some days. Instead of letting this be a reason to beat yourself up or stop meditating all together allow yourself a cheat day once a week. That way, if you have a crazy day that gets away from you (which will probably happen at some point!), you’ve got an easy out that you don’t have to feel guilty about.
Ditched your meditation practice? Start with self-love, no need to beat yourself up over it, then come on back to this list to find some motivation to get started again. Your mind, body, soul, and fellow humans will thank you for it.
How to Balance your Solar Plexus Chakra
Do you feel worthy of love and comfortable setting boundaries? Do you feel a sense of peace and understanding in taking action on things you can control and allowing things you have no control over to happen?When your solar plexus, or Manipura, chakra is open and balanced, you experience a strong sense of authentic power, and use that power to make a difference in the world. You fully understand your worth and have healthy self-esteem and self-confidence.This chakra, located right above the navel, is also where the ego lives. It is the seat of fire in the body, overseeing your emotions, motivating you to achieve your goals, and governing your self-esteem and self-discipline.But like any other chakra, this chakra can become unbalanced.
Do you feel worthy of love and comfortable setting boundaries? Do you feel a sense of peace and understanding in taking action on things you can control and allowing things you have no control over to happen?
When your solar plexus, or Manipura, chakra is open and balanced, you experience a strong sense of authentic power, and use that power to make a difference in the world. You fully understand your worth and have healthy self-esteem and self-confidence.
This chakra, located right above the navel, is also where the ego lives. It is the seat of fire in the body, overseeing your emotions, motivating you to achieve your goals, and governing your self-esteem and self-discipline.
But like any other chakra, this chakra can become unbalanced.
Signs that your solar plexus chakra is unbalanced:
You feel powerless or like a victim.
You often feel anxious and insecure.
You either feel the need to control and manipulate everything or you let others control you.
You experience frequent stomach or lower back pain.
You feel like you have to give your power away in order to keep the peace.
You have addictive tendencies and tend to form co-dependent relationships.
The good news is there are many simple ways to balance the solar plexus chakra. Use one tip or combine several, and find what works for you to get you back to a place of authentic power and control.
10 Ways to Open the Solar Plexus Chakra
Get Outside
The solar plexus chakra is associated with the color yellow and the element fire, so getting outside in the sun can be a big help. Try doing one of the tips below outside, like yoga or meditation, go rock climbing, go for a hike, or simply take a walk around the neighborhood.
Drink Tea
Ginger, chamomile, and mint all work well to open this chakra.
Yoga
Poses that light a fire in the belly— aka focus on the core— are perfect for balancing Manipura. Try Boat Pose, Warrior 2, or a series of Sun Salutations to light that Agni.
Pranayama
Speaking of fire, “breath of fire” or Agni Sara pranayama can help balance the solar plexus chakra. It is similar to kappalabhati breathing, but both inhales and exhales are forceful. The idea is to contract and release the core muscles.
Start in a standing position with the knees gently bent and the hands on the knees. As you inhale, press the stomach out. As you exhale, draw it in.
Affirmations & Mantras
Affirmations and mantras are all about becoming that which you wish to see. Try these mantras for balancing this chakra:
The bija mantra Ram.
I am worthy.
I rule from a place of authentic control and power.
I love and accept myself.
I am open and free from the need to control everything.
I use my power for the highest good.
I release judgment of myself and others.
Scents
Citrusy oils like grapefruit, lemon, orange, and even peppermint are great for healing the solar plexus chakra because they aid digestion, a solar plexus issue. You can also try ginger, fennel, and ylang-ylang to clear negative energy and bring in positive energy.
Burn candles or incense with these scents, diffuse essential oils, or mix these oils with a carrier oil like sesame or coconut and massage them onto the body. It can be particularly powerful to rub them on the belly, the center of this chakra.
Crystals
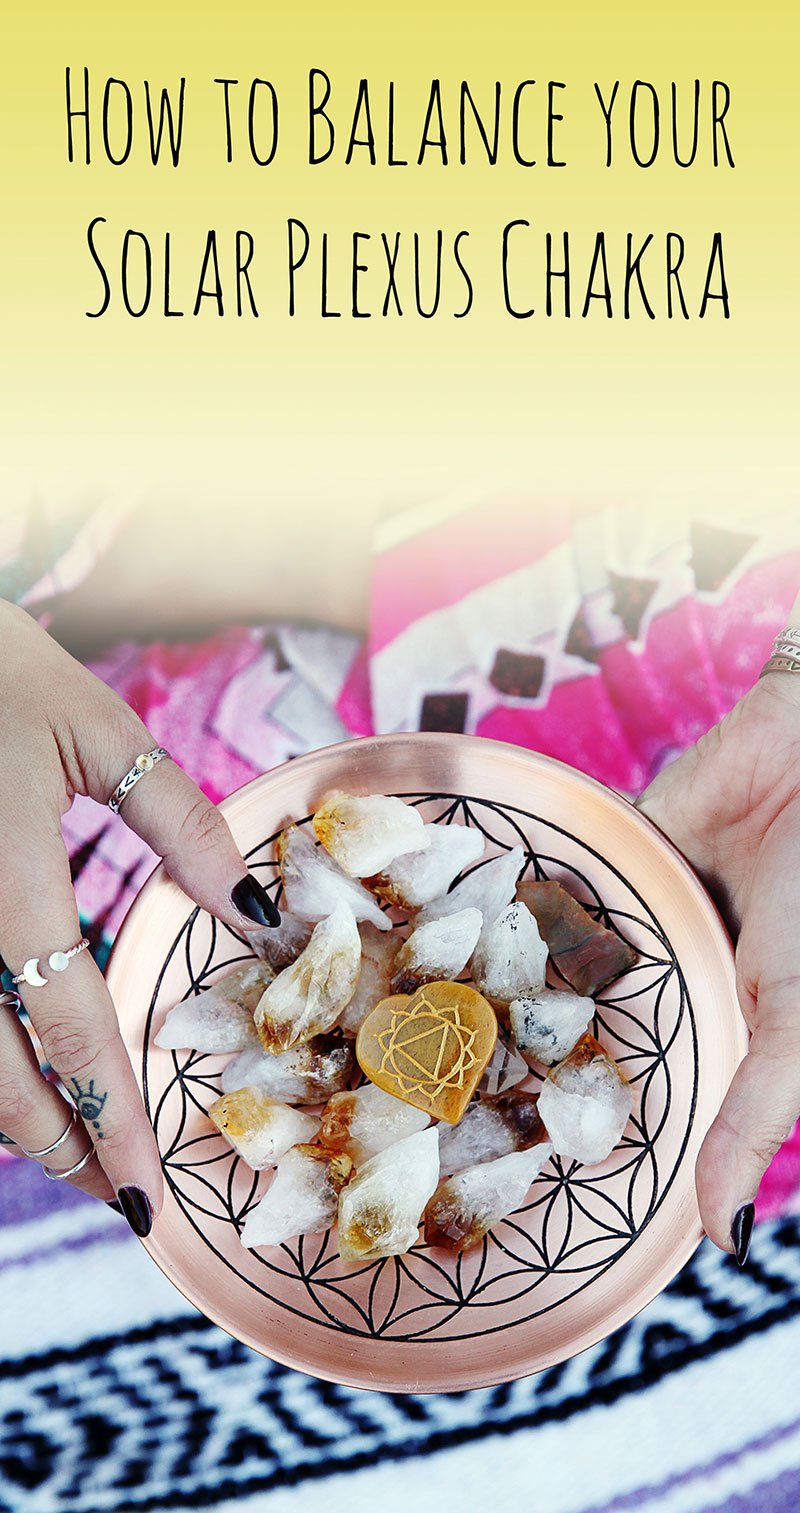
There are many different crystals you can use to balance the solar plexus chakra. Yellow-hued stones tend to work best since yellow is the color of this chakra. Try citrine, yellow topaz, honey calcite, amber, yellow jasper, or tiger’s eye.
Incorporate them into your yoga practice, meditate with them, create a crystal grid on the ground or on the body over the navel area, or wear them.
To create a crystal grid, choose a few stones from the list above that resonate with you, plus clear quartz. Decide on your purpose for the grid, and write that intention down. It could be something like “I reclaim my personal power” or any of the affirmations and mantras above.
Then, cleanse your crystals (learn more about crystal cleansing here) and place them in a geometric pattern on the bare skin of your navel with the clear quartz in the center to amplify the energy of your grid.
Spend at least a few moments with the crystals on your skin, meditating on your intention.
Play with Color
Wearing yellow and eating yellow foods such as corn, bananas, yellow peppers, lemons, and sunflower seeds are easy ways to work on opening this chakra throughout the day.
Meditation
Try imagining a glowing golden ball of light, a burning flame, or a bright yellow flower opening over your navel to open Manipura. Try this guided chakra balancing meditation if you feel called to.
Switch It Up
Sometimes all it takes to balance the solar plexus chakra is a little change. Try switching up your routine, releasing anger by yelling as loudly as you can (in your home alone!), or attending a laughing circle.
These activities allow you to activate your personal power, release control, introduce a little joy, and create a positive flow of energy in the body.
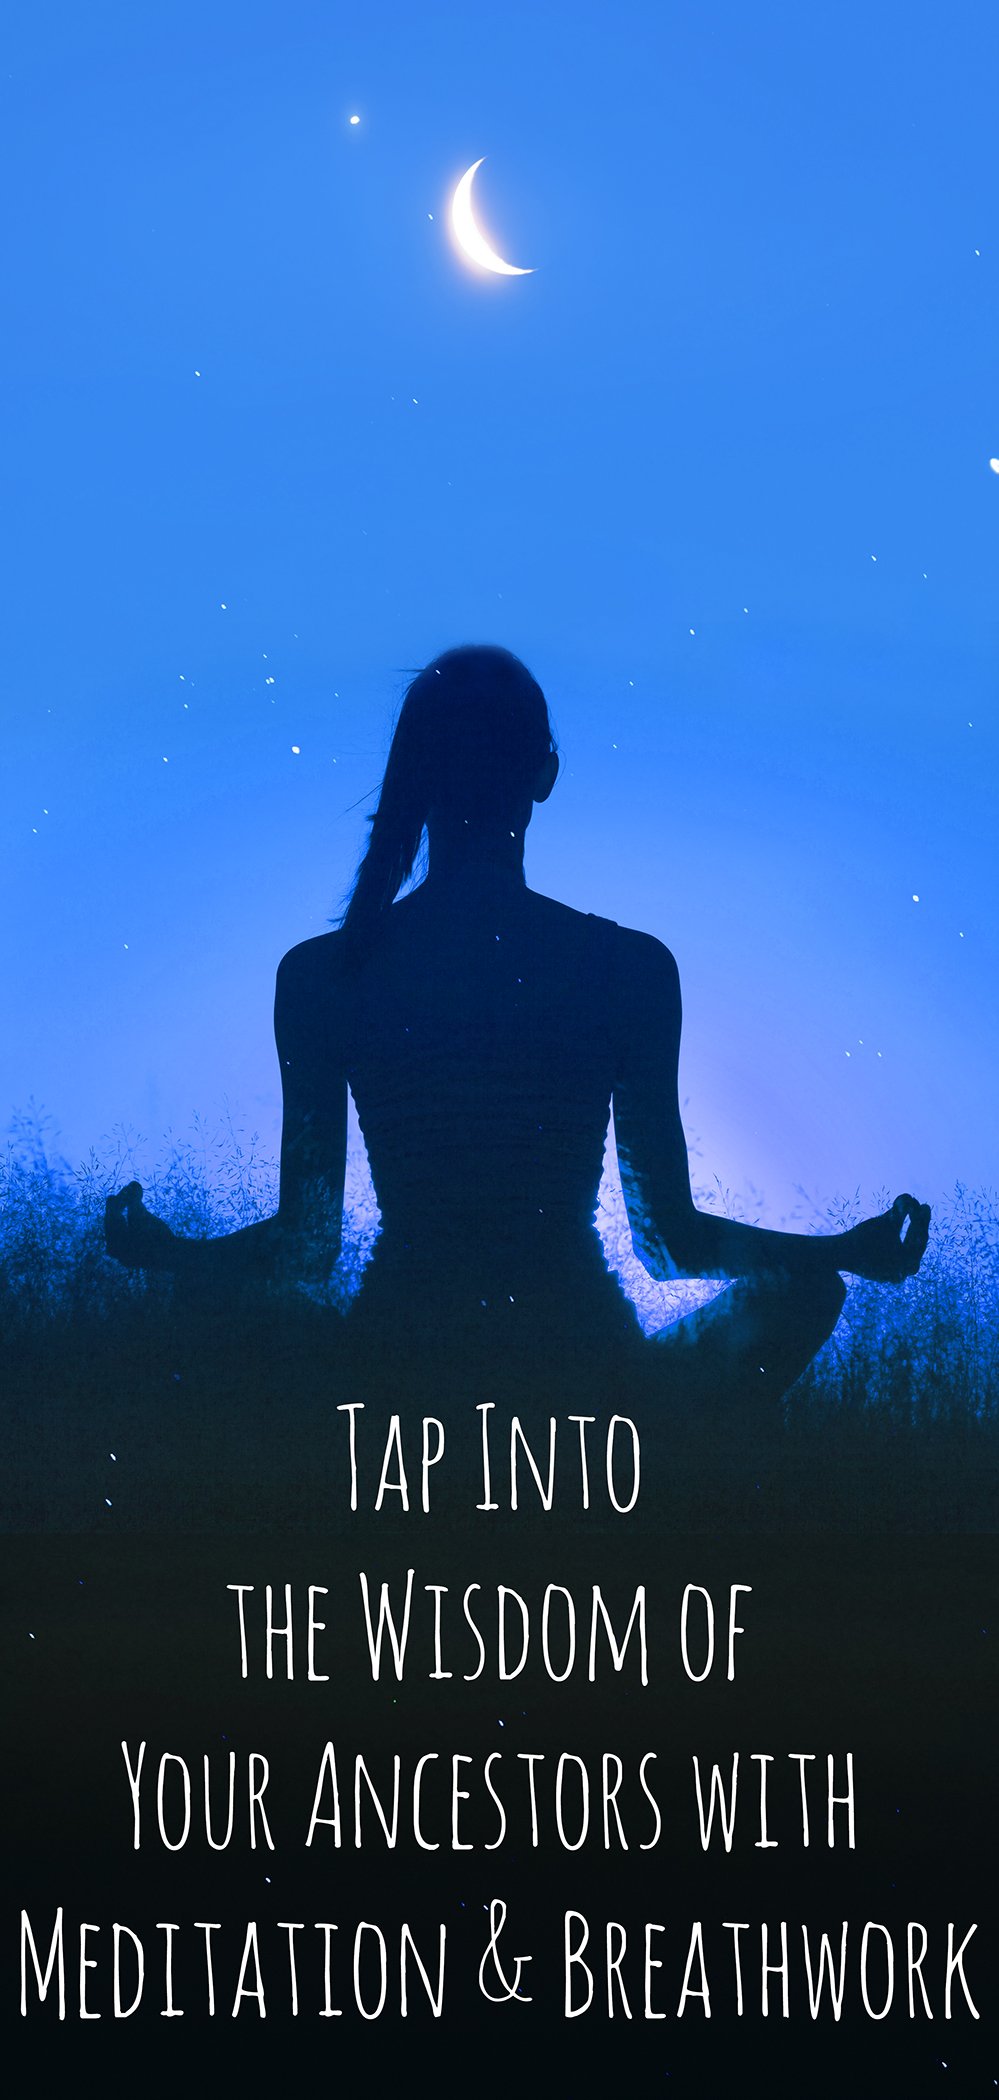
Tap Into the Wisdom of Your Ancestors with Meditation and Breathwork
Samhain, the sacred festival of the dead, occurs on October 31st and the 1st of November. It marks the beginning of winter and the season of the crone. This holiday reconnects us to the cycle of death and rebirth.It is believed that the veil between the spirit world and our world is thin during Samhain, making it easier to communicate with spirits. That’s why it is the best time to honor the wisdom of your ancestors during this time.This meditation and breathwork will take you within, to honor the wisdom you possess inside and the wisdom from those whom you come from.
Samhain, the sacred festival of the dead, occurs on October 31st and the 1st of November. It marks the beginning of winter and the season of the crone. This holiday reconnects us to the cycle of death and rebirth.
It is believed that the veil between the spirit world and our world is thin during Samhain, making it easier to communicate with spirits. That’s why it is the best time to honor the wisdom of your ancestors during this time.
This meditation and breathwork will take you within, to honor the wisdom you possess inside and the wisdom from those whom you come from.
1. Set the stage for your meditation with crystals and EO’s (optional)
There are many different crystals you can use to help you connect with your ancestors. Your energy is unique, so choose the crystals that have worked for you in the past or that you feel drawn to.
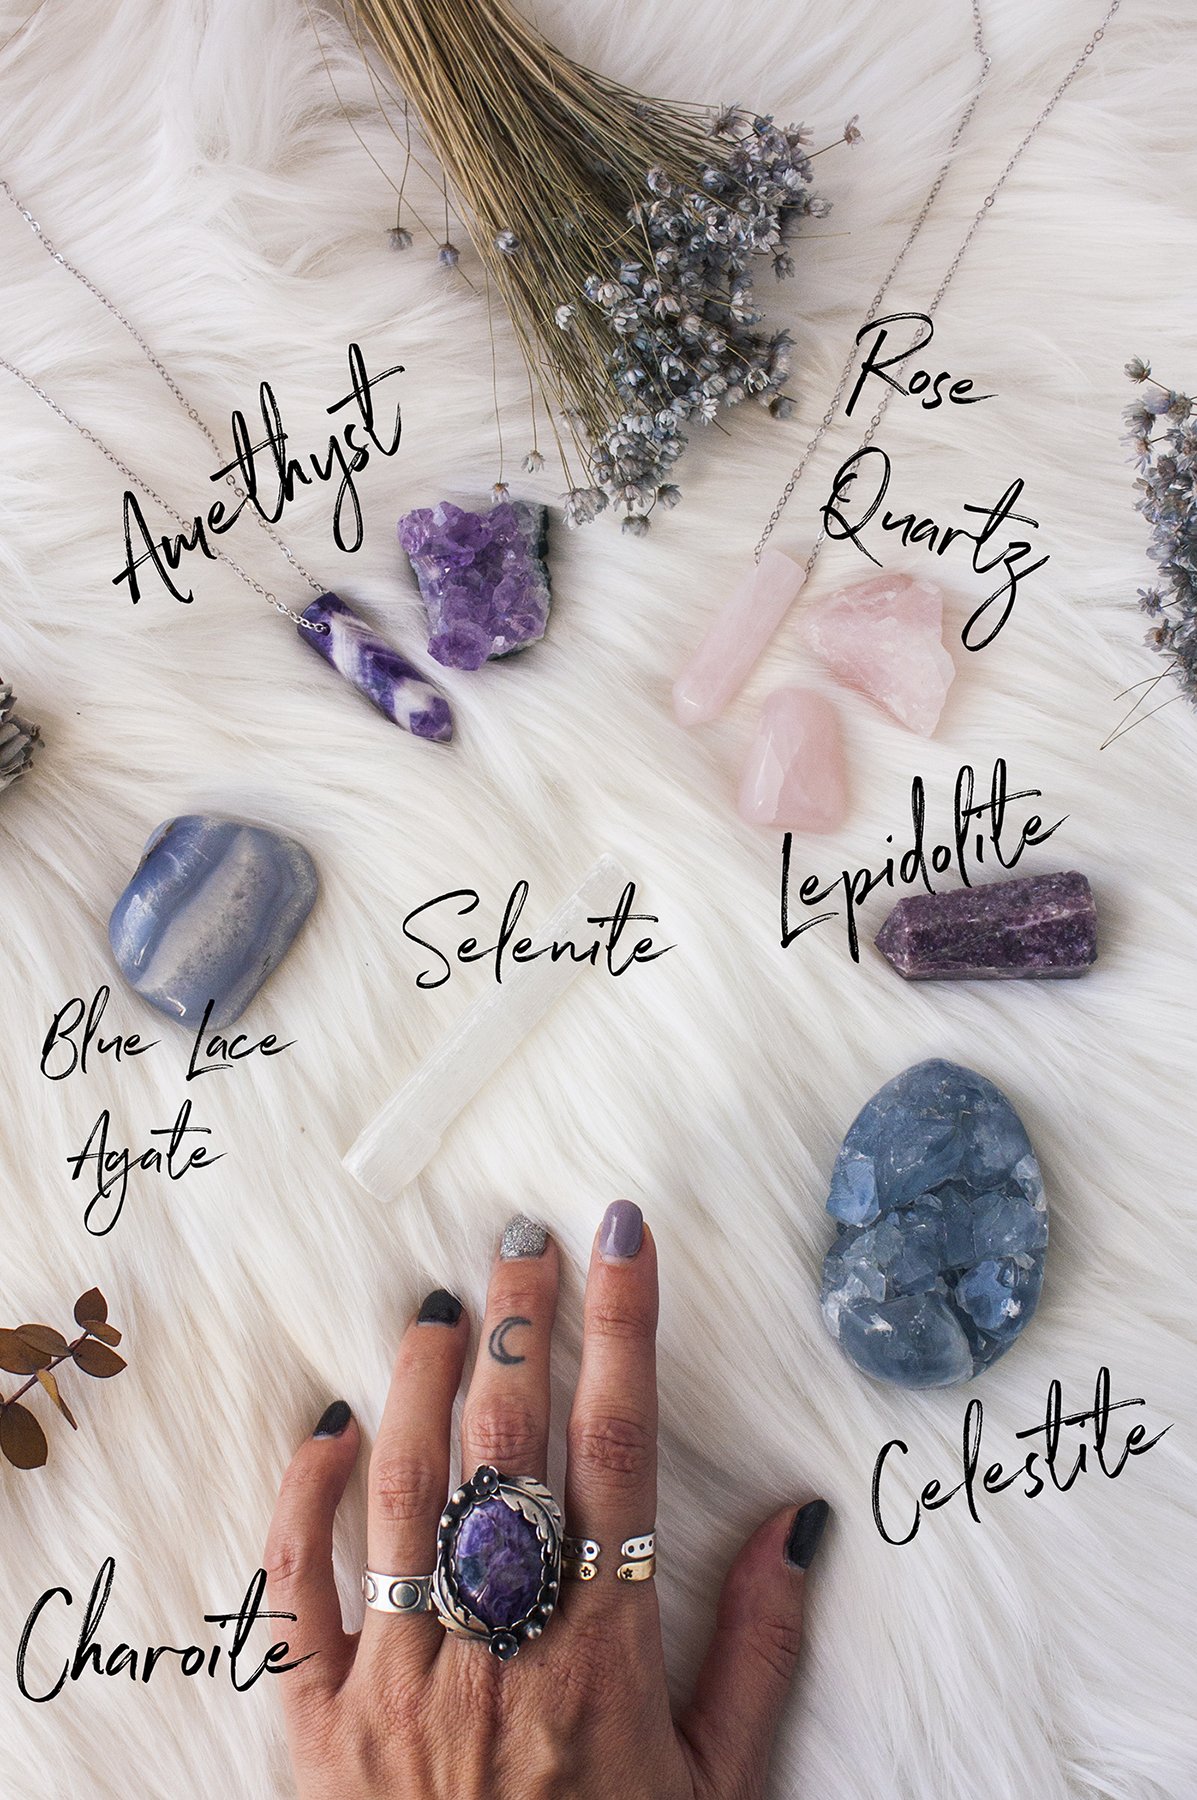
Here are 8 crystals that can help you connect to your inner wisdom and wisdom from your ancestors. Choose one or several of these stones to wear or place next to you for your meditation.
Lepidolite will help you get into a calm state and connect you to your third eye chakra, the center of intuition.
Celestite opens your energy to connect with the spiritual realm by helping you relax and transition into a dream state. Rose quartz a crystal of love, creates a safe and welcoming space for both you and the spirits. Amethyst helps to open your third eye chakra and can help you connect to your intuition.
Charoite will help you connect with your ancestors. It is another powerful stone for communicating with and channeling spirits. It helps you receive information from them using your intuition.
Blue Lace Agate raises your vibration to make a connection with the spirit world easier. It helps you connect with the spirits as it keeps you balanced, allowing you to receive messages without getting overwhelmed.
Selenite increases telepathy and opens the crown chakra, making it a great stone for spirit communication.
When using any of these crystals, make sure you also have obsidian, hematite, black kyanite, or black tourmaline for grounding and protection. These crystals will keep you safe and rooted to the Earth, leaving your mind and spirit free to wander.
You can also use essential oils in your meditation. Mix them with water for a mist to spritz around the area, dilute with a carrier oil such as coconut or olive oil, and massage into the skin, or even burn these scents as candles.
Here are a few essential oils to recruit for this meditation. Use one or all of them during your meditation.
Clary Sage for connection to the divine.
Rosemary for remembrance and love.
Cedarwood for purifying, grounding, and calming.
2. Start with the breath
Start with Nadi Sodhana, also called alternate nostril breathing, to balance the nadis, or energy channels, in the body. This breath brings you into the present moment, calms and centers the mind, and helps you release fear.
Sit in a comfortable seated position and place the left hand on the knee with the palm facing upward. This hand position creates an energy of receptivity. Place the index finger and middle finger of the right hand on the third eye center between the eyebrows, with the ring finger and pinky finger on the left nostril and thumb on the right nostril.
Throughout this breath, use the thumb to open and close the right nostril, and the ring finger and pinky finger for the left nostril. As you exhale, close the right nostril and breathe out of the left nostril. Inhale through the left nostril, and then close the left nostril to exhale through the right. Alternate breathing in this way for ten cycles of breath, holding your inhales and exhales steady and even.
3. Sink into Meditation.
Once you’re centered in a place of presence and balance, begin the meditation by taking a few deep, cleansing breaths. Follow these steps to tap into the wisdom of your ancestors for this meditation.
1. Visualize the support of the Earth underneath you, connecting you to the vast wisdom of Mother Nature. Feel her energy enter your body as you inhale, and run down the spine as you exhale.
2. Think about who you are and where you are in this moment. Remember that every part of you has been woven together by the fabric of your ancestors, the good and the bad. Their blood, their experiences, their pains, their joys all run through you and shape you.
3. Begin to visualize your family line, starting with a parent. Traditionally this is the father, but allow either parent to come to mind. Visualize them in front of you. As you inhale, they breathe the white-hot light of their wisdom within you. As you exhale, you breathe the white-hot light of your gratitude into them.
4. Ask if this spirit has anything they need to share with you.
5. Continue moving up your family line with this conversation, receiving knowledge, and offering gratitude by exchanging breath, taking as many breaths as you need with each spirit.
6. When you reach the end of your family line as you know it, sit in silence as long as you like and allow the messages to come to you. These can come in the form of images or sounds in your head, a feeling, or even a smell.
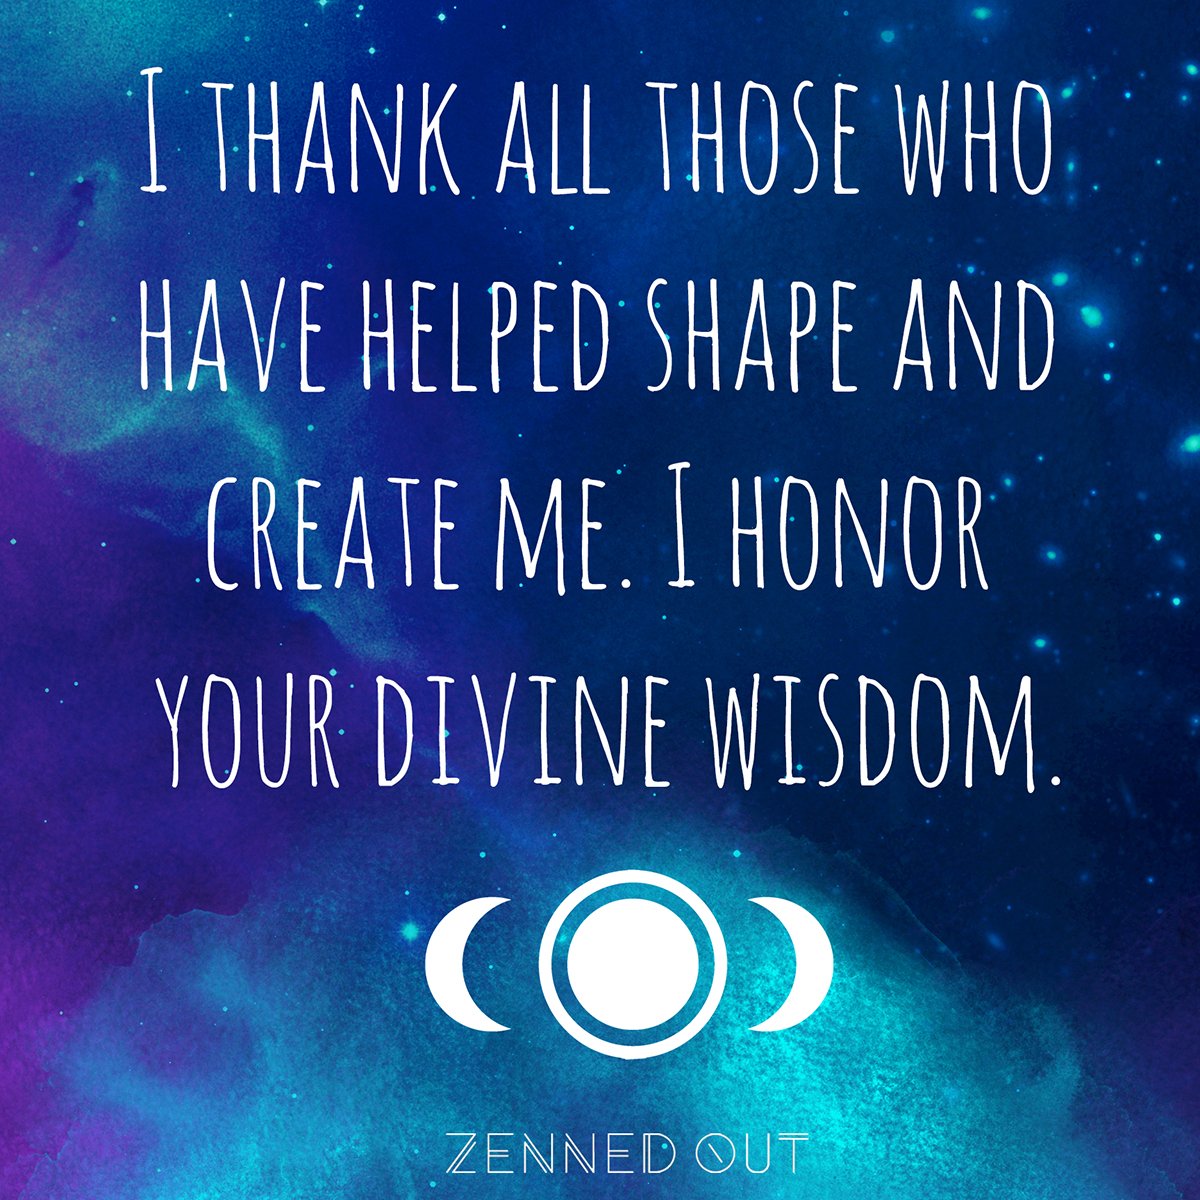
7. End with this simple phrase: “I thank all those who have helped shape and create me. I honor your divine wisdom.” Take a few moments after your meditation to let out your thoughts and emotions in a journal. Release anything that came up for you onto the page, and continue to sit with your crystals for as long as you need.
You can find meditations for the Wheel of the Year here.
8 Simple Ways to ‘Be Here Now’
The present moment; that time in space where the magic happens. Life stops and everything seems perfect just as it is. All of it makes sense, if only for a moment. We’ve all felt this fleeting feeling, but how can we be here more often?I want to help you find freedom from the inner chatter of your brain and reach a new level of consciousness in the present moment. I’ve got 8 quick tips for you that will help you ‘be here now’ more often....Which is a BIG deal. These 8 tips can help turn your worry-filled moments at a stoplight into zen filled moments. I think we all need more of that!
The present moment; that time in space where the magic happens. Life stops and everything seems perfect just as it is. All of it makes sense, if only for a moment. We’ve all felt this fleeting feeling, but how can we be here more often?
I want to help you find freedom from the inner chatter of your brain and reach a new level of consciousness in the present moment. I’ve got 8 quick tips for you that will help you ‘be here now’ more often.
...Which is a BIG deal. These 8 tips can help turn your worry-filled moments at a stoplight into zen filled moments. I think we all need more of that!
1) 5-4-3-2-1 Technique
This one is my favorite go-to for when you are having an internal freak-out!! Let's put those anxiety attacks to rest! By recognizing your senses, you can gain control of your thoughts. Catch your breath and ground yourself in reality by way of your five senses!
Acknowledge 5 things you can SEE around you
Acknowledge 4 items you can TOUCH around you.
Acknowledge 3 things you can HEAR
Acknowledge 2 things you can SMELL
Acknowledge 1 thing you can TASTE
2) Yin Yoga
Turn it down a notch with this slow-paced form of yoga. Switch out one of your faster-paced yoga classes for a Yin class!
By incorporating this style of yoga into your routine, you will begin to find the beauty in your pause. Trust me, all the feels come to the surface when your body melts into pigeon pose for two minutes! When you move so quickly in all other areas of your life, yin allows you to just be still. Bonus, you’ll eventually start to notice this slowness creep into other areas of your life.
3) Walking Meditation
Are you so busy some days that you don’t even have a chance to sit down? This one is for you! It also means that means you have lots of opportunities to practice it too!
Thich Nhat Hanh suggests not focusing so much on where you are walking, but rather how you are walking. Walk with reverence. Try matching your inhales and exhales with your steps. Focus intently on how the ground feels under your feet and how your feet feel coming in contact with the ground. Imagine each of your steps as a nod to our Mother Earth.
4) Power of the Pause
There's power in the pause. Heated moments of anger, frustration, jealousy, and fear are some of the hardest times to live in the present moment. Acting on your first thought isn’t the best option and can leave you in a pit of resentment or regret. But, when you buy yourself this space, you create options.
Next time you have a flash of one of those powerful emotions try pausing before you react. Perhaps in the quiet moment of a pause, a new option for a reaction (or lack of reaction) will enter your mind? It’s certainly easier said than done, but practice truly does make perfect. Try turning the pause into one of your habits and see what happens!
5) Mindfulness Apps
Being in the present takes practice, especially in our fast-paced lifestyles. Mindfulness apps are perfect for building reminders into your fast-paced day.
I could easily write a full blog post about the magic of modern mindfulness apps! I’ve tried many and am happy to share some of my findings. Though many of these do have paid options or upgrade they’re all absolutely free to start out with!
My top 4 mindfulness app finds:
Lotus Bud: This simple app will offer gongs or buzzes at random times as reminders to focus on the present moment.
Calm: This app is more robust and has lots of great paid offerings. My favorite thing about it is the free “breathe” function it has on it that has a timer for inhaling, holding the breath, and exhaling.
Tibetan Bowls Meditation: The app is great for the more seasoned mindfulness practitioner. It offers a variety of singing bowl sounds that are great for on the spot self-guided meditations.
Headspace: This app is great if you’re new to meditation. It has short and helpful videos before each mediation that walk you through all the mindfulness know-how you’ll need to know and has a great 10-day free trial.
6) Tapping
Past traumas and losses can play a huge role in your ability to be present and can seem difficult to overcome. Practicing tapping can help you get out of “lizard brain” mode (the fear, fight or flight, part of your brain) and into the prefrontal cortex (the conscious decision-maker part of the brain).
I know this one might seem a bit odd, but I can tell you firsthand, it works! This is one of my favorite methods for calming down when I’m consumed by panic or anxiety.
My preferred method is to cross my arms and lightly tap opposite shoulders. This might not always be a good option, like if you’re in a busy meeting. If tapping your shoulders won’t work you can try lightly tapping back and forth on opposite thighs.
If you have a specific traumatic event you’re trying to work through try out the following steps for a simple tapping exercise:
Begin by tapping your left hand on your left thigh and then your right hand on your right thigh or by tapping opposite shoulders with your arms crossed.
Lightly tap left to right, left to right.
See the event. Acknowledge what you see, smell, hear, taste...as you relive that event.
Continue tapping left to right left to right.
Now replace the trauma with your “happy place” or a “circle of love.”
Use your five senses as you dive into your happy place.
Continue tapping left to right until you feel free from the bad memory and grounded in the present.
Pair this technique along with some breathing for a presence powerhouse!
7) Conscious Observation
This is a great tool for redirecting overactive mental energy. I can't tell you how many ceiling tiles I've counted in waiting rooms! Sometimes when we feel nervous about a situation we project all of the possible future outcomes, the good, the bad, and the ugly! Try taking your mind off of the unknown by observing something in your surroundings.
Find an object near you, it can be anything.
Observe the item, take in every inch of it.
Mentally note the color, size, and texture of every aspect of it (i.e. the pillow is brown, it looks soft to the touch, it has light vertical lines in it etc.).
Repeat with as many objects as you’d like.
8) Count Your Breaths
When you are overwhelmed, you sometimes forget to breathe! Instead of holding your breaths, count them! Depriving your body of oxygen can actually create anxiety. Take deep breaths to bring yourself back to the moment.
Inhale for 5 counts through your nose
Hold for 3 counts
Exhale for 5 counts through your mouth
I like counting on my fingers by touching the top of my thumb to the top of each finger for each count. Add in your favorite calming essential oil for added benefits!
I hope you’re able to snag a few of these for your tool chest. Now you’ve got a mindfulness tip for every day of the week, and an extra for good measure! There are more tips for staying the moment than there is room on this blog, if you have a favorite I’d love to hear about it, send me a message on Instagram.


