Protection Rituals for Travel
Getting away on an adventure is one of life’s greatest pleasures, but as much as we love it, traveling can be anxiety-inducing too. Setting intentions with rituals, symbolism, and crystals can be a powerful way to ground yourself before travel and offer a layer of protection.There are so many uncontrollable situations when it comes to traveling, especially if you’re visiting a new place. I’ve got a list of rituals to offer peace and protection during any summertime travels you may have coming up! Read on to learn 4 protective tools for traveling.
Getting away on an adventure is one of life’s greatest pleasures, but as much as we love it, traveling can be anxiety-inducing too. Setting intentions with rituals, symbolism, and crystals can be a powerful way to ground yourself before travel and offer a layer of protection.
There are so many uncontrollable situations when it comes to traveling, especially if you’re visiting a new place. I’ve got a list of rituals to offer peace and protection during any summertime travels you may have coming up! Read on to learn 4 protective tools for traveling.
Invoke Green Tara
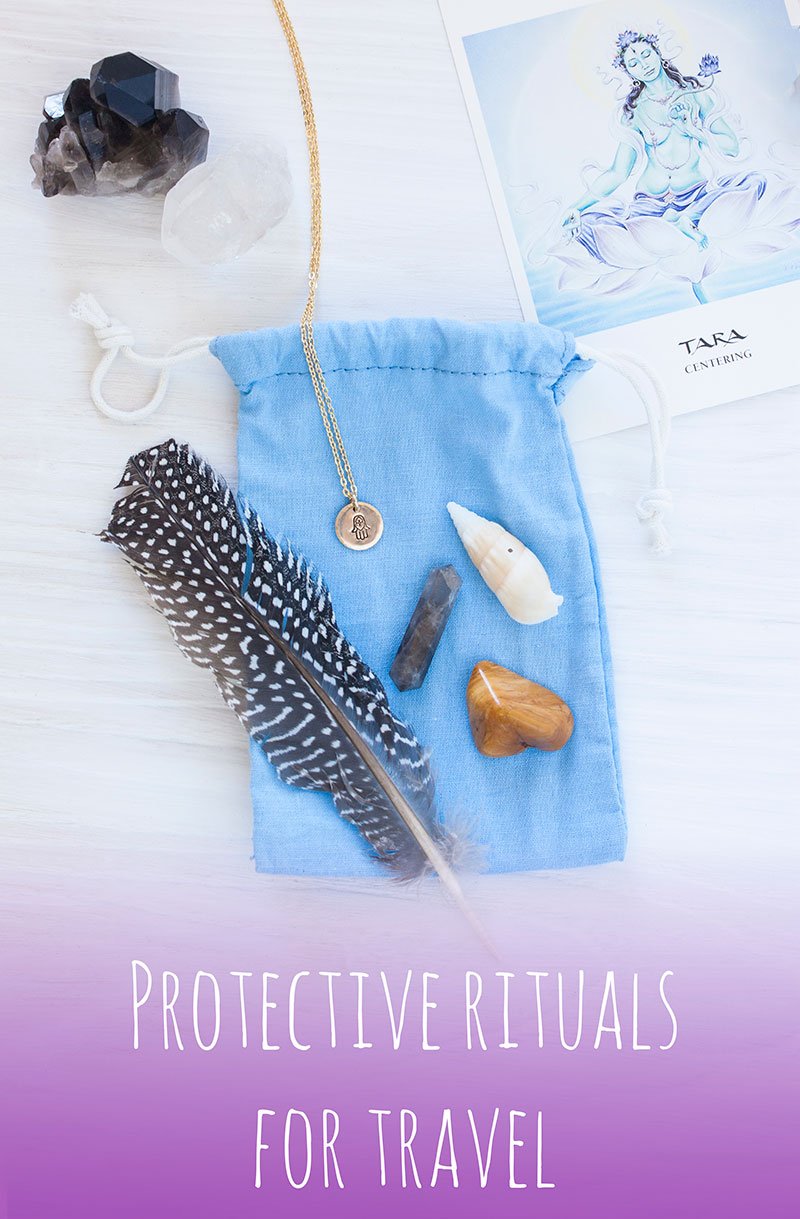
Tara is an adored Buddhist Goddess that is portrayed in many colors, 21 to be exact, each with their own qualities. Green Tara, one of the more well-known of the 21, is your go-to Goddess for protection. She will help shield you from negative energy and soothe your fears and anxiety.
Invoke Green Tara’s protective energy by inviting her into your meditation, carrying around a card or image of her, or repeating her mantra, “Om Tare Tuttare Ture Soha,” (Ah-um Tah-ray Too-tah-ray Too-ray So-hah).
Protective Crystal & Stones
There is a multitude of protective gemstones, but some are better for traveling. Here’s my list of favorite crystals to keep in my bag, on my rearview mirror, on my finger, or around my neck while traveling.
Tiger Eye
This stone has long been used as one of the most powerful stones for protection and warding off evil. My favorite part about this stone is that it can bring confidence and a sense of security when going through anxiety-provoking situations. Tiger eye is perfect for wearing to act as a protective shield during travel.
vYellow Jasper
This stone is specifically helpful for traveling, mentally and physically. It is protective like tiger eye, but it also connects with your solar plexus chakra. The solar plexus chakra often becomes drained during travel, and yellow jasper is ideal for keeping the energy of your solar plexus balanced and energized. Place yellow jasper on your solar plexus chakra (in between your belly button and heart center) to balance and restore your will and power center.
Smoky Quartz
This is your stone for grounding and protecting any valuables as you travel. Put a piece of smoky quartz in your suitcase or purse to help guard them. Between flying and projecting fears about the unknowns during travel it’s easy to throw your root chakra out of balance. If you’re feeling detached from Mother Earth place a couple of smoky quartz pieces in each hand pointing down and take several deep breaths to restore your root chakra.
Wear a Protective Hamsa Hand Amulet
If you prefer to keep your crystals in your luggage or purse wearing a Hamsa Hand is beautiful and powerful alternative. The Hamsa Hand is perfect for traveling because it is said to see all things and ward off evil for the wearer. Beyond protection, the Hamsa Hand is also good for bringing good fortune, blessings, and strength.
The Hamsa Hand has roots in many cultures so its meaning will vary from person to person. Some believe that each of the fingers represents an element, the combination of these elements is said to change the flow of energy within the body and offer healing.
Whatever your beliefs are about this symbol, they all come back to protection!
Protection Magic Charm Bag
Charm bags are one of the easiest magical tools and great for travel because they’re small, powerful, and easy to create. I travel often and like to tuck away a protective charm bag somewhere in my luggage. During my most recent trip back home, I drew a Hamsa Hand on my charm bag for an extra layer of protection and it made it look extra fun!
To create your magic charm bag, put any combination of the following ingredients into your choice of bag color. As you place the items in the charm bag imagine a white shielding light enveloping you and your luggage. This is a perfect time to invoke Green Tara too! Place your charm bag in a suitcase, on your rearview mirror, or in your purse as you travel.
Bag color: black, blue, or yellow
Stones: Any of the stones listed above!
Earth: Pointed shell, black and white feather, pine, acorns, cinnamon
Amulet or Symbol: Hamsa Hand, Eye of Horus
Now you have all the tools you need to travel with confidence that you’re protected mind, body and spirit. Wishing you a summer full of new and magical experiences!
Create a Flower Crown for the Goddess in You!
Breathe it in, do you smell it? Spring is here! Sending you joyous Spring Equinox and Ostara vibes! Ostara is the Wiccan holiday that honors the Spring Equinox and its part of the Wheel of the Year. Ostara is a time to bring balance to your life, welcome the coming light, and celebrate blossoming life.If you are looking to bring some sunshine into your world after hibernating for the past few months, wearing a flower crown will really get you in the springtime spirit and give you good reason to embrace your goddess energy.
Breathe it in, do you smell it? Spring is here! Sending you joyous Spring Equinox and Ostara vibes! Ostara is the Wiccan holiday that honors the Spring Equinox and its part of the Wheel of the Year. Ostara is a time to bring balance to your life, welcome the coming light, and celebrate blossoming life.
If you are looking to bring some sunshine into your world after hibernating for the past few months, wearing a flower crown will really get you in the springtime spirit and give you good reason to embrace your goddess energy.
Crowns of all sorts have adorned the heads of the most ultimate goddesses throughout time and across cultures. However, no crown seems to come close to the beauty that is the flower crown, and it’s the perfect celebratory craft for Ostara.
I’ve got a bit of floral history for you, the meaning behind some favorite flowers, and a short DIY to get you started with flower crowns.
History
Wicca
Floral crowns have been used for celebrating Ostara (Spring Equinox) and, maybe more commonly, Beltane (the celebration between spring and summer). Various Pagan religions would adore statues of their Gods and Goddesses with flower crowns during these times of the year.
Flora
The Romans held this fertility goddess in high esteem. Flora was said to wear “garlands of a thousand flowers.” In the Roman culture, a springtime festival was held to honor the renewal of the lifecycle. If flower crowns are your thing, then this was the place for you! Even the dogs were decorated with flowers! Flora was said to wear soft yellow flowers to represent the essence of spring. Honor Flora with a buttercup blossom!
Island Life
Hawaii definitely has its bases covered when it comes to tropical blossoms. Here, flowers are worn on ankles, wrists, and yes...heads, too. In Hawaii floral crowns are known as “haku lei.” You can find bronzed goddesses roaming the beaches decked out in flower crowns on any day of the week! It's also customary for the natives to gift these beautiful crowns to friends and visitors.

Flower Meanings
Laurel: Symbol of triumph
Buttercup: Childishness, neatness, humility
Myrtle: Marital fidelity, good fortune
Periwinkle: Happy memories, achieving your dreams
Daisy: Innocence, cheerfulness
Rose: Love
Pink Peony: Riches, honor, prosperity
Baby's Breath: Long lasting love, angelic
Dandelion: Survival, spiritual intelligence
Gardenia: Purity, love
Laurel: Success, glory
Daffodil: Self love
DIY Flower Crown
Crown crafting is the perfect tribe building activity! Of course, you're economical so it only makes sense for you and your besties to get together and bring your favorite bunch of flowers to share.
I really wanted to create my flower crown with only flowers. Turns out, that is pretty tough. I was able to create my crown from flowers plus a little string.
If you’re using thinner, bendier stems, I think it would be possible to create a crown from only flowers. If you’re going for a statement-making crown like mine, string might be a necessity.
Supplies: Flowers, scissors, string
Start with three flowers and start by braiding the stems together.
As you braid continue to add in more flowers and their stems into your braid.
Once you have long enough braid of flowers to make a crown, carefully bend your braid into a circle shape.
Using string or a stem of a flower tie the back overlapping parts of your flower braid.
Fill out your crown by sticking flowers into the braid around the crown or by tying them onto the braid.
This took some time and patience. I couldn’t be happier with my end result and I felt like a goddess all day! Be bold, rock your flower crown as you welcome Ostara, the coming light, and the birth of spring. You are the peaceful warrior, a goddess, the light bringer, and the bearer of sunshine!
5 Tips to open your heart chakra and how to know when it's blocked
How are you feeling about giving and accepting love right now? Are you feeling open, receptive and giving--or maybe a little blocked? Whether you’ve got a lot or a little blocking you from giving and accepting love in your life, I’ve got tips to help you enliven your heart chakra, from herbal tinctures to heart chakra inspired altars!The heart chakra, or in sanskrit anahata, is the chakra (energy center) located at the center of your sternum. The heart chakra is responsible for your ability to give and receive love. If you’ve had any heartache in your past (and let’s be honest, who hasn’t?) you may have some lingering blocks that could be making it hard for you to give and receive the love you deserve.
How are you feeling about giving and accepting love right now? Are you feeling open, receptive and giving--or maybe a little blocked? Whether you’ve got a lot or a little blocking you from giving and accepting love in your life, I’ve got tips to help you enliven your heart chakra, from herbal tinctures to heart chakra inspired altars!
The heart chakra, or in sanskrit anahata, is the chakra (energy center) located at the center of your sternum. The heart chakra is responsible for your ability to give and receive love. If you’ve had any heartache in your past (and let’s be honest, who hasn’t?) you may have some lingering blocks that could be making it hard for you to give and receive the love you deserve.
Is your heart chakra blocked?
Here’s a quick checklist to see if you’ve got any areas in your heart chakra that could use some extra love:
Is your self-talk critical and negative?
Do you have trouble making friends?
Are you lonely?
Do you have a lack of trust in your relationships?
Do you have social anxiety?
Do you have a hard time accepting and/or giving?
Whether you resonate with all of these or just 1 or 2 of these, I’ve got something for you. Read on to learn 5 versatile tips to clear up blocks in your heart chakra.
You can also read this blog post where I explain 3 ways to understanding the health of chakras.
1. Heart Chakra Altar
Make your sacred space a haven for your heart chakra by adorning your altar with colors, crystals, and symbols that will help balance and restore you to love.
Color: Green and pink. Feast your eyes on the color of your heart chakra by adorning your altar with candles, cloths, or statues with green and pink.
Crystals: Rose quartz, aventurine, emerald, green and pink tourmaline, chrysoprase, moss agate, and malachite. Aside from their green and pink hues all of these stones have energy that lends themselves to healing your heart chakra. Choose any combination of them to place on your altar.
Symbols: Anahata symbol, hearts, and the Wunjo Rune symbol all represent love. These symbols on your altar will act as a visual reminder of your intention to be open to giving and accepting love.
2. Ask the Cards
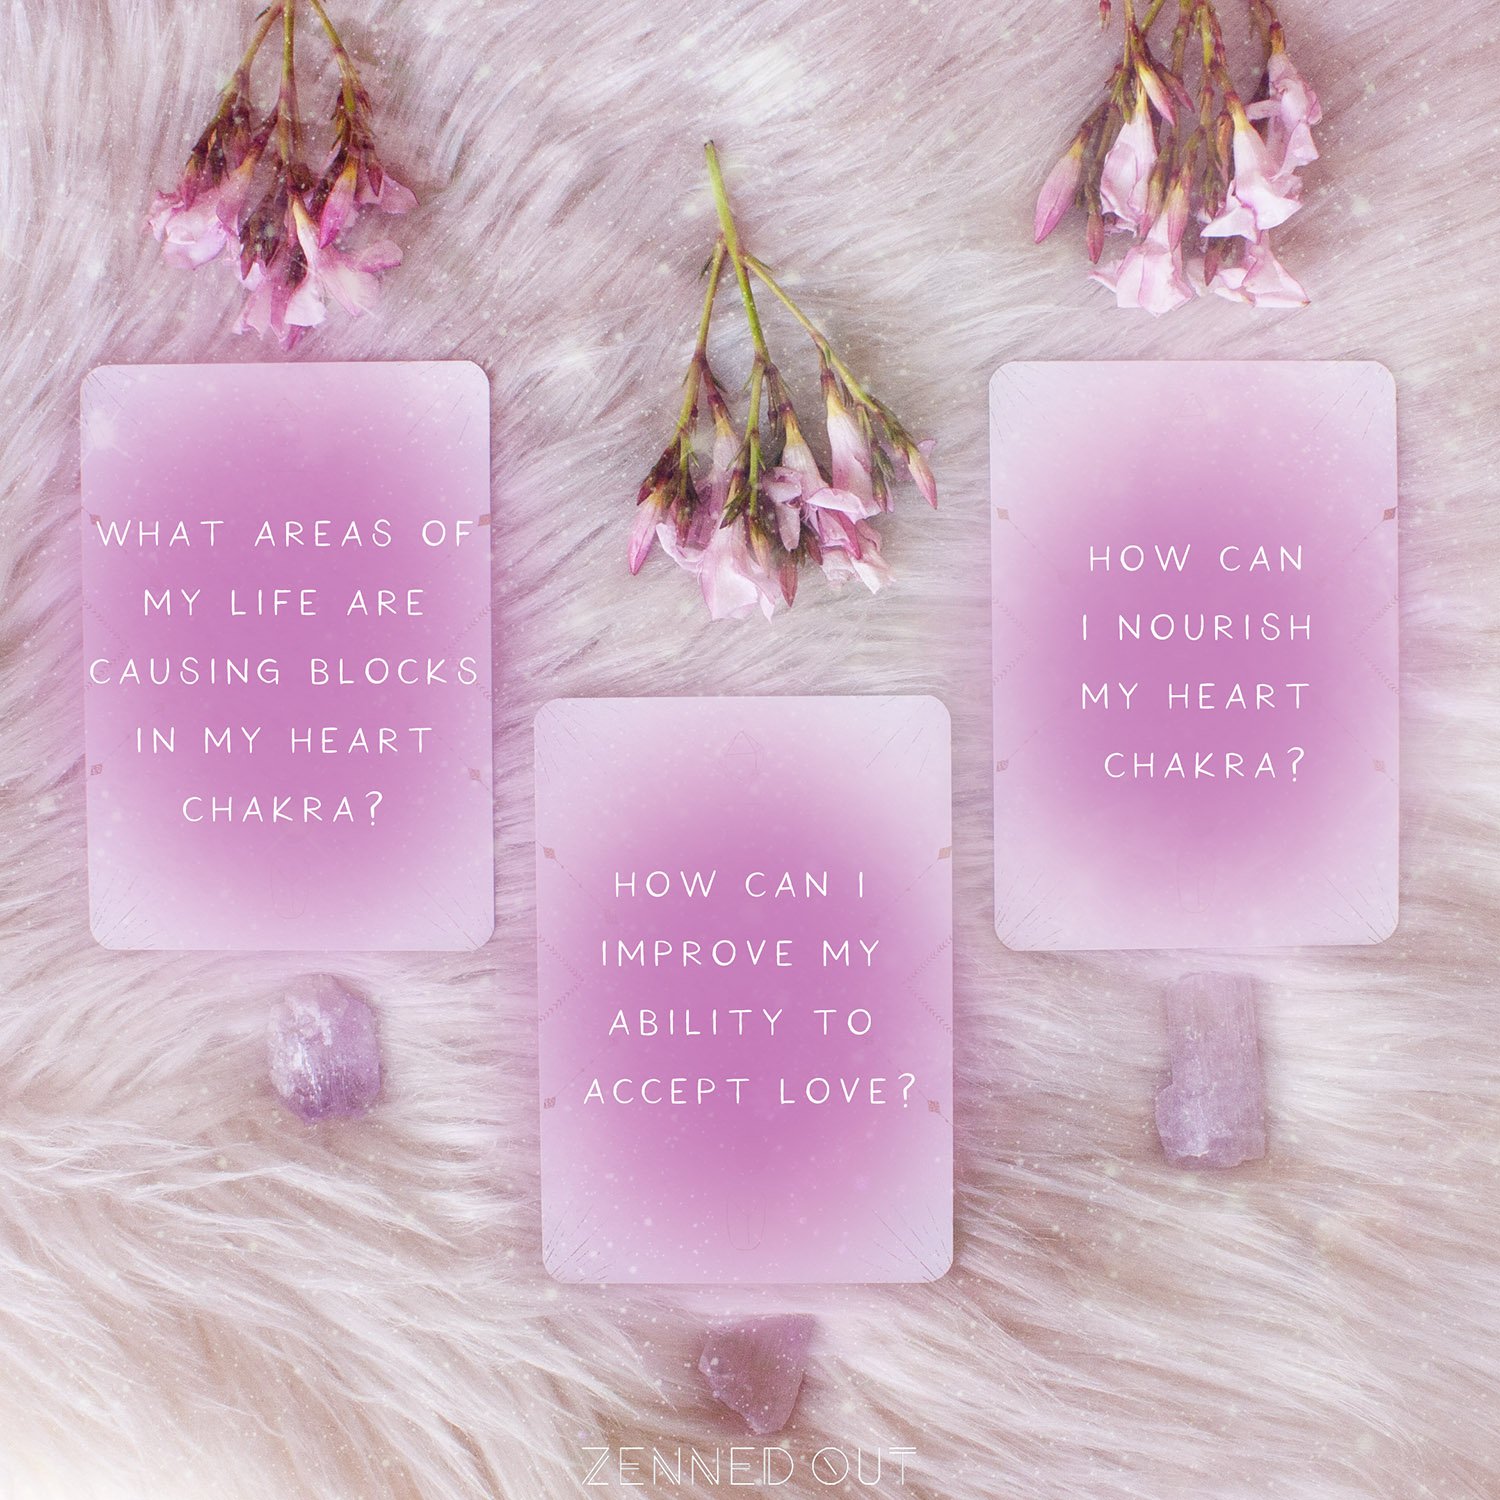
Grab your favorite tarot or oracle card deck and ask them how you can open and balance your heart chakra. Oracle and tarot cards, like any divination tool, are a direct link to your spirit guides and higher self. Try this heart chakra three-card spread or create your own. If you don't have a card deck handy you can opt to journal about each of the questions below instead.
What areas of my life are causing blocks in my heart chakra?
How can I improve my ability to accept love?
How can I nourish my heart chakra?
3. Heart Chakra Meditation
Set aside 5 minutes (or more!) of your day for some deep breaths, connect with your heart chakra on an even deeper level with a simple meditation. Energy reset meditations are a personal favorite of mine, probably because I find them so effective. You can check out my energy reset meditation bundle here.
Try working some of the following tips into your next meditation session balance and open your heart chakra:
Scents: If you have any rose or bergamot essential oils around, these are perfect for balancing the heart chakra. Add them to your diffuser or just take a few deep breaths before you start your meditation.
Visualize: Imagine a glowing green light around your heart chakra as you meditate. Visualize that with each inhale it grows bigger and with each exhale it comes back to center. Eventually, let this growing green light consume your whole body with each inhale.
Mantras: YAM (pronounced yawm, like CD-rom) is the mantra of the heart chakra. Layer this mantra into your meditation with long yaaaaaaaaammmmm added into your exhale. If you’d like a mantra with a clearer intention feel free to repeat one of these mantras during your meditation, “I am love” or “I accept love freely.”
4. Herbal Love for your Heart Chakra
Did you know that heartache, grief, and loss can lead to physical symptoms around your heart chakra? There’s even a name for it, it’s called “broken heart syndrome.” Yeah sure, we’ve all dealt with bad break ups, but if you’ve been dealt more than your fair share of heartache and loss it could be affecting your physical health too. Our physical bodies and energetic bodies are closely connected and intertwined. Keeping your heart in its best physical shape can help keep your heart chakra bright and shining!
Need a tune-up in the heartache department? Hawthorne is your go-to herb! For a quick fix, you can grab some hawthorne and hibiscus (also great for your heart) tea. But, if you want some serious healing herbs here’s a recipe for a hawthorn tincture.
If making tinctures aren't your thing, or you don't have supplies handy to make one, bergamot, rose, and ylang-ylang are all great options for activating the heart chakra. Diffuse or wear any of these oils to help soothe and open the heart chakra.
Hawthorne Heart Tincture
Dried organic hawthorn berries
80 proof or greater vodka or brandy
Optional: dried organic hawthorn leaves and flowers
Glass jar
Fill your jar full with your herbs, then add the alcohol until all of your herbs are covered.
Don’t forget to label your concoction! Be sure to add the date you made it and what herbs are included.
Let your brew sit for 4-6 weeks, preferably in the window where it can soak up good vibes from the sun and moon.
Give your mixture a little shake up every couple of days. This is also the perfect time to infuse your tincture with some good vibes and intentions from you, so be sure to send it some happy thoughts when you shake it up!
Once the 4-6 weeks have passed, drain your mixture through a cheesecloth or fine mesh strainer.
Pour your tincture into a glass dropper bottle and you’re all set. Let the heart healing commence!
Enjoy 2-4 droppers full of your tincture 1-2 times a day in tea, water, or juice.
5. A Wearable Reminder of Love
Wearing symbols or crystals that associate with the heart chakra can serve as a potent reminder to give yourself and others love throughout the day.
If you're not into wearing jewelry, wearing colors associated with the heart chakra or carrying some heart chakra crystals in your pocket will have a similar effect.
8 Simple Gratitude Rituals
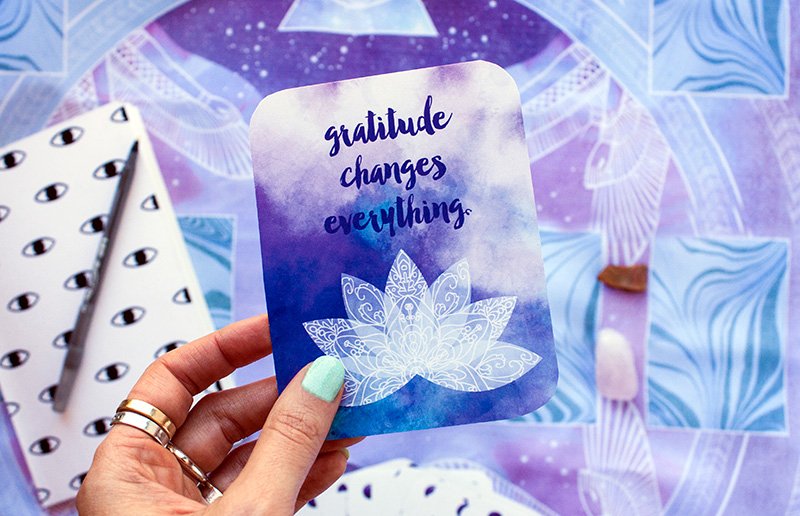
What does gratitude do for you? It brings a sense of peace within you where there might otherwise be turmoil. Gratitude calms your nerves and makes you right-sized. All of that doesn't happen on its own. Gratitude is a state of being that can be accomplished more readily if you are vigilant about revisiting the gratitude rituals that work for you...and maybe even throwing in some new ones!Practicing gratitude allows you to realign your roots with the universe. It can aid in manifesting your desires and help to pull you out of catastrophic thinking. Keep scrolling for eight simple gratitude rituals to add to your practice and check out an Instagram reel I made to tune into gratitude below.
What does gratitude do for you? It brings a sense of peace within you where there might otherwise be turmoil. Gratitude calms your nerves and makes you right-sized. All of that doesn't happen on its own. Gratitude is a state of being that can be accomplished more readily if you are vigilant about revisiting the gratitude rituals that work for you...and maybe even throwing in some new ones!
Practicing gratitude allows you to realign your roots with the universe. It can aid in manifesting your desires and help to pull you out of catastrophic thinking. Keep scrolling for eight simple gratitude rituals to add to your practice.
1. Make a Gratitude Box
When we aren't getting what we think we should have, it's easy to lose sight of what we are grateful for. To help with this amnesia, create a Gratitude Box. Every day, put a piece of paper in it and scribble something on it that you are grateful for. In times of need, open your gratitude box and read the slips of paper. When you think you are having a tough day you might pull out a slip from a time when you were grateful for the roof over your head. For me, I know that most of my problems today are “luxury problems.” If I find myself upset that I didn't get a day off from work, I might pull out a slip of paper reminding me that I should be lucky I have such an awesome career in the first place!
2. Play the Appreciation Game
This gratitude ritual comes from Gabby Bernstein who is a goddess of gratitude and manifesting. She recommends playing the appreciation game, based on the idea that it’s good to feel good.
To play this game, “follow the fun” by focusing on what’s thriving in your life. Start to speak out loud a list of all the things you appreciate. This can range from simple physical things like your favorite ring or yoga pants to your amazing career or best friend. Start small and allow the vibration of gratitude to take you deeper and deeper into what’s thriving in your life.
If you get stuck for a moment, return to something you already said! Try to do this for at least 3 to 5 minutes, and afterward notice how you feel.
It can also be really fun to do this with another person or even a whole circle of people. Hold space for another to speak their blessings out loud, and then allow them to hold space for you.
3. Meditate with Mantras to Inspire Gratitude
Incorporate a version of this mantra that resonates with you into your meditation practice: I know the abundance of the Universe flows to and through me, and I receive freely without hesitation. I am so grateful for the abundance in my life, and I know it all comes from you. Thank you, thank you, thank you.
Gratitude is a muscle, and these rituals will help you flex that muscle so that gratitude becomes part of each day.
4. Ask Your Tarot or Oracle Cards
Try asking one of these questions, and then pulling a tarot card or an oracle card:
What blessings are available to me now?
What new blessings are coming my way?
What am I grateful for in my career, relationships, or personal development?
How can I express my gratitude towards myself?
How can I express my gratitude towards others?
What are the silver linings of challenges I have faced this year?
How can I continue to create abundance in my life?
Tarot and oracle cards are incredible tools available to you as a mirror for your own inner wisdom. The cards you pull might give you a new perspective on certain situations or people in your life. To learn more about how to get started using tarot, click here. To learn more about using oracle cards, and get a free printable oracle card deck click here.
5. Create a Gratitude Crystal Grid
Invoke gratitude by opening your heart chakra! Gain a heart-based perspective by creating a gratitude crystal grid. Green and pink stones will speak to your heart chakra. They will vibrate love, truth, and compassion. You might choose rose quartz and green kyanite, and harmonize all of the stones with some clear quartz. If you are looking for something special choose a moss agate Merkaba for the center of your grid! You can find out more about crystal grids here.
6. Journal with Crystals for Gratitude
I encourage you to commit to doing this practice for at least ten days, and maybe even every single day. Before you go to bed each night, make a list of 10 things that you were grateful for today. You can use rose quartz to open the heart chakra, petrified wood to ease fear and connect to your deep roots, and tiger eye for balance and harmony as you journal.
What amazing things happened? What is the opportunity that something not-so-amazing may be creating for you? Create a journal specifically for this gratitude practice and flip through it when you feel discouraged to remember how blessed you are.
7. Work with Essential Oils for Gratitude
Part of being grateful is staying grounded. It's planting your roots in what matters, and letting go of everything else. For scents that inspire gratitude, choose earthy oils such as patchouli and cedar. To keep yourself firmly planted in the present try this rollerball blend with your favorite carrier oil (mine is sweet almond oil!!)
5 drops patchouli
5 drops sandalwood
5 drops frankincense
5 drops ylang ylang
8. Get Outside
It may be chilly and gray where you live, or maybe it’s beautiful and sunny. Either way, take a walk outside sans cell phone and challenge yourself to be really present. Notice the beautiful things you see. They could be really simple— the shapes of the clouds in the sky, the color of the grass, a crisp leaf on the ground.
Beyond feeling amazing after practicing these rituals, carrying a heart full of gratitude is a great way to usher in a new year! Above all, be kind. Ultimately, gratitude is an action. It's a display of thankfulness.
DIY Wintertime Self-Care
Are you ready to take on winter like a glowing goddess? Despite all of its beauty, winter brings with it some blustery weather that will surely sap your skin dry. And let's not forget all the wintertime illnesses that linger in the air.No worries though, I've dug up some delicious DIYs to carry you through this winter season! Bonus, they make perfect handmade gifts.
Are you ready to take on winter like a glowing goddess? Despite all of its beauty, winter brings with it some blustery weather that will surely sap your skin dry. And let's not forget all the wintertime illnesses that linger in the air.No worries though, I've dug up some delicious DIYs to carry you through this winter season! Bonus, they make perfect handmade gifts.
Evergreen Lip Balm
Our super sensitive puckers are left on their own to brave the elements. Smooth, shine, and refresh your lips with this grounding lip balm!
Supplies
lip balm tin
double boiler (or a glass bowl fit into a saucepan)
grated beeswax
virgin organic coconut oil
organic raw honey
vitamin E capsules
toothpick
your favorite evergreen EO (mine is Plant Guru’s “Deep Forest”)
How To
Add 1 TBSP beeswax to double boiler at low heat. When halfway melted add in 1 TBSP coconut oil. Melt together, then add 2 vitamin E capsules or ½ tsp. Remove from heat and quickly mix in-dash of honey and a few drops EO. Add mixture to the tin container before it solidifies. In order to keep ingredients from separating, continue to stir with a toothpick until the mixture is more solid.
Benefits
Beeswax is anti-inflammatory, antibacterial, and full of antioxidants. Heals damaged skin and protects against UV rays. Locks in moisture, soothes dryness, contains vitamin A for healthy cell development.
Coconut oil contains lauric acid that dives deep into the skin barrier to relieve inflammation.
Honey sucks moisture from the air and locks it into your skin, a natural exfoliant, heals, nourishes, protects.
Vitamin E fights off free radicals, softens skin.
Evergreen is a grounding scent that promotes harmony and clarity.
Vanilla Bean Body Oil
This sensual body spray is my new favorite. It smells heavenly and its added health benefits make it a cold-weather must-have.
Supplies
glass spray bottle
macadamia nut oil
sweet almond oil
2 organic vanilla beans
vanilla essential oil (optional)
How To
Combine equal parts macadamia nut oil and sweet almond oil into your glass spray bottle. Cut vanilla beans in half (lengthwise) and add to oil. The vanilla beans can take some time to infuse with the oils. For instant aroma add a few drops of vanilla essential oil. Spritz the oil on after your shower to seal in moisture! Once you’ve used up the oil, salvage the vanilla seeds and use them as a facial exfoliant or add to a body scrub!
Benefits
Macadamia nut oil is lightweight, reduces itching and inflammation; linoleic fatty acid helps skin retain moisture.
Sweet almond oil has 200% of the daily recommended amount of vitamin E, packed full of antioxidants that help protect against UV damage, contains vitamin A that can help prevent acne, helps with psoriasis and eczema.
Vanilla anti-inflammatory, antibacterial, contains antioxidants, packed with vitamin B for healthy skin! The scent of vanilla is said to promote feelings of well being, and the Mayans even believed it to be an aphrodisiac!
Homemade Honey Cough Syrup
Every year, I think I'm in the clear. And then...it hits me! Bam! That first cough/cold combo of the season is bound to happen. Whip up a batch of this cough syrup while you’re feeling good so you can tackle that sickness with a vengeance when it comes your way. You can even start taking some now as a preventative! This recipe will stay good for a few weeks when stored in a cool and dry environment.
Supplies
raw or manuka honey
ground ginger (fresh or dried)
ground black pepper
lemon
ground thyme (fresh or dried)
water
mixing bowl
mason jar with lid
How To
Mix 10 TBSP honey with 4 TBSP warm water. Stir in 1 ½ tsp each of thyme, ginger, and pepper. Squeeze in the juice of ½ of a lemon. Mix together thoroughly. Store in a sealed container.
Benefits
Honey coats irritated membranes with its strong antibacterial properties.
Ginger is a natural expectorant, anti-inflammatory, and helps sweat toxins out of the body; antiviral.
Lemon is super immune-boosting packed with vitamin C.
Black pepper is antibacterial, packed with vitamin C and antioxidants, and helps loosen phlegm when used with honey.
Thyme opens and relaxes airways, reduces inflammation.
Now you’re ready to take on wintertime like a glowing goddess. I hope you enjoy these blends as much as I have! Do you have a favorite winter self-care recipe? I’d love to hear about it, feel free to contact us.
3 Healing DIY Herbal Tea Blends
Is coffee your main squeeze? Don’t worry, I’m not going to try to convince you to give up your morning caffeine! Coffee drinker or not you can still enjoy the magic of herbal teas, and I’ve got some good reasons why you’ll want to add them to your healing arsenal.This one is for my novice and veteran tea drinkers alike!I'm going to tap into tea’s magical powers and present you with a list to create your own fusion and 3 of my favorite recipes! Caffeine doesn’t agree with my body so I enjoy multiple cups a day of herbal tea. The varieties of herbal blends are endless, but my favorite part is that each blend comes with multiple healing benefits.Tea really is a gift from some ethereal being. After all, legend has it that the second emperor of China discovered tea when some tea leaves mysteriously blew into his pot of boiling water. Today, you can elaborate on this otherworldly brew by picking herbs to tailor-make your special blend.
Is coffee your main squeeze? Don’t worry, I’m not going to try to convince you to give up your morning caffeine! Coffee drinker or not you can still enjoy the magic of herbal teas, and I’ve got some good reasons why you’ll want to add them to your healing arsenal.
This one is for my novice and veteran tea drinkers alike!
I'm going to tap into tea’s magical powers and present you with a list to create your own fusion and 3 of my favorite recipes! Caffeine doesn’t agree with my body so I enjoy multiple cups a day of herbal tea. The varieties of herbal blends are endless, but my favorite part is that each blend comes with multiple healing benefits.
Tea really is a gift from some ethereal being. After all, legend has it that the second emperor of China discovered tea when some tea leaves mysteriously blew into his pot of boiling water. Today, you can elaborate on this otherworldly brew by picking herbs to tailor-make your special blend.
The Herbal Lineup
Here are a few of my favorite common herbs to give you some ideas on your path to becoming a tea blending guru!
Ginger: digestive issues, nausea, colds, immune booster, improves diabetes, reduces inflammation
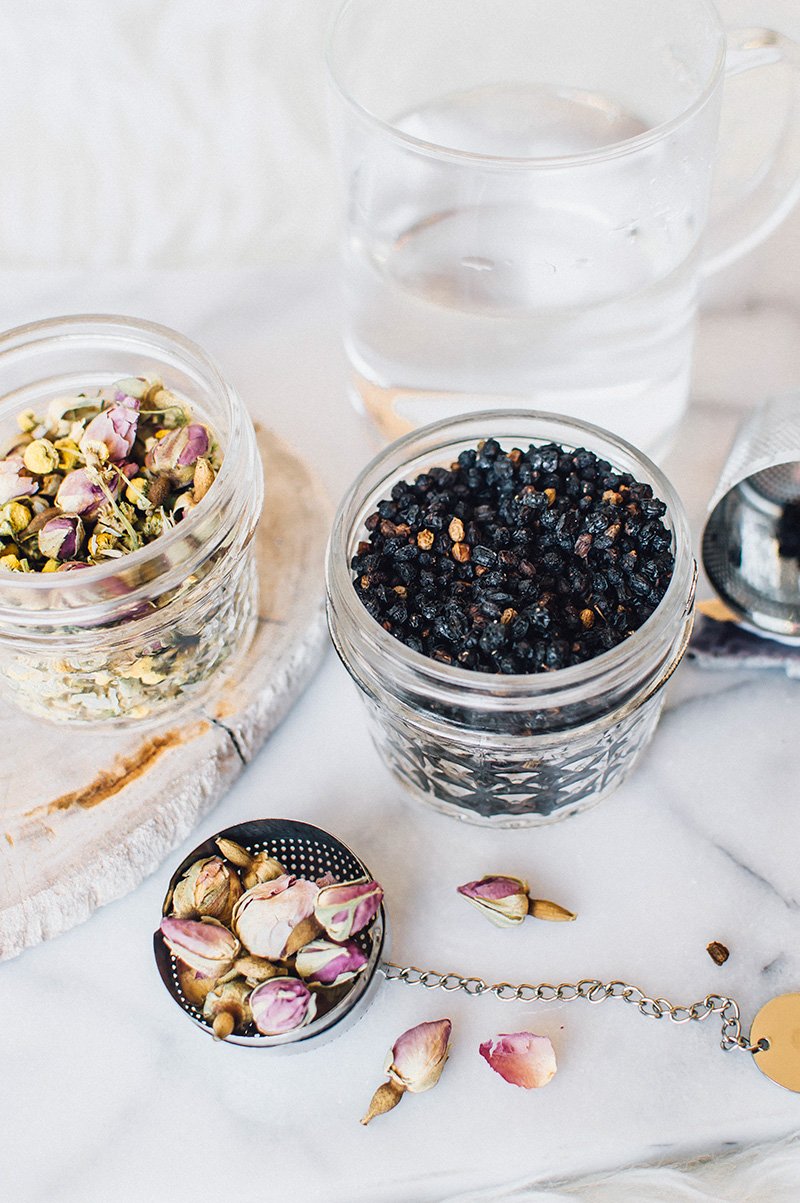
Chamomile: helps prevent illness, helps heal bacterial infections, calms muscle spasms including menstrual and digestive cramps, soothes the nervous system for decreased feelings of anxiety and improved sleep, promotes clear skin
Rose Buds: flushes toxins from the body, immune booster, improves digestion and blood flow, improves skin elasticity, helps with menstrual cramping and stress
Peppermint: fever reducer, soothes nausea and stomach pain, opens airways, appetite suppressant, stimulates the mind
Elderberry: immune booster, contains fiber for gut health, heart health, improves and prevents diabetes, reduces joint pain, slows aging of the skin
Raspberry Leaf: amazing for women, uterine tonic, antioxidant, protects against cancer, improves circulation
Hibiscus: blood pressure management, liver protection, lowers cholesterol, thirst-quenching, can help with weight loss, tastes amazing!
Echinacea: immune booster, anti-inflammatory, pain reliever, mental health, improves skin, fights infection
Lemongrass: cleansing and detoxifying, can reduce arthritis pain, antimicrobial, antioxidants
3 Healing Herbal Tea Recipes
If you want to create blends that you can premix and keep on your shelves you’ll want to use all dried herbs for each ingredient. Some of these herbs can be used fresh, you just won’t be able to save them.
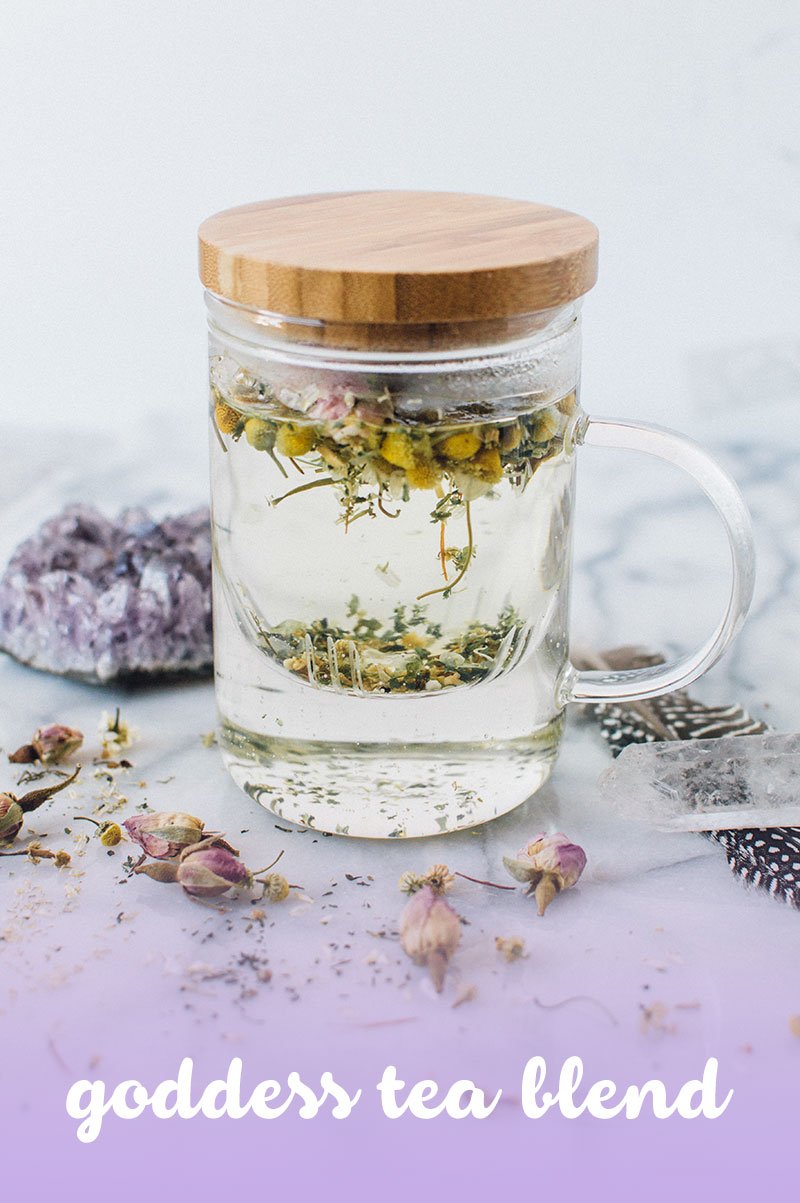
Goddess Tea Blend
A goddess inspired floral fusion! Package this one in a mason jar and tie it up with a big pink bow before gifting it to your bestie. Include:
rosebuds
chamomile
red raspberry leaf
orange peel
hibiscus
honey or stevia (optional)
Immune Booster Blend
Here's an immune booster you’ll want to keep handy this winter. Store this one in an airtight container with your other natural remedies for warding off illness. Include:
elderberries
echinacea leaf
lemongrass
ginger to taste
honey or stevia (optional)
Cacao Peppermint Dessert Tea
Calm the spirit and enliven the mind with this delicious dessert blend! Serve it up with cream and raw honey at your next dinner party. Include:
peppermint
cacao nibs
dried coconut
cinnamon to taste
milk substitute (optional)
honey (optional)
Brewing Instructions
Mix equal parts of each of the herbs, place in your favorite herbal tea bag or infuser, pour hot water over the herbs, maybe even drop a crystal in your glass for an amped up elixir, cover with a lid or plate as the herbs infuse into your water, wait 5-10 minutes, remove your tea infuser, enjoy!
Have a favorite herbal blend? I’d love to hear about it!
3 Anxiety Reducing Tips for the Holidays or Post Election
Do you sense it? That palpable feeling of uncertainty, anger, and anxiety in the air?I intended to share this blog post closer to the holidays, but hey, I think we might all need it now and the holidays really aren’t too far away!If you’ve been sitting in a combination of befuddlement, anger, and anxiety over the last few days, like me, you might be getting to the point where you’re asking yourself, “what now?”Well, I might not have the big answers for you but I do have 3 quick tips for reducing your anxiety, which will hopefully give you the tools you need to answer, “what now?”, for yourself.
Do you sense it? That palpable feeling of uncertainty, anger, and anxiety in the air?
I intended to share this blog post closer to the holidays, but hey, I think we might all need it now and the holidays really aren’t too far away!
If you’ve been sitting in a combination of befuddlement, anger, and anxiety over the last few days, like me, you might be getting to the point where you’re asking yourself, “what now?”
Well, I might not have the big answers for you but I do have 3 quick tips for reducing your anxiety, which will hopefully give you the tools you need to answer, “what now?”, for yourself.
Not only can lingering feelings of anger and anxiety make it hard to move forward, but they can also seep out onto others and wreak havoc within your body. Here are 3 of my favorite go-to’s to help heal mind, body, and soul during intense times of anger and anxiety.
Golden Milk Latte
Turmeric is the main ingredient in golden milk (I could write a whole post just about the health benefits of turmeric alone) but I’ll save that for another day! Studies have shown turmeric to help with inflammation, depression, and anxiety.
This recipe has quickly become my favorite anxiety soothing beverage. Bonus, it’s delicious. Move out of the way pumpkin spice!
Golden Milk Latte Recipe
1 tsp of golden milk powder
2 cups of coconut milk or your favorite milk substitute
Honey to taste
Heat your milk substitute on the stove, whisk in your golden milk powder, and add honeyto taste.
Gold milk powder ingredients will vary, though my favorite blends include ashwagandha root. Ashwagandha root is an adaptogenic herb that is also helpful with combating anxiety. If you’re live in Phoenix, I purchase my gold milk powder locally from Strawberry Hedgehog Soap shop (available in her store only) but you can also purchase it here.
Have turmeric at home and want your soothing beverage now? Not a problem, add 1 tsp. of turmeric to your milk substitute then blend in some cinnamon, ginger, and cardamom, to taste.
Earthing: Get Grounded
Have you had a hamster wheel of thoughts and emotions cycling through your head over the last few days? It’s to be expected, anger and anxiety often come with a whirling array of constant thoughts that can be hard to silence.
Getting a big dose of grounding energy is a great way to help silence the mental chatter and may even lower your cortisol (stress hormone) levels.
There are countless ways to invite grounding energy in, but sometimes the simplest are the most healing. Have you heard of Earthing before? It’s the idea that you can be healed from the Earth and there’s actually some science behind it too. A recent study indicates that skin contact with the earth can actually lower cortisol levels.
When I was dealing with the anger and sadness of the loss of my Grandma and Father last year, I had a strong desire to lean on trees and lie on the ground. It was strange and I didn’t know why it was happening, but I went with it. After learning more about Earthing it makes sense, and now I listen to those gut instincts and get in some grounding time when I need it.
I know it might be getting cold where you are, and sometimes it’s too hot here in the desert. My second grounding go-to is an earthy essential oil, it’s not quite the same but it can help in a pinch!
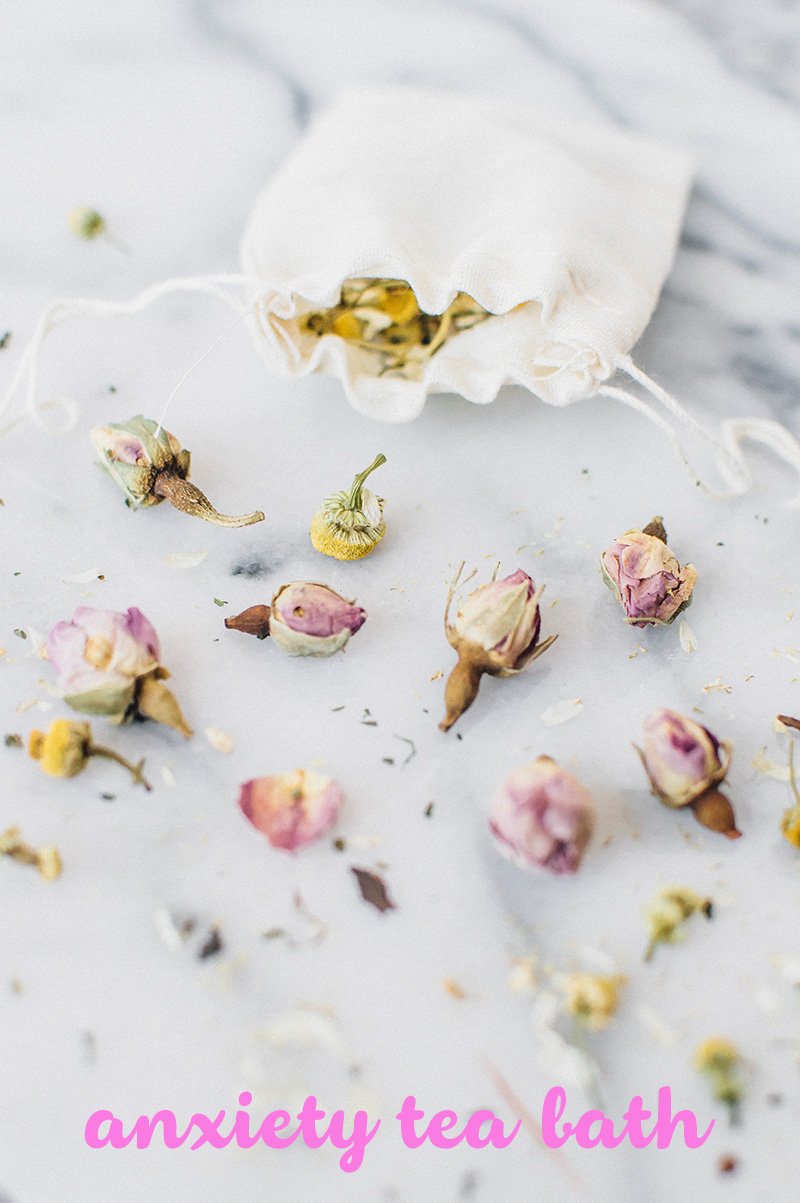
Anxiety Tea Bath
The power of a bath is often overlooked but your skin is your largest organ! Can you think of a more relaxing way to get in your favorite calming herbs? With open pores from warm water, your body can soak up the healing powers of herbs quickly.
Think of this as making a giant cup of tea for your body. Many herbalists actually prefer this method for administering herbs. Here’s one of my favorite recipes from Rosemary Gladstar’s book Herbal Recipes for Vibrant Health.
Mix these herbs into a muslin cloth bag or a cotton cloth that you can tie a knot in one end. Tie or wrap the bag of herbs around your faucet so the running water runs through the herbs.
2 parts chamomile
2 parts lavender
2 parts roses
1 part comfrey leaf
I love to add in some Epsom salt and essential oils to the mix for the ultimate calming bath.
Will any of these tips heal the world? Nope. I simply want to offer you some of my favorite tools when sometimes taking any action to move forward seems difficult. There is much work to be done here on this Earth plane, and I don’t want you or me to be a ball of angry anxiety as we embark on it!
Have a favorite de-stressing tip? I’d love to hear it, feel free to send me a DM!
3 Unexpected & Healing Uses for Himalayan Salt
Did you know that the Himalayan salt “crystal” is an up and coming contender not only in the kitchen but also in the medicine cabinet?What you put in fuels your temple. I know that you need your ingredients to pack a punch. Actually, you need salt to survive. It keeps hormones and nutrients in balance and maintains fluids. Since your body doesn't produce salt, it's counting on you to give it the purest option out there. Table salt isn't going to cut it.Let me start though, by answering your first question…Is it really that different from table salt?
Did you know that the Himalayan salt “crystal” is an up and coming contender not only in the kitchen but also in the medicine cabinet?
What you put in fuels your temple. I know that you need your ingredients to pack a punch. Actually, you need salt to survive. It keeps hormones and nutrients in balance and maintains fluids. Since your body doesn't produce salt, it's counting on you to give it the purest option out there. Table salt isn't going to cut it.
Let me start though, by answering your first question…
Is it really that different from table salt?
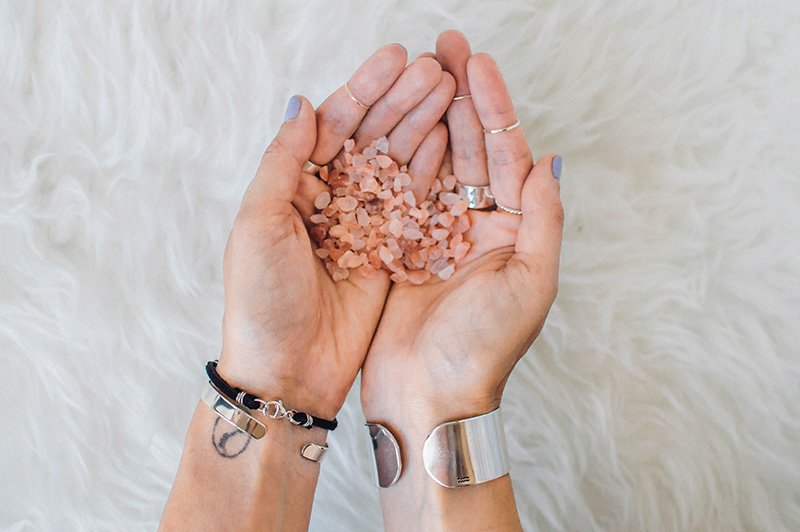
What you might not know about Himalayan salt is that it is mined from ancient sea beds in Pakistan. Ancient. Meaning, before pollution. This pure pink salt is free from toxins that appear in other sea salts. Because it has housed itself in such a clean environment it doesn't need to be cleaned, and therefore stripped of any of its 83 trace minerals. The same can't be said of table salt. After it's been cleaned, you’re left with sodium chloride and maybe even some additives to keep it from clumping.
So, how can you incorporate this magical salt crystal into your day? Here are 3 easy and healing uses for Himalayan salt.
Salt Inhaler
When I first stumbled upon the uses of Himalayan salt, I saw that it helps with respiratory and sinus function. There's actually such a thing as a salt inhaler! For us allergy sufferers, I'm not sure a more steadfast way exists to test out this crystal’s effectiveness.
Can't wait to find out if this crystal will work its magic on your wicked allergies? I couldn't either. I got a portable inhaler to take on the go here, but you can also purchase larger ones here.
While I was surprised by this awesome gadget, using salt to treat breathing ailments dates back to the ancient Greeks who coined the term, “Halotherapy.” Other forms of Halotherapy include salt caves and even Neti pots! Benefits of Himalayan salt for breathing conditions include:
cleanses the nasal passages of irritants and pollutants
reduces swelling
relaxes airways
natural expectorant to reduce mucus
Salt Sole
An obvious way to enjoy the healing effects of Himalayan salt is to ingest it, so...I'm going to give you ZO’s recipe for Himalayan salt rock candy. It'll be a hit at your next family party...no, no, just kidding!! The best way to get a full dose of Himalayan salt is by making sole (so-lay).
Sole is a super-concentrated saltwater solution that can be made with a glass jar and a non-metal lid.
To Make Sole
Fill your jar ¼ of the way with Himalayan salt. Then add filtered water, seal with a lid, shake, and allow the mixture to sit overnight so that the salt can dissolve. If you notice that all of the salt has dissolved, add more salt until the water cannot hold anymore and is therefore fully saturated.
To Use Sole
Add a tsp to a glass of water every morning and take on an empty stomach. This is also a great concoction to add to your homemade electrolyte drinks! The benefits include:
antibacterial components detox the body
stimulates the digestive system and aids in healthy weight loss
increased hydration
caffeine-free energy
trace minerals contribute to bone health, healthy veins, skin, hair, and nails
lowers blood pressure
Salt Lamp
Himalayan salt has your allergies in the bag! But more important than clearing your nasal passages, it can also improve the air quality and give your mood an overhaul!
You are made up of negatively charged cells. So, like a magnet, you attract things with a positive charge...such as pet dander...dust...oh, and ions from electronics like microwaves, cell phones, and TVs. Himalayan salt lamps can combat these positive ions by emitting negative ions. Use a salt lamp by your bedside to emit negative ions for these benefits:
increased oxygen flow to the brain for better sleep and more energy
neutralizes electric smog
lowers blood pressure
decreases feelings of anxiety
I've done the research on the salt inhaler, and I have a salt lamp on my bedside table. Now, I'm looking forward to adding a Sole salt flush to my morning routine! Let me know about some of your other favorite ways to use this pretty pink crystal!
Understanding Birth Chart Basics in 6 Steps
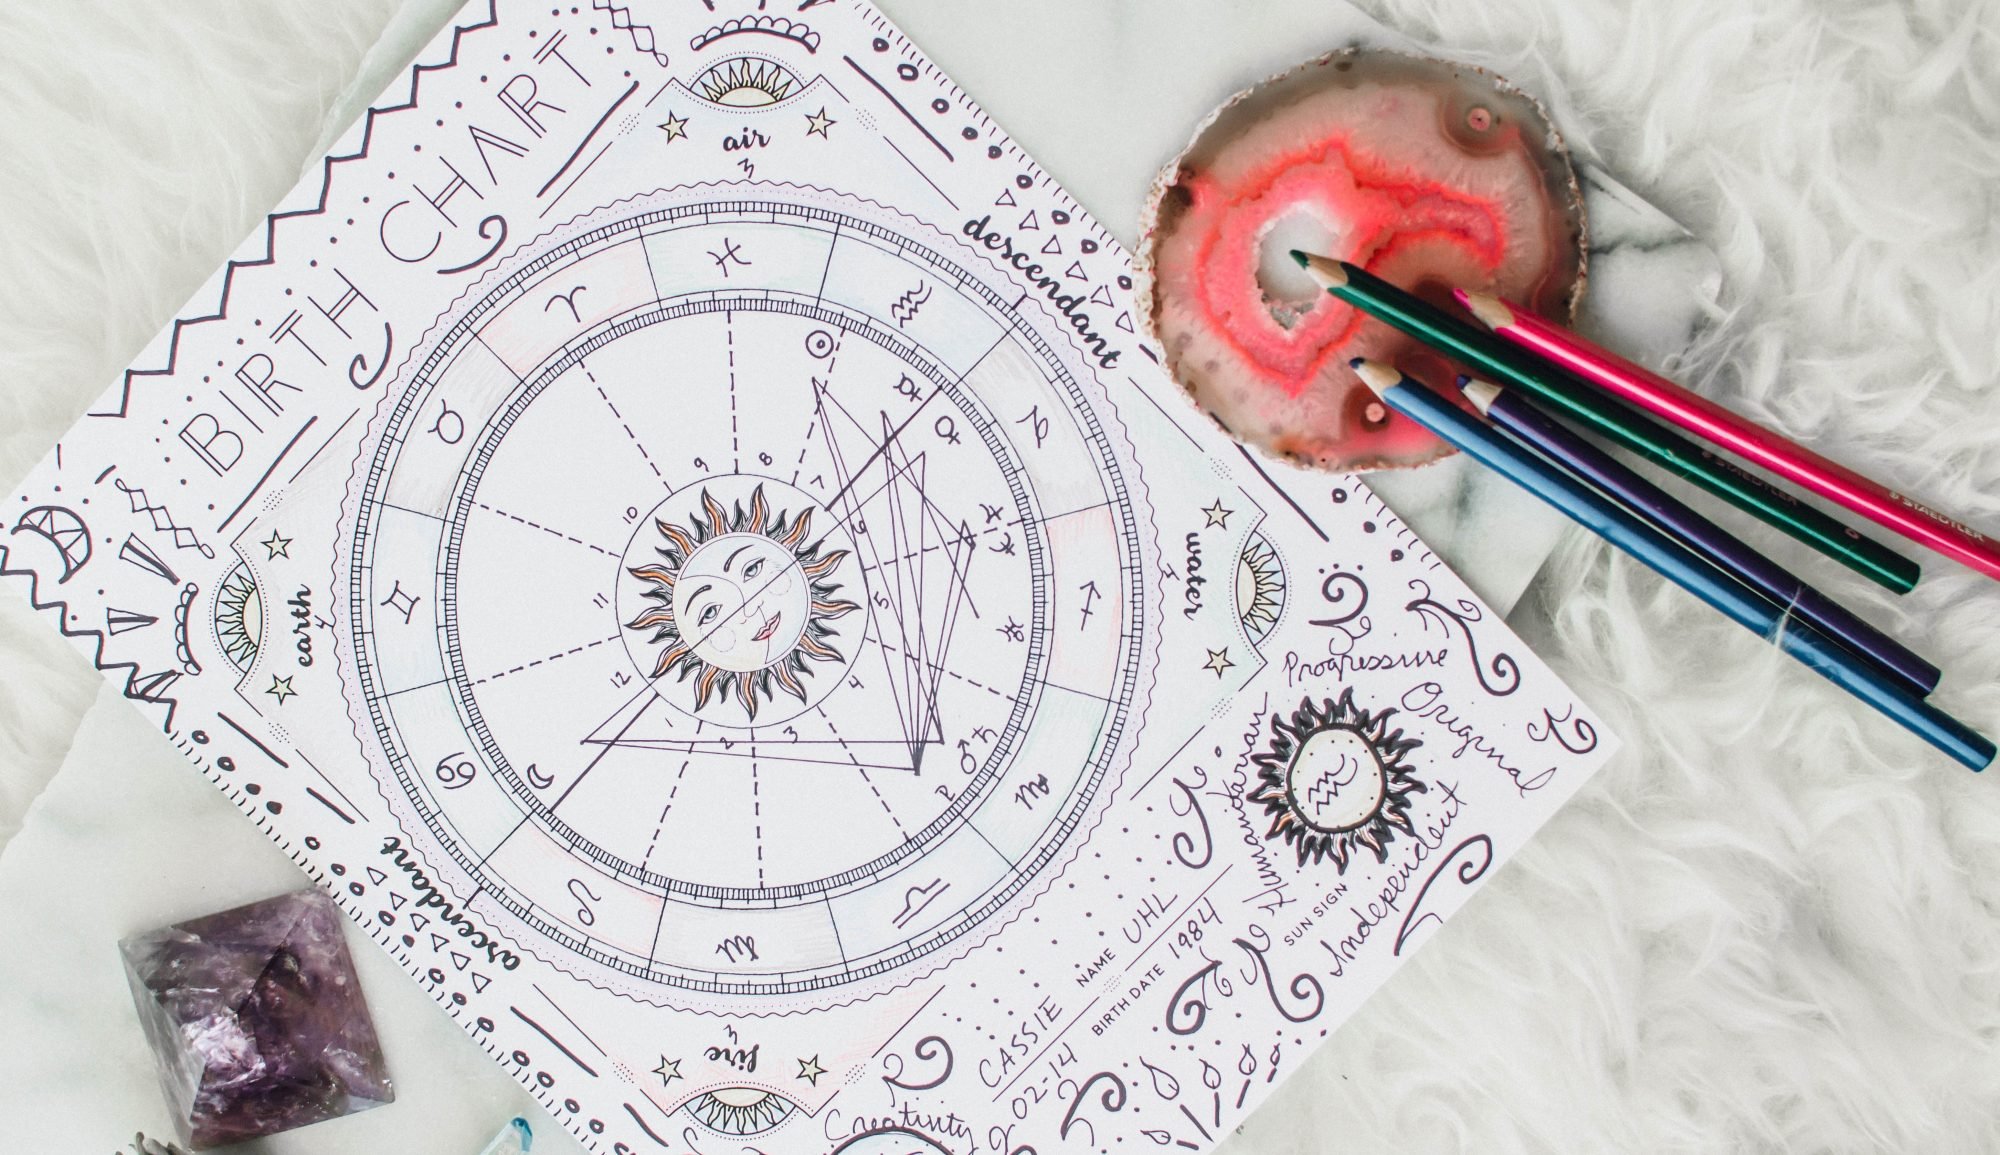
So, you made birth charts for everyone you know but then they wanted to know what it all meant! Today, I’m going to help you decipher the lovely birth chart you made last week. Learning how to decode an astrology birth chart can be a little bit like going down the rabbit hole. Let me save you a headache and break it all down for you into six nice little steps!If you want to brush up on your astrology terms visit the first post in this series here. If you need to, grab your free printable birth chart and learn how to make it click here.First, a few things to point out about your birth chart. Think of your chart as a map of your potential. Sometimes you may get lost, take an alternate route, or change paths completely. Your birth chart is not your fate, but it can help guide you.
So, you made birth charts for everyone you know but then they wanted to know what it all meant! Today, I’m going to help you decipher the lovely birth chart you made last week. Learning how to decode an astrology birth chart can be a little bit like going down the rabbit hole. Let me save you a headache and break it all down for you into six nice little steps!
If you want to brush up on your astrology terms visit the first post in this series here. If you need to, grab your free printable birth chart and learn how to make it click here.
First, a few things to point out about your birth chart. Think of your chart as a map of your potential. Sometimes you may get lost, take an alternate route, or change paths completely. Your birth chart is not your fate, but it can help guide you.
Rising/Ascendant Sign
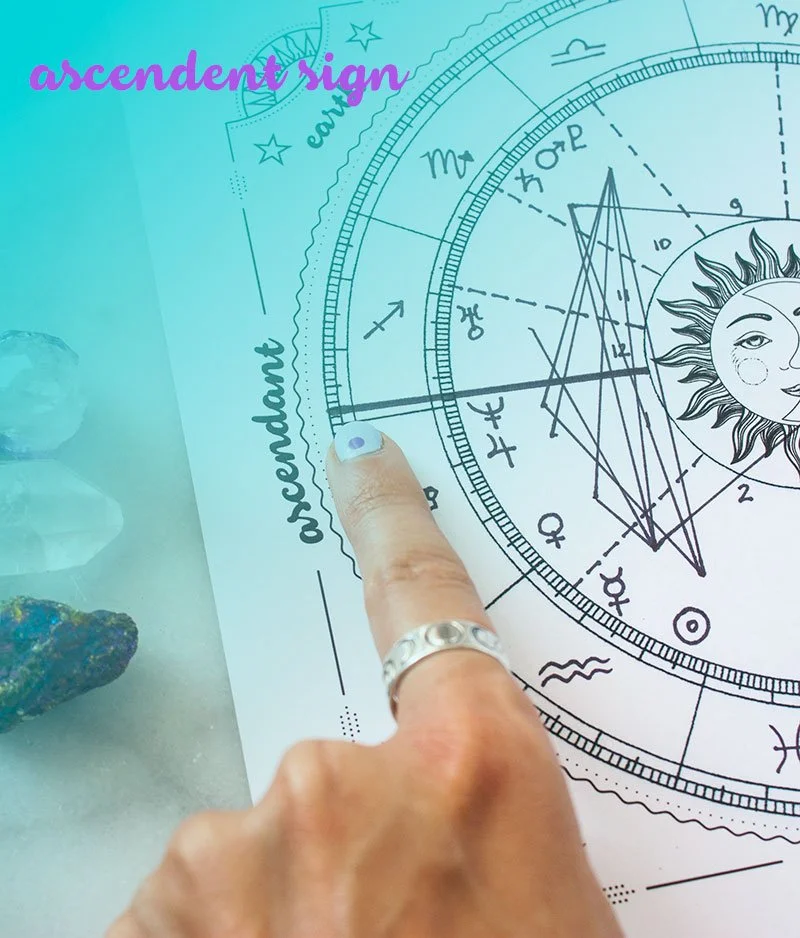
Your rising sign is how you present yourself to the world and is usually the first impression that you give people. Find your rising sign on the left side of your chart, you should have an arrow or a line pointing to what zodiac sign it falls into. Click here to learn more about your rising sign at Astro Library.
Sun & Moon Sign
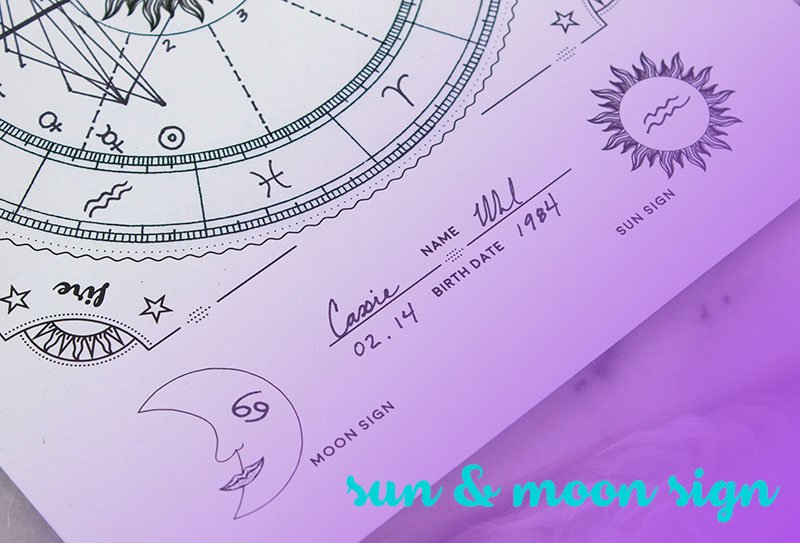
Your sun sign is the core of your personality. Though your Ascendant sign might be what shows up first when you meet someone, your Sun sign is what comes out once you’ve gotten to know that person. Check out what your Sun Sign says about you here.
Your big, bright and bold Sun sign personality traits need some balance and that’s where your Moon sign comes in. Think of your Moon sign as your shadow side, more subtle and soft. Moon sign personality traits will often show up when you tap into your intuition. Check out what your moon sign says about you here.
The Other Planets
Though your Sun and Moon signs do bear a lot of weight when it comes to your personality, there 8 other planets that can shed light on your personality as well. Take a look at your chart to see which Zodiac signs your planets fall into, then check what they mean here.
The Elements
Take a look at where each of your planets falls on your birth chart. Each planet will fall into a zodiac sign, and each zodiac sign has an element assigned to it. Add up how many of each element is represented on your chart. Here’s a great link to understand how your prominent elements may affect you. See the guide below to know which signs fall into which element.
Houses
Each of your planets also falls into a house. These are the pieces of the pie that are numbered 1-12. Your houses will show you where your personality traits may manifest in this lifetime. Here’s a quick description of what each house represents. Dive deeper into understanding the different houses here.
You can use this reference to see what having certain planets in each house may mean for you.
Aspects
This one was a challenge to fit into one step, but it’s an important one so here it goes! Your aspects indicate the relationship of your planets with each other. Their relations with each other are shown with all those crazy lines in the middle of your chart. Though the crazy lines on your chart do look pretty cool, this is one step that is worth referencing your computer-generated birth chart. I’ll be referencing the L shaped grid below your computer-generated chart for this.
Your aspects can make a big difference in your chart and leaving this step out wouldn’t give you a full picture of your life path. Your aspects indicate how your planets may manifest, each planet has a balance of positive and negative energy.
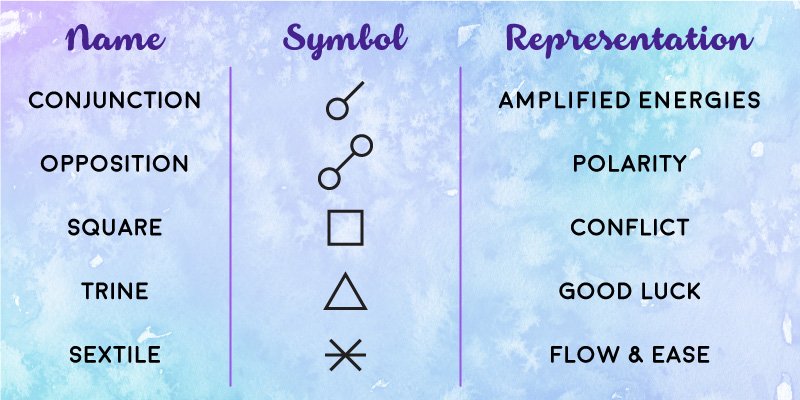
For this post, I’ll only be referencing the major aspects. You may see some symbols on your chart that aren’t represented here, those are minor aspects (another thing you can explore down the Astrology rabbit hole!). Here’s a chart that indicates what each of these symbols looks like and what they represent. Cross-reference with your chart to see how your aspects will affect the energy of your planets.
Addictively fun right?! Like I said, there are endless things you can learn about astrology and your birth chart.
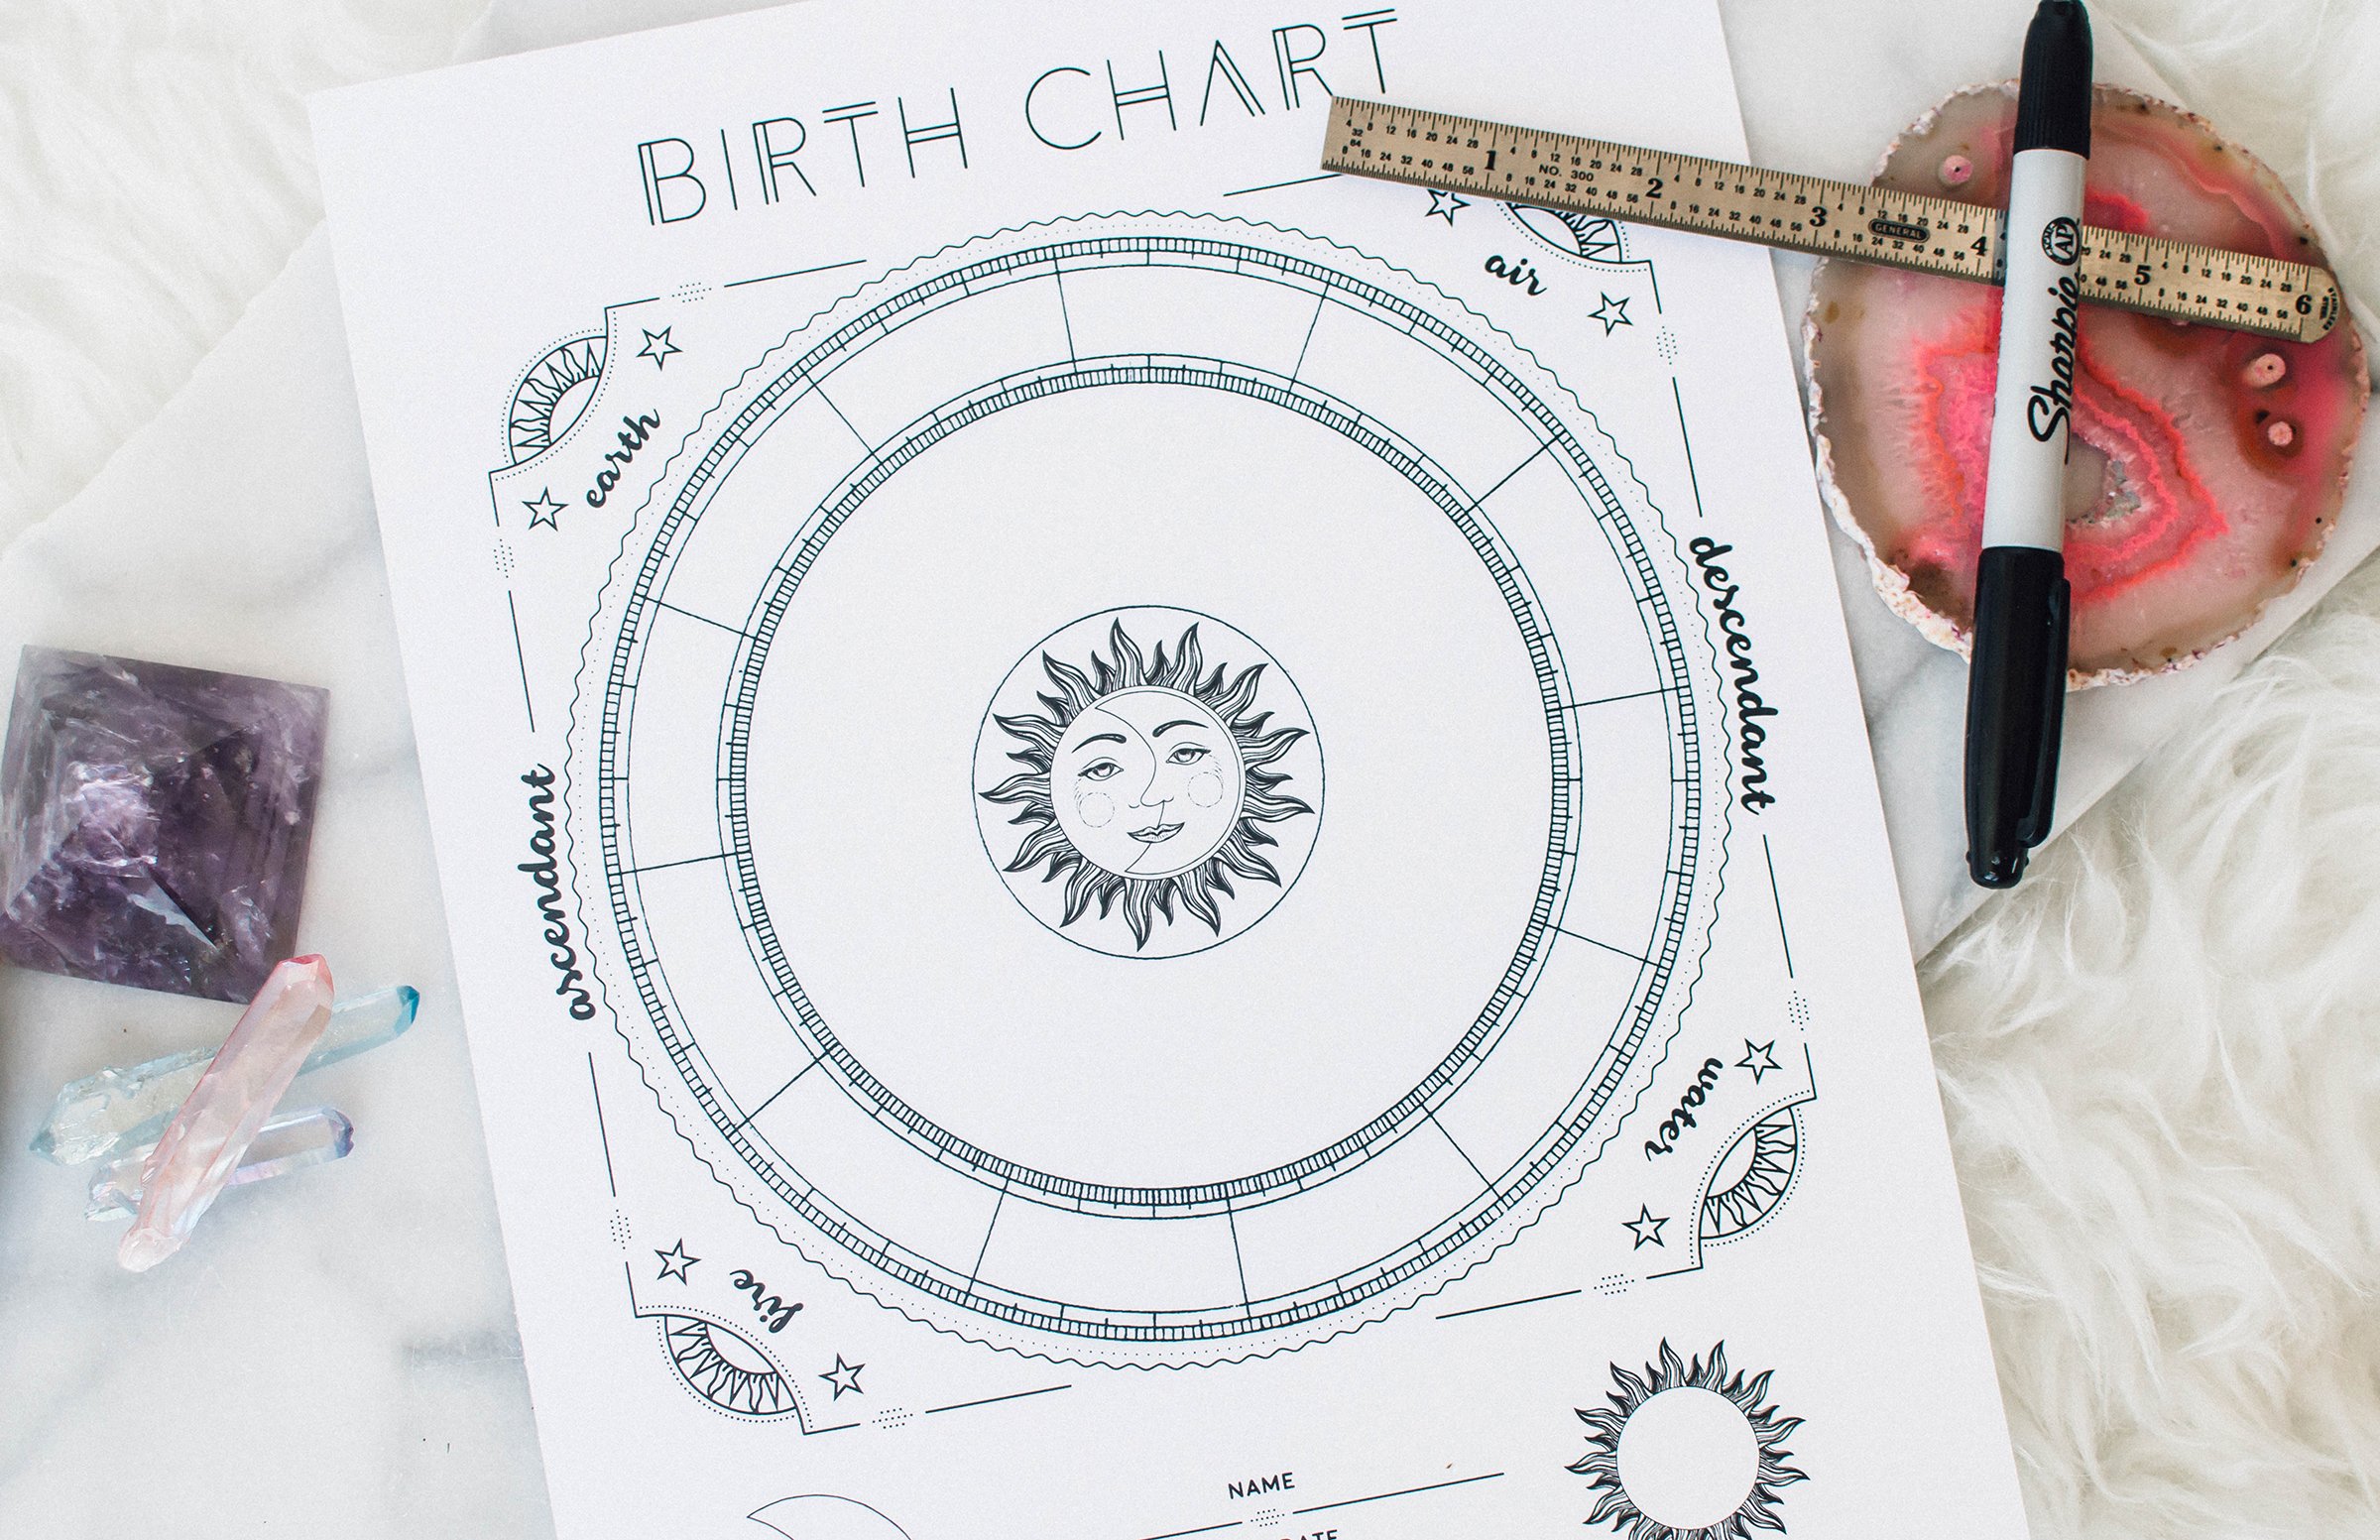
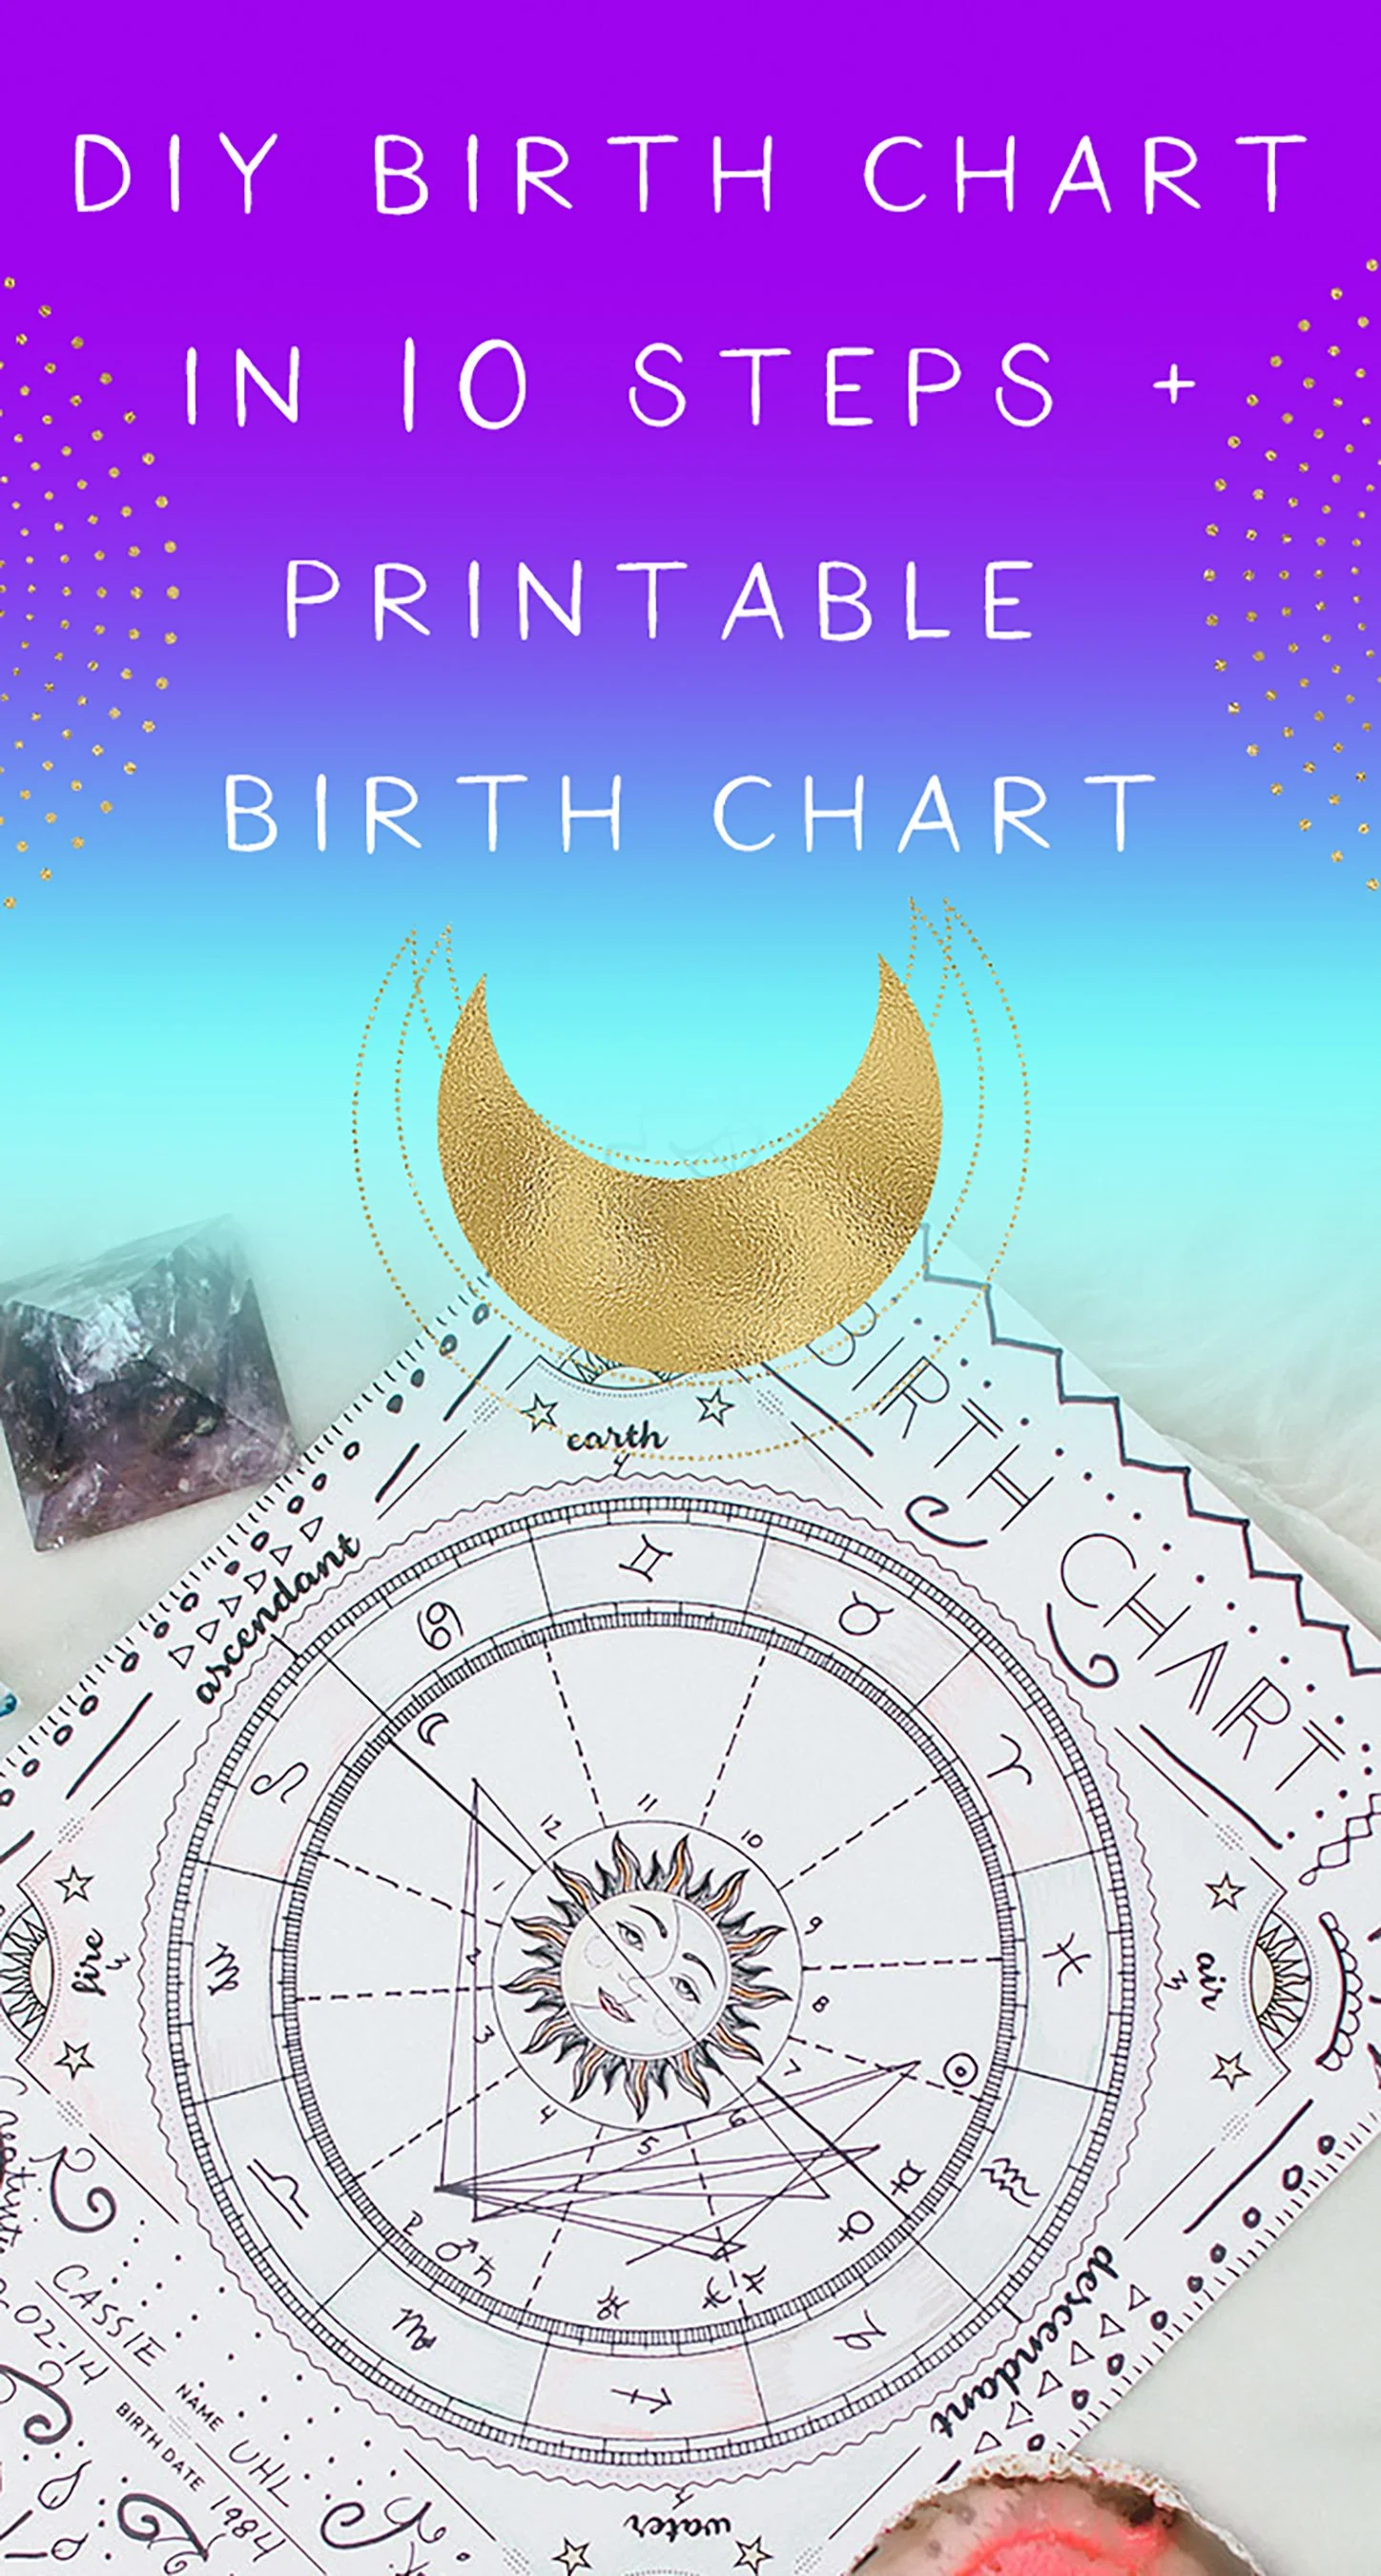
DIY Birth Chart in 10 Steps + Free Birth Chart Printable
Have you ever wished that you had a roadmap for your life? But does the thought of making another adult decision cause you a little sadness inside? I’m right there with you.This week I’m going to teach you how to create your own astrological birth chart and you might be surprised how telling this chart is! Bonus, I’ve even got a free printable so your birth chart will be frame-worthy.
Have you ever wished that you had a roadmap for your life? But does the thought of making another adult decision cause you a little sadness inside? I’m right there with you.
This week I’m going to teach you how to create your own astrological birth chart and you might be surprised how telling this chart is! Bonus, I’ve even got a free printable so your birth chart will be frame-worthy.
What is a Birth Chart?
A birth chart, also called a natal chart, is a chart that shows where all of the planets were at the moment you were born. A few factors play into your birth chart, the time and day you were born and the location you were born. With just this bit of information, the heavens can reveal truths about your personality, your life path, and how to get the most out of this lifetime.
Making Your Birth Chart
The free birth charts online are great for gathering information, and that’s exactly what we’re going to use them for, but if you want to gift a birth chart or hang one on your wall making your own is the way to go!
You can even get some extra practice and create natal charts for your loved ones as gifts. Plus, creating your own is a really great way to learn all of these terms.
Last week you learned some basic astrology terms and this week we’re going to put them to use. Let’s get started!
Step 1
Click here to receive your free printable birth chart.
Step 2
Gather your supplies. You’ll need:
Birth chart printable
Pen or pencil
Straight edge
Colored pencils for decorating! (optional)
Birth Date, time, and location
Step 3
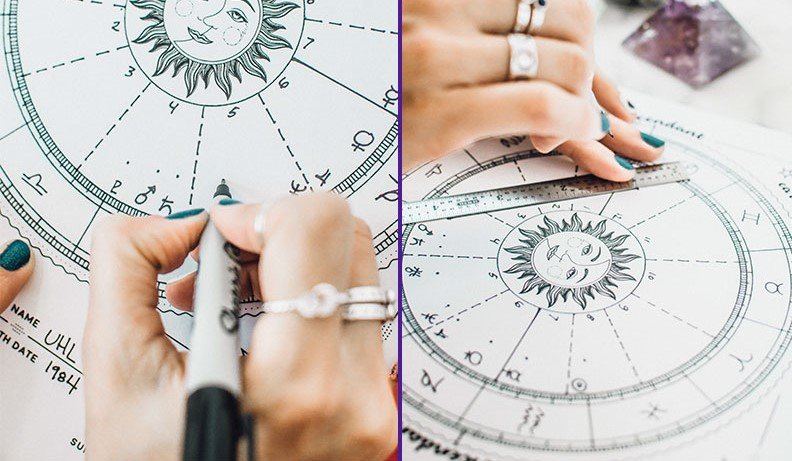
Get a free birth chart report here as a reference for your DIY chart. Simply plug in your info, submit, then scroll all the way to the bottom of the page to the circular chart, that’s what we’ll be using.
Step 4
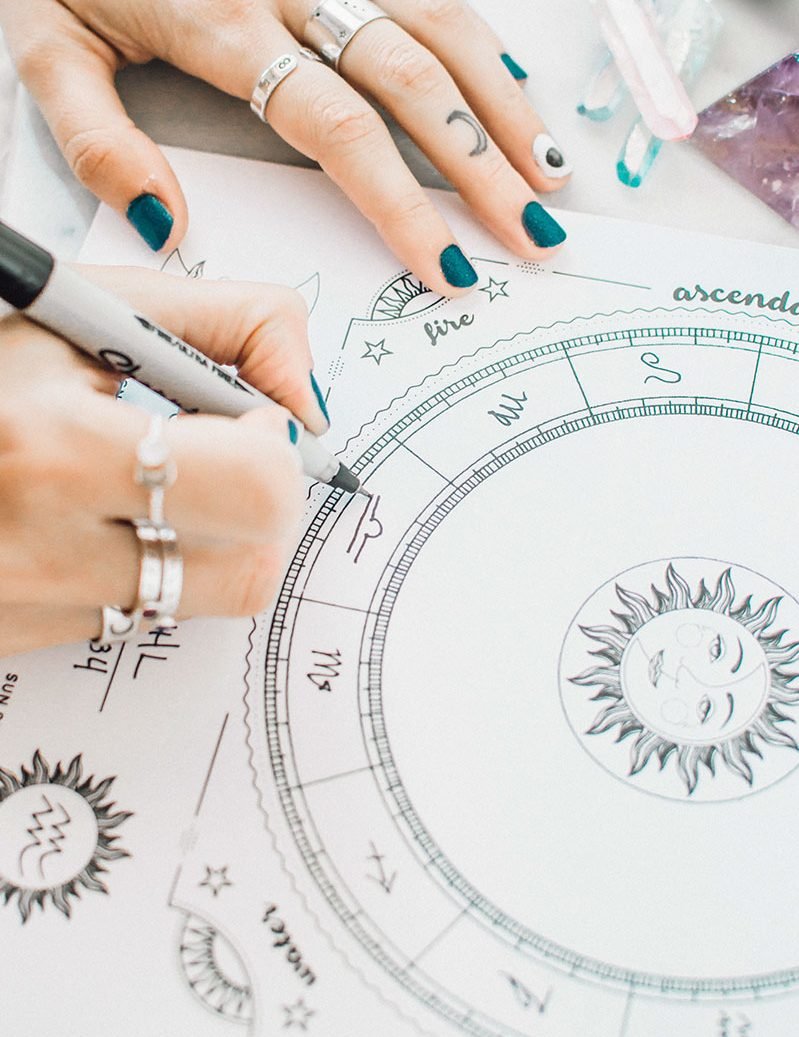
Look at your online chart to see where the zodiac signs fall on the outer wheel. Draw them in on your chart.
Step 5
Write your name and birthdate on the chart.
Step 6
Draw in your sun and moon sign in the sun and moon pictures underneath the wheel. To figure out your sun and moon signs, look at your online chart. Find the moon symbol and see what zodiac sign it is in, and then find the sun symbol (a circle with a smaller circle inside) and see what zodiac sign it is in.
Step 7
Now we’ll draw in your ascendant and descendent line. On your online chart, there’s an arrow that’s pointing to a degree mark on the left side of the chart, this is your ascendant sign. You can also see it notated in the key below it with the number location it is in. Make a small dot on the inner circle of tick marks on your printable of where it will go, then make a dot on the opposite side of the chart, that is where your ascendant sign is. Use your ruler to connect these dots.
Step 8
Next, we’ll draw in your houses. Looking at your online chart, make a little mark on your printable where each house starts and ends. The houses are the numbered areas 1-12 or AS-XII on your online chart. Once you’ve marked each one, use your straightedge to create a dashed line to separate the houses. Starting at the house right below your ascendant sign draw in numbers or roman numerals 1-12 going counterclockwise around the wheel.
Step 9
My favorite part! Draw in where your planets fall on your chart. Look at your online chart to see where they are and draw them in roughly the same area on your printable chart. You can reference the key below the chart again to see the degree that each planet is at, and then make a tick mark at each one on your printable so you know exactly where to draw your planets in, or you can eyeball it. You can decide to draw the line that points to the degree mark it’s at or not, it’s up to you.
Step 10
The final step, draw your aspects, all those crazy zig-zag lines around the chart. Remember this chart is more for show and doesn’t have to be perfect so don’t stress over this step! The easiest way to complete this step is to make a little dot in the middle ring each place there is a planet, about an inch away from the planet you drew. Then, using your straight edge, and referencing your online chart, connect the dots, in the same order that they’re connected on the online version.
Now you can decorate your chart however you’d like or leave it as is. Learn more about decoding your birth chart here.
DIY Crystal Infused Elixirs
I love discovering all the ways I can add a little more sparkle to my life! And let me just say, you are going to love my newest find! When it comes to beauty and wellness I'll take all the help I can get. Crystal elixirs are becoming the newest part of my regimen. I'm so happy to be letting you in on this little bit of magic that you can use to spark up your routine!
I love discovering all the ways I can add a little more sparkle to my life! And let me just say, you are going to love my newest find! When it comes to beauty and wellness I'll take all the help I can get. Crystal elixirs are becoming the newest part of my regimen. I'm so happy to be letting you in on this little bit of magic that you can use to spark up your routine!
The Back Story
Crystal elixirs are no modern craze. In fact, they were all the rage in ancient cultures! Some crystals have long been esteemed as heavenly stones. They were put to use in Neolithic times for fashioning tools and weapons, by the Pharaohs and Indian culture for curing disease, and get this...Chinese emperors used to drink a powder form of crystals and herbs to achieve immortality!! Ummm, not sure if immortality is my aim, but wouldn't you love to add a little youth to your day!?
How it Works
Today, companies are selling crystal elixirs in the form of waters and beauty products. Here's a fun little tidbit. When evaluating the difference between tap water and water treated with crystals, Institute Hagalis (an international research company), determined that in the crystal treated water there was "a distinct improvement in water quality, neutralization of harmful substances, improvement of the pH-value and oxygen content, increase in bioavailability of minerals, and an increase in energy balance." Wow!
Also interesting is that the energy of the crystal can be transferred to the product it's being used in. KORA Organics beauty line uses crystal-infused water in their products. The process incorporates rose quartz "to give the vibration of self-love." Sounds amazing!
The Cost of Luxury
While I wish I could just add all of these products to my shopping cart with the click of a mouse, they'll cost you a pretty penny.
You can find Vitajuwel's Gem Water on Amazon for $87, which is a steal compared to some of their other products. Over $340 for their Golden Moments Crystal edition water, or a whopping $624 for the GranFontana Sunny Morning Set! Vitajuwel's products are utterly delectable though, so maybe jot down one of their Gem Wands onto your holiday wish list this year!
DIY Solutions
Budget worthy DIYs are definitely the way to go with crystal elixirs. You can tailor them to your exact needs, and incorporate your current stash.
Crystal Infused Water
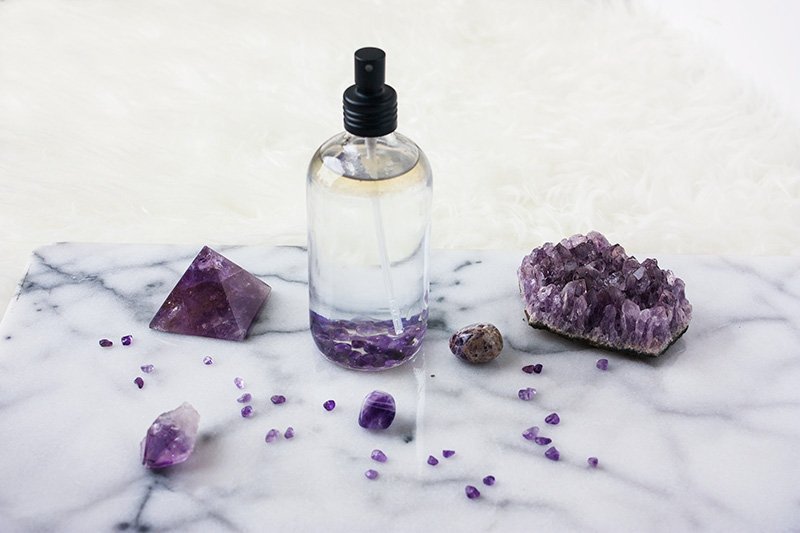
Select a crystal that speaks to your needs. We’ll be using amethyst for this DIY.
Cleanse the amethyst with warm filtered water and incorporate any other cleansing routine that works for you, such as smoke cleansing.
Put the amethyst in a glass bowl and cover them with filtered water.
Charge your water in the sunlight or moonlight.
Enjoy your amethyst infused water!
Amethyst relieves headaches, as well as promotes good dreams and healthy skin. Add some lavender to your water and use it as a nighttime foot soak as you wind down from a long day!
Crystal Infused Face Mist
Instead of adding lavender to your crystal infused water, take advantage of amethyst’s properties for healthy skin by making this moisturizing facial mist!
Add your amethyst infused water to a 4 oz. glass spray bottle.
Add ¼ tsp of argan oil.
Add 12 drops of rose oil.
Add some rinsed amethysts directly into your bottle (optional).
Shake well.
Mist cleanse your face while repeating affirmations of self-love!
My skin has been loving me for this new elixir plus it smells like fresh roses. Rose and Argan oil offer a host of healing benefits for your skin including helping with acne, dry skin, and skin permeability.
Have a favorite crystal blend that you use? I’d love to hear about it!
The Power of Altars // 5 Steps to Create Your Sacred Space
Loss and change are an integral part of our human experience. I’m sure you’ve experienced your own passages through pain and hardships. Whether you’ve experienced the loss of a loved one, a bad breakup, a sudden change in career path, or all of the above, these life experiences can leave us feeling isolated and lost.Even if you’re not going through a hardship at this moment, loss and change are inevitable. Today I want to share my story of the power of altars in my life and how you can use them as a healing tool in your life as well.
Loss and change are an integral part of our human experience. I’m sure you’ve experienced your own passages through pain and hardships. Whether you’ve experienced the loss of a loved one, a bad breakup, a sudden change in career path, or all of the above, these life experiences can leave us feeling isolated and lost.Even if you’re not going through a hardship at this moment, loss and change are inevitable. Today I want to share my story of the power of altars in my life and how you can use them as a healing tool in your life as well.
What is an Altar?
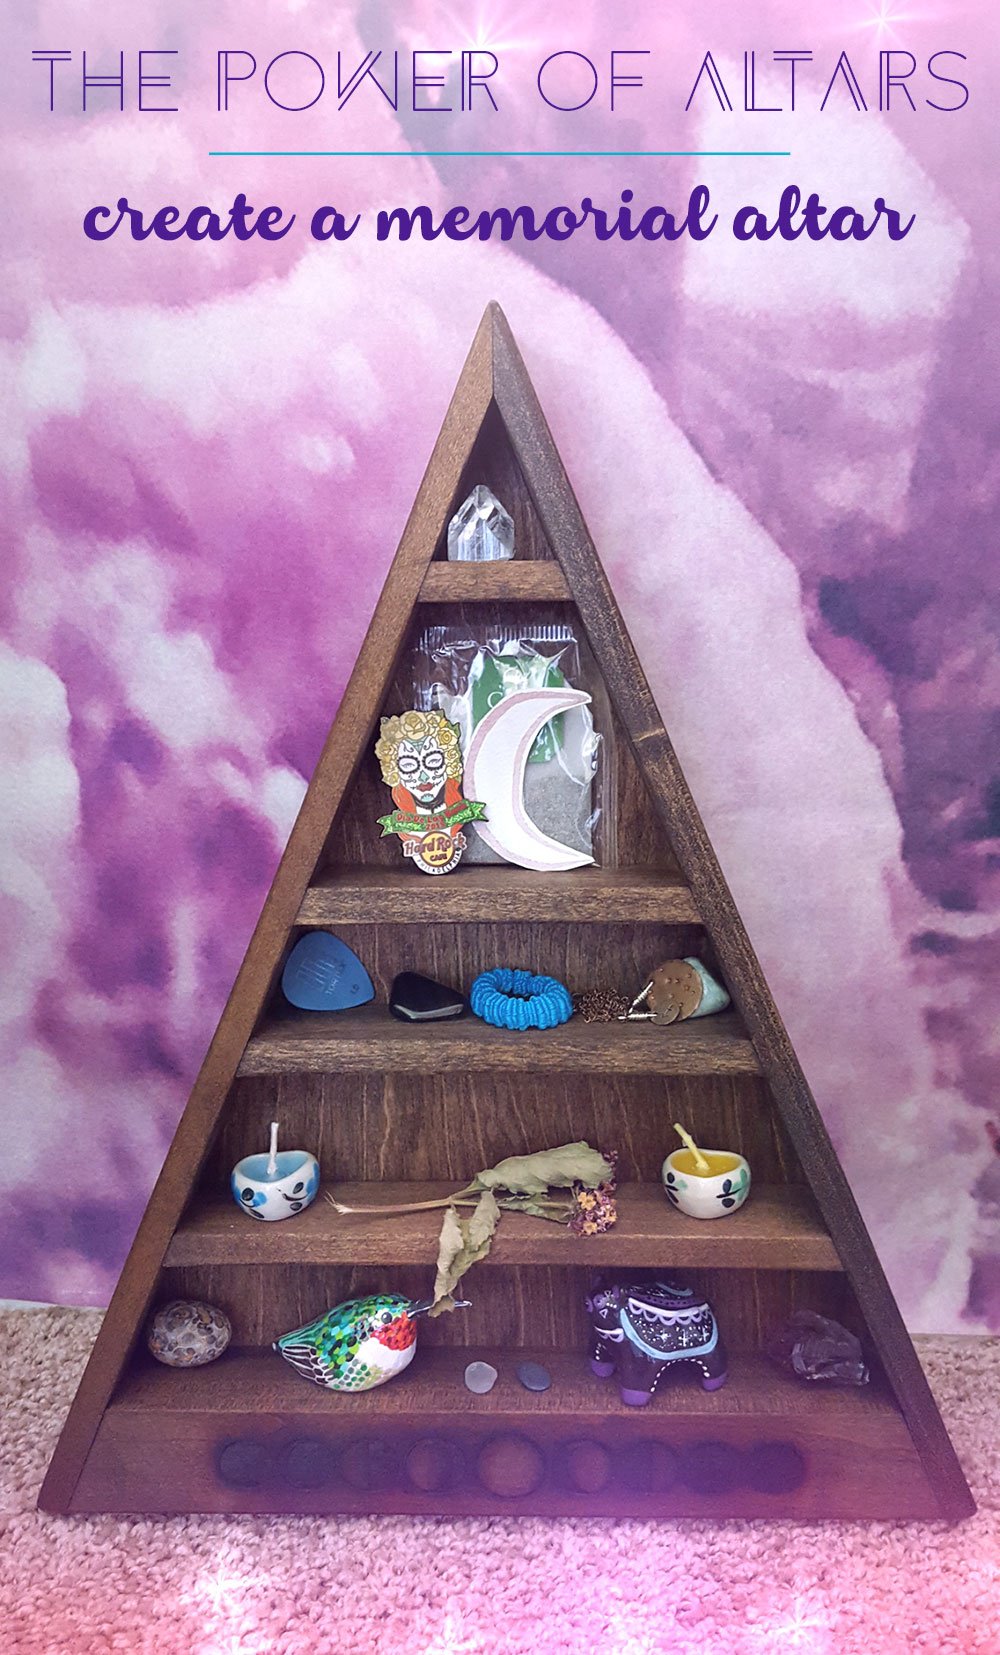
An altar is simply a space with a collection of items that hold significance to you, and they are often created around a theme. They can vary in size from a couple of items on a window sill to a large decorative display.Altars are a place that can hold energetic space for you, they are a place of reflection and meditation and a great place to conduct meaningful rituals.
My Experience with the Power of Altars
I’ve always loved the idea of having an altar, but to be honest, mostly just as a cute place to put my crystals. It wasn’t until the sudden loss of my grandma and father that the use of an altar became a powerful healing tool in my life.
I’m not going to lie, when I was in the depth of my sadness and a spiritual coach suggested an altar to help deal with my grief, I didn’t believe it would help. I thought I had too much sadness within me for a box with some stuff in it to help. But, I listened, kept an open mind, and decided to try what was suggested to me.
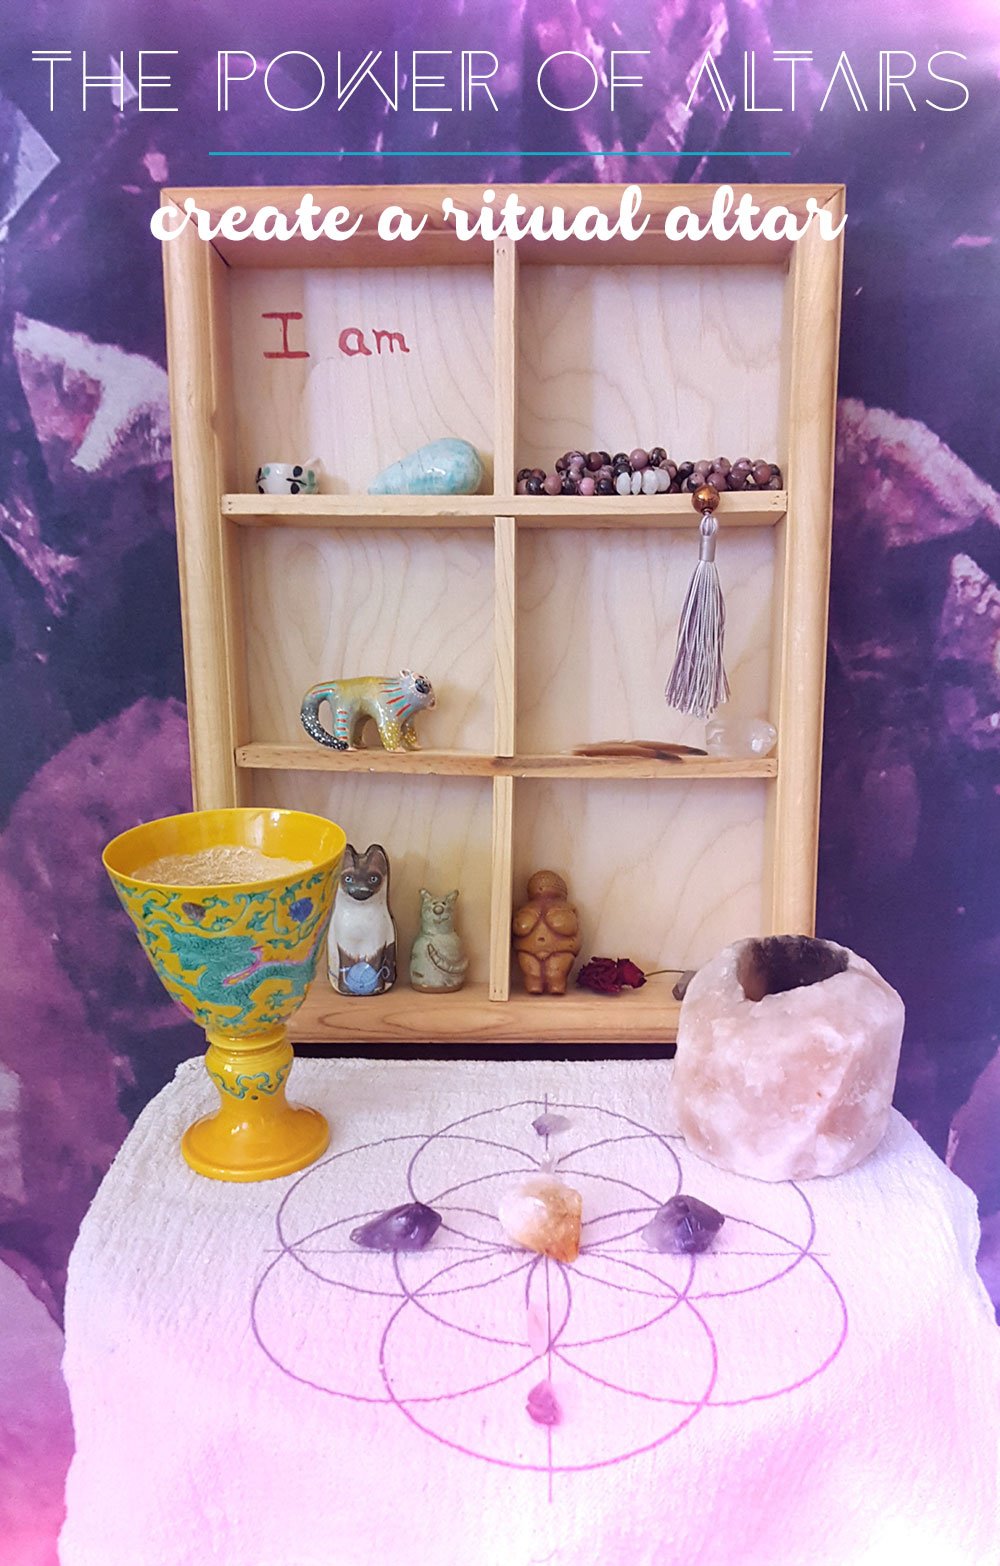
With my altar in place, I not only had space for my sadness to be felt but more importantly a place that my sadness could be held. If I had a bad day, it brought me comfort to know that I had a designated space for all of my feelings that I could visit anytime I wanted to.Because my experience with this altar was so meaningful I’ve gone on to create a second altar to honor my goals and for holding rituals, and have found it to be just as powerful and healing.
How to Create Your Own Altar or Sacred Space
So, where do you start? There is no reason to be daunted by the idea of creating an altar. Starting out, your altar or sacred space can be as simple as a collection of a few meaningful objects. Your altar is fluid and will never be finished, so it doesn’t have to be “perfect” when you start yours.
5 Steps to Create Your Own Altar
Decide what the purpose of your altar will be. Here are some ideas: memorial altar, meditation altar, goals altar, and ritual altar, seasonal altar but any loving purpose you desire will work.
Choose a space that fits the theme of the altar. If you’re creating a meditation altar you’ll want to place it somewhere that you’ll have uninterrupted quiet. For a memorial altar, it was important for me to have mine somewhere that I could easily see it and could have privacy.
Clear the space (optional). Though it’s not a necessity, it is nice to clear the space of your altar. Do this with a herb or incense of your choice.
Select your items for the altar. Find items that you’re drawn to, and that fit the theme of your altar. If you’re making an altar for reaching your goals consider researching crystals that are good for goal-setting. If you’re creating a ritual altar consider what items you might need to create your rituals.
Arrange your items and make a commitment to spend a little bit of time each day with your altar. Spending time with your altar can be as simple as looking at it in passing or simply touching an item on it for a moment. I found that daily contact of some sort with my altars has been helpful.
Here are a couple of my favorite shops for altars and altar pieces:
Altar Shelves: Stone and Violet
Altar pieces: The Lunar Fae Shop
Animal Totems: Periwinkle Nuthatch
Ritual Tools: The Ritual Store
Remember your altar is an extension of your soul and they’ll vary greatly in size, style, and appearance--there’s really no wrong way to do it. Let me know how your altar turns out, feel free to share a picture with me, or if you already have an altar I’d love to hear about your experience with it! Please feel free to send me a message.
Magic Charm Bags for Protection, Love, Luck & Health
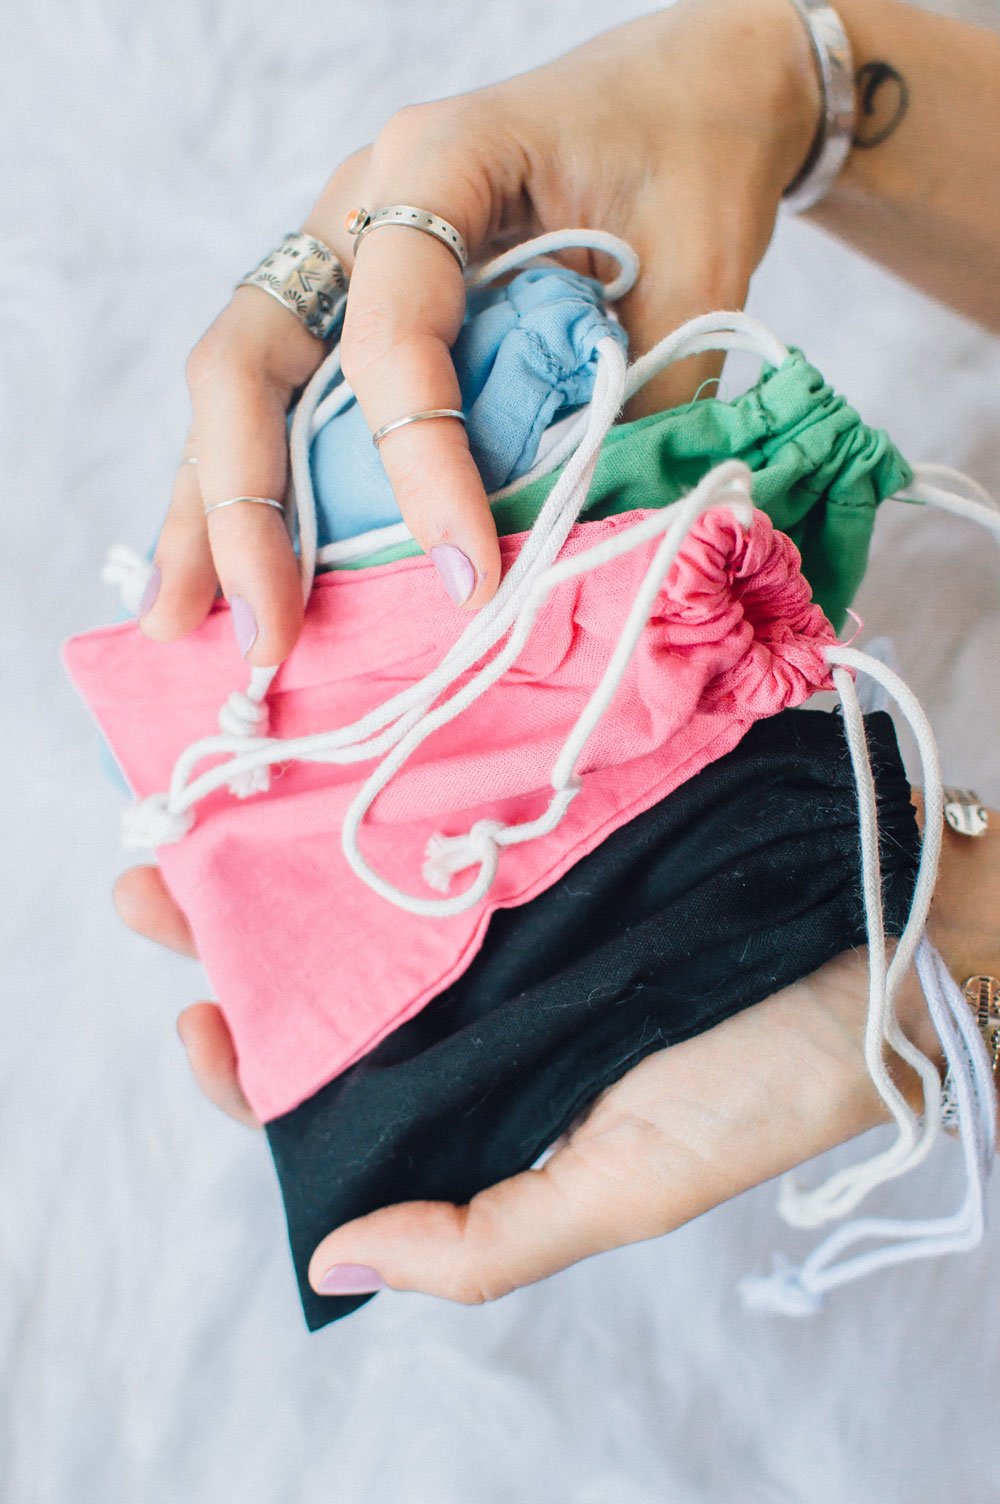
Need a sprinkle of magic in your summer? Known in Voodoo as “gris-gris,” or to Native American’s as “medicine bags,” these good ol’ fashioned spells in a bag are sure to bring some magic into your life! For me, charm bags have some nostalgia surrounding them.CharmBag_01Growing up with my Grandma referencing her astrological charts and talking to spirits with her pendulum, I became very open-minded to all things woo woo. Though charm bags weren’t Grandma’s thing, I stumbled upon some magic books at a young age and was hooked. I created my first charm bag during middle school, in hopes to improve my relationship with my Mom. Like any good teen, I argued with her a lot. I’m not sure if it was the intention or true magic but our relationship did improve from that point forward!This summer season, entertain your inner child by creating a custom charm bag (or two)!!
Need a sprinkle of magic in your summer? Known in Voodoo as “gris-gris,” or to Native American’s as “medicine bags,” these good ol’ fashioned spells in a bag are sure to bring some magic into your life! For me, charm bags have some nostalgia surrounding them.
Growing up with my Grandma referencing her astrological charts and talking to spirits with her pendulum, I became very open-minded to all things woo woo. Though charm bags weren’t Grandma’s thing, I stumbled upon some magic books at a young age and was hooked. I created my first charm bag during middle school, in hopes to improve my relationship with my Mom. Like any good teen, I argued with her a lot. I’m not sure if it was the intention or true magic but our relationship did improve from that point forward!
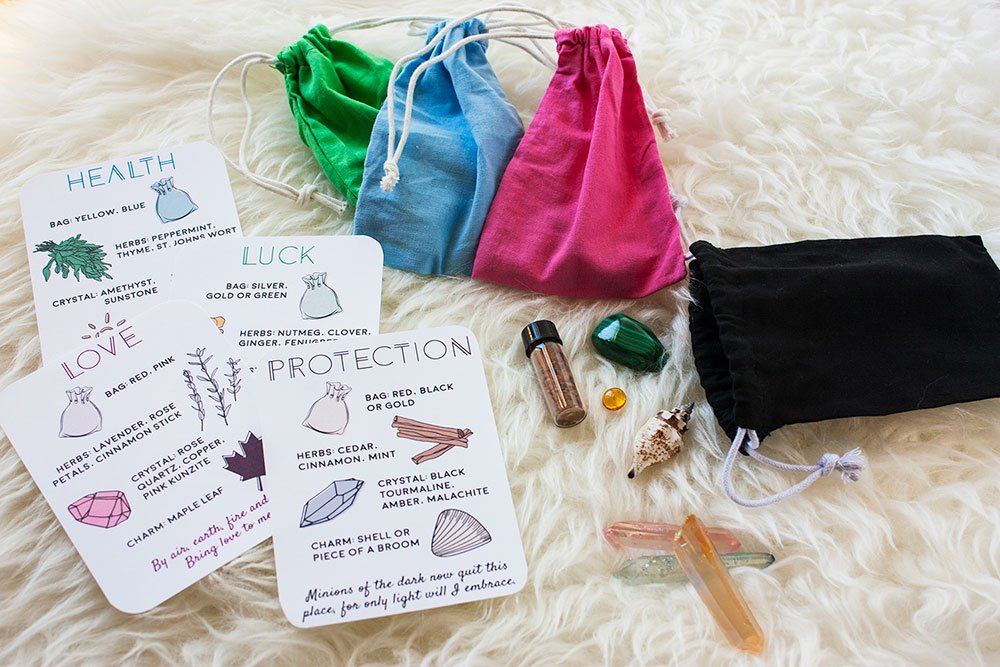
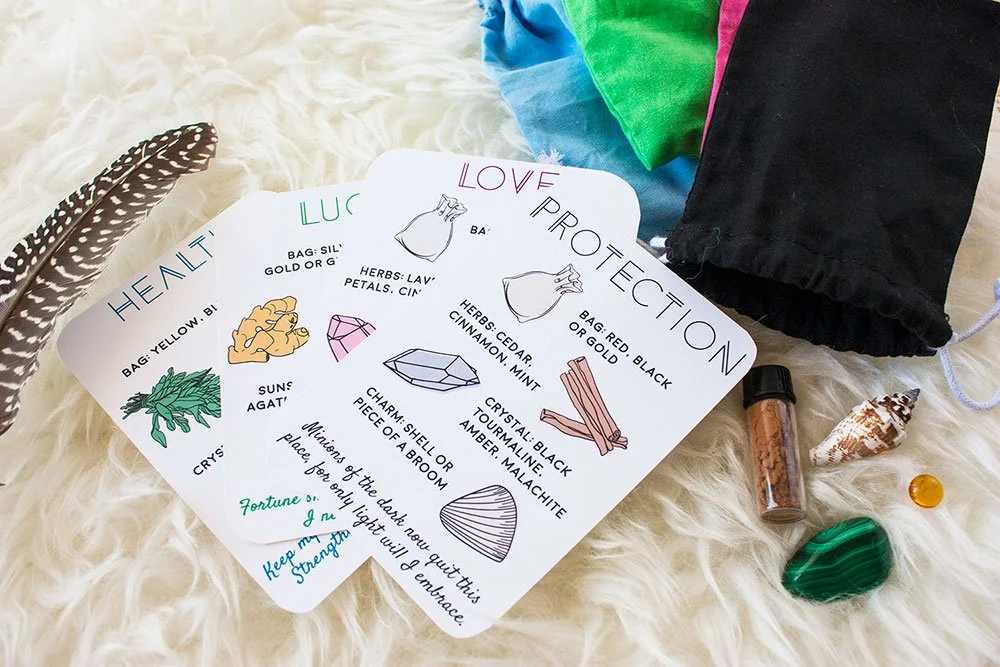
This summer season, entertain your inner child by creating a custom charm bag (or two)!! I’ve got everything covered for you, from the container to its contents, a prayer to empower your charms, and even some printable “recipe” cards to have as reminders!
When choosing a bag it’s important to pick an appropriate color that reflects the purpose of your spell, lucky for you I’ve done all of the work on these details! Don’t have all of the herbs or all of the crystals for each one? Don’t fret, using one or two from each category is fine. Remember, the intention behind your charm bag is the most important part.
Protection
Bag Color: Red, black, or gold
Herbs: Betony (protects against malicious fairies), cedar, cinnamon, mint
Gemstones: Black tourmaline, amber, malachite
Charm: Shell (to symbolize a hard protective surface) or a piece of a broom (to brush away negativity)
Prayer: “Minions of the dark now quit this place, for only light will I embrace.”Imagine protective energy pouring into the bag and creating a force field of light around you as you place each item in the bag.
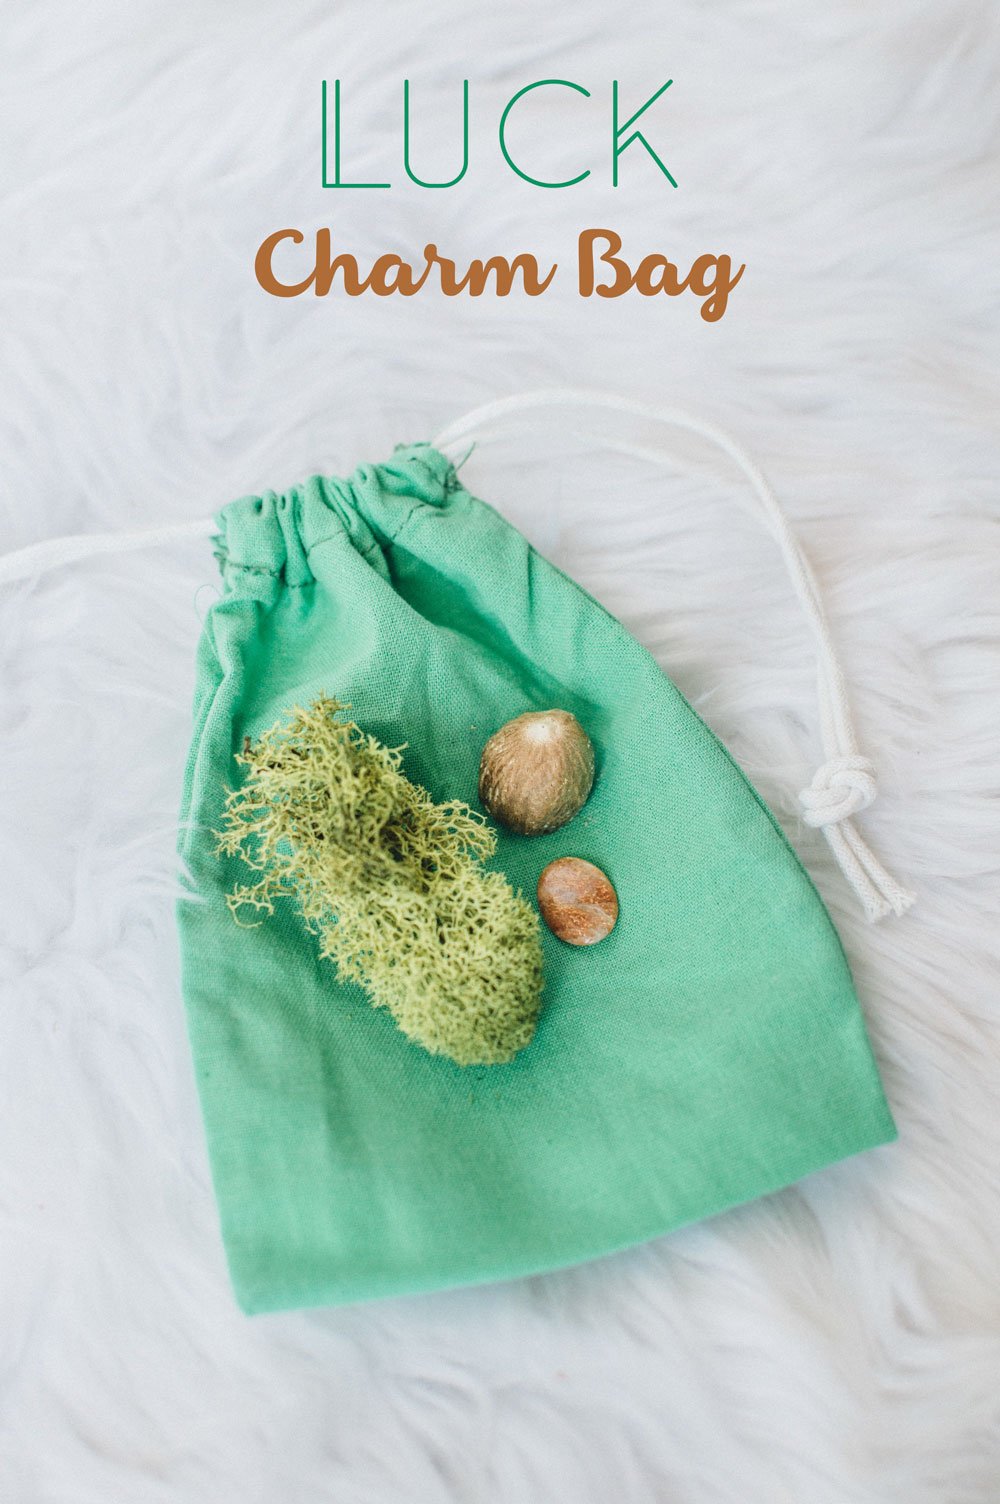
Luck
Bag Color: Silver, gold, or green
Herbs: Nutmeg, clover, ginger, fenugreek
Gemstones: Sunstone, moss agate, tiger’s eye
Charm: Moss; both Spanish and Irish moss are known to bring luck. Also, a horseshoe figurine.
Prayer: “Fortune smile on me this day, may all I need come my way.”
Imagine your hopes and dreams coming to you easily and effortlessly as you place each item in the bag.
Love
Bag Color: Red, PinkHerbs: Lavender, rose petals, a stick of cinnamon for passionate love
Gemstones: Rose quartz, copper, pink kunzite
Charm: Maple leaf; the sap of the maple tree makes sweet, rich syrup. So, the maple leaf symbolizes rich and full love. Or a triangle object to represent the love in the union of a mother, father, and child.
Prayer: “By air, earth, fire, and sea. Bring love to me.”
Concentrate deeply on the kind of love you want to bring into your life as you place each item in the bag.
Health
Bag Color: Yellow, blue
Herbs: Peppermint, St. Johns Wort, Thyme
Gemstones: Amethyst, sunstone
Charm: Toadstone or something to symbolize the sun. The sun is the heart of the solar system and provides life to all living things on Earth, so it is a preferred talisman for health.
Prayer: “Keep my mind and body strong and fit. Strengthen both my heart and wit.”
Visualize yourself at your perfect physical and mental health as you place each item in the bag.
Carry your charm bag in your pocket, display them on an altar or prominent place to remind you of its intention, or gift it to a friend. Just like your crystals, you can set your charm bags out in the light of the full moon to give them a good cleaning. Whether it be for protection, luck, love, or health, have fun in the childlike wonder and playfulness of creating your charm bag!
Essential Oils on the Go // 4 Rollerball Blends for Daily Use
With all this talk of essential oils, I bet you’ll be wanting to take them with you wherever you go! For good reason, too! Essential oils aren’t just something you spritz on your pillow at night. They have so many uses that you’ll wish you had one on hand for every occasion.I’m always on the go, and there are countless moments throughout the day where I’m tired, I’m feeling down….and good god, a pimple!! Where are my essential oils when I need them?? Rollerballs are here to save the day! A perfect little fun-sized container for our precious EO blends.
With all this talk of essential oils, I bet you’ll be wanting to take them with you wherever you go! For good reason, too! Essential oils aren’t just something you spritz on your pillow at night. They have so many uses that you’ll wish you had one on hand for every occasion.I’m always on the go, and there are countless moments throughout the day where I’m tired, I’m feeling down….and good god, a pimple!! Where are my essential oils when I need them?? Rollerballs are here to save the day! A perfect little fun-sized container for our precious EO blends.
What You’ll Need
An eyedropper (many rollerball sets will come with these)
Essential oils
A carrier oil. Any of the following will work wonderfully:
Fractionated coconut oil
Sweet almond oil
Olive oil
Sunflower oil
The Recipes
ZIT ZAPPER
Let’s start with a blend that treats the arch-nemesis that we are plagued by from time to time, if not chronically. Whether a pimple is predictable on a daily basis or pops up at the most inconvenient moment, you need a remedy! So here it is.
20 Drops Lavender Oil
20 Drops Tea Tree Oil
20 Drops Frankincense
Fill with the desired amount of carrier oil and shake to mix
MIDDAY PICK-ME-UP (JET LAG BLEND)
This past month has kept me super busy. I’ve entertained house guests, taken road trips and long plane rides, and “sleep” has become a word from a foreign language. Here's a blend that will wake you up and invigorate your senses. Use this blend to pull you through a study session or to bring clarity to a mental fog while you’re in the office.
8 Drops Eucalyptus Oil
6 Drops Peppermint Oil
30 Drops Lemon Oil
2 Drops Cinnamon Oil
Fill with the desired amount of carrier oil and shake to mix
MOOD SUPPORT
No one likes feeling down, but it happens. It’s part of being human. Maybe someone said something that made you feel less than, or not a part of. Perhaps you are mourning a loss, or you are disappointed about expectations that weren’t met. Try this rollerball blend for some comfort and to improve your attitude. This blend works well when inhaled. Apply it to your hands, cup your hands over your mouth and nose, and breathe deep.
20 Drops Bergamot Oil
20 Drops Frankincense
20 Drops Lavender Oil
Fill with the desired amount of carrier oil and shake to mix
A BLEND FOR YOUR GUY - TURN YOUR MAN ON TO EO’S
I saw this “Lumber Jack Blend” and couldn’t leave it out! I’m a sucker for all things sandalwood. Have your favorite counterpart use this as his cologne or even as an oil for that beard he’s been sporting. Can’t wait to try this out on my main squeeze!
10 Drops Patchouli
10 Drops Sandalwood
10 Drops Clary Sage
10 Drops Frankincense
Fill with the desired amount of carrier oil and shake to mix
Hope these recipes remedy some of the things that afflict you! We would also love to hear any of your tried and true EO rollerball concoctions!
Breathe Deep with These 3 DIY Lavender Recipes
Aside from smelling heavenly, lavender comes with a slew of amazing benefits. Lavender can help with anxiety, insomnia, restlessness, PMS, antiseptic and a recent study reported in the Journal of Medical Microbiology shows that lavender oil is a potent anti-fungal as well. Take a look around your home. Hand soap, body lotion, countertop cleaner, linen spray, candles…you probably keep some sort of lavender-scented item in your home.
Aside from smelling heavenly, lavender comes with a slew of amazing benefits. Lavender can help with anxiety, insomnia, restlessness, PMS, antiseptic and a recent study reported in the Journal of Medical Microbiology shows that lavender oil is a potent anti-fungal as well. Take a look around your home. Hand soap, body lotion, countertop cleaner, linen spray, candles…you probably keep some sort of lavender-scented item in your home.
I wondered, what else this amazing herb could be used for? It turns out lavender is a gold mine for DIY home products! I’ve chosen three that I think you’ll find come in super handy.
Lush Lavender Bath Scrub
Lavender oil is a choice pick for a bath time scrub! This oil works as an antiseptic to promote healing of the skin. It’s also popular for assisting with sleep. Insomnia may have met its match with this one! So, get ready to settle your senses after a long day.
Here’s what you’ll need to whip up a batch of this delectable and healing scrub:
Mason or apothecary jar
1 1/2 cups of organic sugar
1/4 cup of olive oil
Mix the ingredients together to coat the sugar. Add dried lavender flowers for some extra pizzaz!
Chilled Lavender Towels
Lavender oil’s sedating qualities work well for sleeplessness AND pain relief. Whether you have a headache, fever or you’re white-knuckling it through childbirth--its ability to curb pain really is astonishing! Here is one of my most cherished methods for diminishing discomfort.
How To:
Fill your sink with water and add 6-10 drops of lavender oil
Soak several hand towels in the lavender water (let excess water run off of the towels)
Roll up the towels and put them on a tray in the freezer
Grab a towel from the freezer whenever you are in need. These little bits of magic are nothing short of amazing. Place one across your forehead or unroll it to cover your nose and mouth. Now relax and breathe in the crisp, cool, heavenly aroma for some obligatory tranquility.
Lavender Insect Repellent
My personal favorite! If you’re worried about all of those harsh chemicals in regular bug sprays like I am, you’ll love this one. Plus, it’s super easy! What’s better than an au naturel bug spray smelling of sweet, sweet lavender? Gliding through the woods, free of bug bites and smelling like an angel…Ha! I’m in!
Ingredients & How To:
Fill an 8oz spray bottle halfway with distilled water
Add 30-50 drop of lavender oil
Add witch hazel to fill the remainder of the bottle
Venture to the great outdoors with a new-found freedom from deet…and mosquitos!
Bonus Lavender Quick Tips
Make lavender oil a staple in your stash. You can find it at a health food store, specialty grocery store, or maybe you even have a friend that sells EO’s. It can be used alone, or with a carrier oil. Choose a food-grade oil for lavender lemonade, or pick a lavender oil to keep in your first aid kit for its topical anesthetic properties. Sometimes I’ll even rub a little lavender oil on my hands to give my easily irritated chi, Ren, a belly rub, this miraculously always helps him calm down.
Lavender is a great reminder to stop and take a deep breath on a busy day. Send me a DM with your lavender oil tips and tricks! Bonus points if you can let me in on your favorite lavender oil rollerball blend and its uses. I’d love to feature it in an upcoming post and share it with all of our community!
